A newer version of the Gradio SDK is available:
5.12.0
title: Demo
emoji: 🖼️
colorFrom: blue
colorTo: green
sdk: gradio
sdk_version: 4.41.0
app_file: app.py
pinned: false
setup:
  - pip install torch
  - pip install gradio
  - pip install opencv-python
command: python app.py
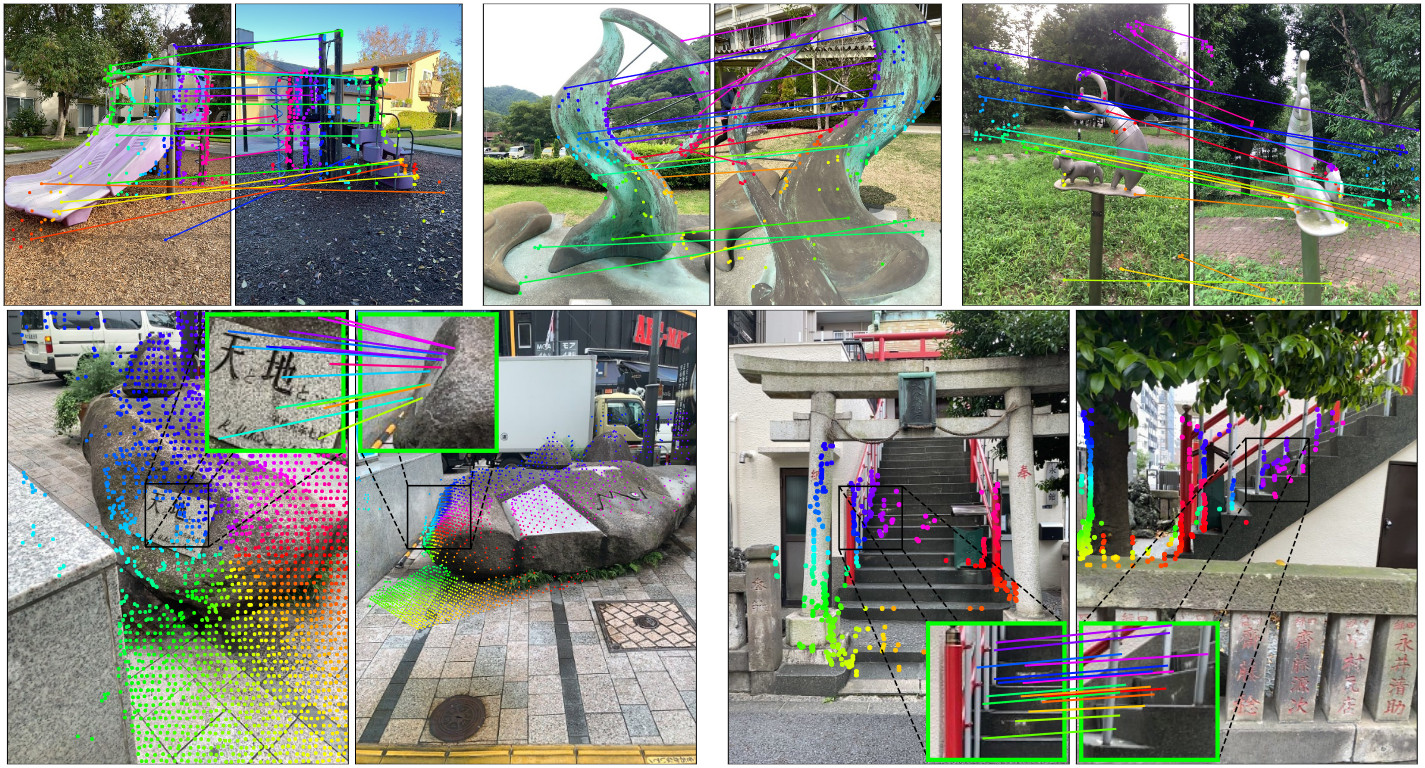
Official implementation of Grounding Image Matching in 3D with MASt3R
[Project page], [MASt3R arxiv], [DUSt3R arxiv]
@misc{mast3r_arxiv24,
      title={Grounding Image Matching in 3D with MASt3R},
      author={Vincent Leroy and Yohann Cabon and Jerome Revaud},
      year={2024},
      eprint={2406.09756},
      archivePrefix={arXiv},
      primaryClass={cs.CV}
}

@inproceedings{dust3r_cvpr24,
      title={DUSt3R: Geometric 3D Vision Made Easy},
      author={Shuzhe Wang and Vincent Leroy and Yohann Cabon and Boris Chidlovskii and Jerome Revaud},
      booktitle = {CVPR},
      year = {2024}
}
Table of Contents
License
The code is distributed under the CC BY-NC-SA 4.0 License. See LICENSE for more information.
# Copyright (C) 2024-present Naver Corporation. All rights reserved.
# Licensed under CC BY-NC-SA 4.0 (non-commercial use only).
Get Started
Installation
- Clone MASt3R.
git clone --recursive https://github.com/naver/mast3r
cd mast3r
# if you have already cloned mast3r:
# git submodule update --init --recursive
- Create the environment, here we show an example using conda.
conda create -n mast3r python=3.11 cmake=3.14.0
conda activate mast3r
conda install pytorch torchvision pytorch-cuda=12.1 -c pytorch -c nvidia  # use the correct version of cuda for your system
pip install -r requirements.txt
pip install -r dust3r/requirements.txt
# Optional: you can also install additional packages to:
# - add support for HEIC images
# - add required packages for visloc.py
pip install -r dust3r/requirements_optional.txt
- Optional, compile the cuda kernels for RoPE (as in CroCo v2).
# DUST3R relies on RoPE positional embeddings for which you can compile some cuda kernels for faster runtime.
cd dust3r/croco/models/curope/
python setup.py build_ext --inplace
cd ../../../../
Checkpoints
You can obtain the checkpoints by two ways:
You can use our huggingface_hub integration: the models will be downloaded automatically.
Otherwise, We provide several pre-trained models:
| Modelname | Training resolutions | Head | Encoder | Decoder |
|---|---|---|---|---|
MASt3R_ViTLarge_BaseDecoder_512_catmlpdpt_metric |
512x384, 512x336, 512x288, 512x256, 512x160 | CatMLP+DPT | ViT-L | ViT-B |
You can check the hyperparameters we used to train these models in the section: Our Hyperparameters Make sure to check license of the datasets we used.
To download a specific model, for example MASt3R_ViTLarge_BaseDecoder_512_catmlpdpt_metric.pth:
mkdir -p checkpoints/
wget https://download.europe.naverlabs.com/ComputerVision/MASt3R/MASt3R_ViTLarge_BaseDecoder_512_catmlpdpt_metric.pth -P checkpoints/
For these checkpoints, make sure to agree to the license of all the training datasets we used, in addition to CC-BY-NC-SA 4.0. The mapfree dataset license in particular is very restrictive. For more information, check CHECKPOINTS_NOTICE.
Interactive demo
We made one huggingface space running the new sparse global alignment in a simplified demo for small scenes: naver/MASt3R There are two demos available to run locally:
demo.py is the updated demo for MASt3R. It uses our new sparse global alignment method that allows you to reconstruct larger scenes

python3 demo.py --model_name MASt3R_ViTLarge_BaseDecoder_512_catmlpdpt_metric

# Use --weights to load a checkpoint from a local file, eg --weights checkpoints/MASt3R_ViTLarge_BaseDecoder_512_catmlpdpt_metric.pth
# Use --local_network to make it accessible on the local network, or --server_name to specify the url manually
# Use --server_port to change the port, by default it will search for an available port starting at 7860
# Use --device to use a different device, by default it's "cuda"

demo_dust3r_ga.py is the same demo as in dust3r (+ compatibility for MASt3R models)
see https://github.com/naver/dust3r?tab=readme-ov-file#interactive-demo for details
Interactive demo with docker
To run MASt3R using Docker, including with NVIDIA CUDA support, follow these instructions:
Install Docker: If not already installed, download and install
dockeranddocker composefrom the Docker website.Install NVIDIA Docker Toolkit: For GPU support, install the NVIDIA Docker toolkit from the Nvidia website.
Build the Docker image and run it:
cdinto the./dockerdirectory and run the following commands:
cd docker
bash run.sh --with-cuda --model_name="MASt3R_ViTLarge_BaseDecoder_512_catmlpdpt_metric"
Or if you want to run the demo without CUDA support, run the following command:
cd docker
bash run.sh --model_name="MASt3R_ViTLarge_BaseDecoder_512_catmlpdpt_metric"
By default, demo.py is lanched with the option --local_network.
Visit http://localhost:7860/ to access the web UI (or replace localhost with the machine's name to access it from the network).
run.sh will launch docker-compose using either the docker-compose-cuda.yml or docker-compose-cpu.ym config file, then it starts the demo using entrypoint.sh.
Usage
from mast3r.model import AsymmetricMASt3R
from mast3r.fast_nn import fast_reciprocal_NNs

import mast3r.utils.path_to_dust3r
from dust3r.inference import inference
from dust3r.utils.image import load_images

if __name__ == '__main__':
    device = 'cuda'
    schedule = 'cosine'
    lr = 0.01
    niter = 300

    model_name = "naver/MASt3R_ViTLarge_BaseDecoder_512_catmlpdpt_metric"
    # you can put the path to a local checkpoint in model_name if needed
    model = AsymmetricMASt3R.from_pretrained(model_name).to(device)
    images = load_images(['dust3r/croco/assets/Chateau1.png', 'dust3r/croco/assets/Chateau2.png'], size=512)
    output = inference([tuple(images)], model, device, batch_size=1, verbose=False)

    # at this stage, you have the raw dust3r predictions
    view1, pred1 = output['view1'], output['pred1']
    view2, pred2 = output['view2'], output['pred2']

    desc1, desc2 = pred1['desc'].squeeze(0).detach(), pred2['desc'].squeeze(0).detach()

    # find 2D-2D matches between the two images
    matches_im0, matches_im1 = fast_reciprocal_NNs(desc1, desc2, subsample_or_initxy1=8,
                                                   device=device, dist='dot', block_size=2**13)

    # ignore small border around the edge
    H0, W0 = view1['true_shape'][0]
    valid_matches_im0 = (matches_im0[:, 0] >= 3) & (matches_im0[:, 0] < int(W0) - 3) & (
        matches_im0[:, 1] >= 3) & (matches_im0[:, 1] < int(H0) - 3)

    H1, W1 = view2['true_shape'][0]
    valid_matches_im1 = (matches_im1[:, 0] >= 3) & (matches_im1[:, 0] < int(W1) - 3) & (
        matches_im1[:, 1] >= 3) & (matches_im1[:, 1] < int(H1) - 3)

    valid_matches = valid_matches_im0 & valid_matches_im1
    matches_im0, matches_im1 = matches_im0[valid_matches], matches_im1[valid_matches]

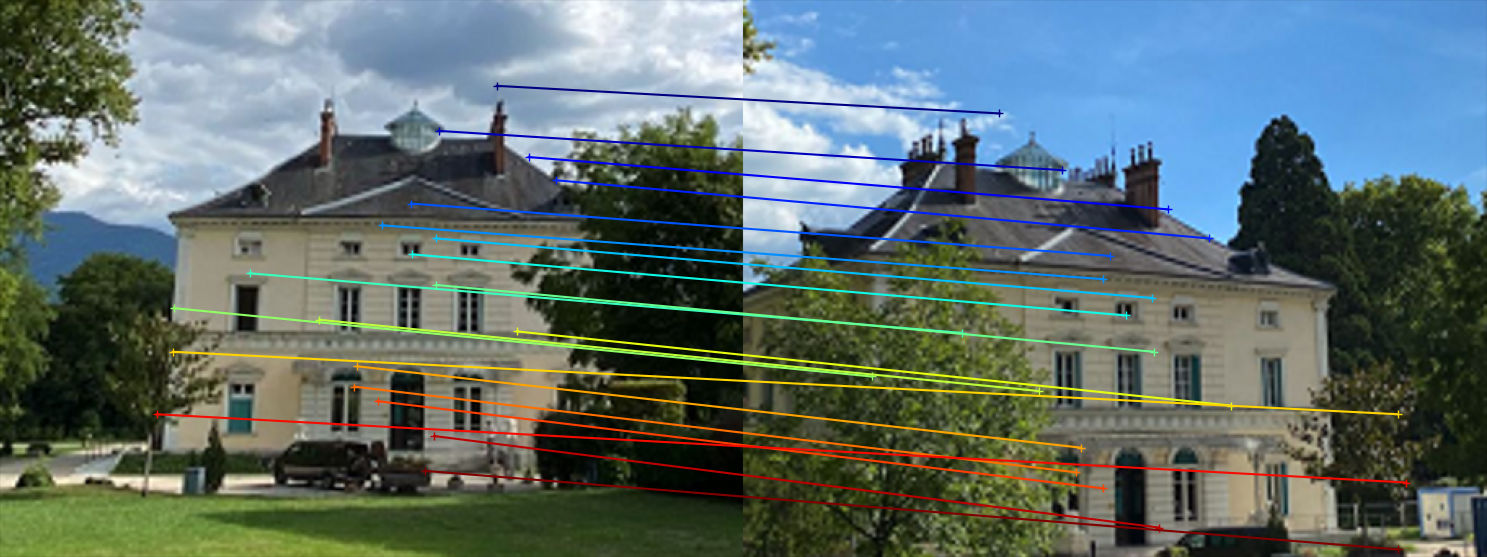
    # visualize a few matches
    import numpy as np
    import torch
    import torchvision.transforms.functional
    from matplotlib import pyplot as pl

    n_viz = 20
    num_matches = matches_im0.shape[0]
    match_idx_to_viz = np.round(np.linspace(0, num_matches - 1, n_viz)).astype(int)
    viz_matches_im0, viz_matches_im1 = matches_im0[match_idx_to_viz], matches_im1[match_idx_to_viz]

    image_mean = torch.as_tensor([0.5, 0.5, 0.5], device='cpu').reshape(1, 3, 1, 1)
    image_std = torch.as_tensor([0.5, 0.5, 0.5], device='cpu').reshape(1, 3, 1, 1)

    viz_imgs = []
    for i, view in enumerate([view1, view2]):
        rgb_tensor = view['img'] * image_std + image_mean
        viz_imgs.append(rgb_tensor.squeeze(0).permute(1, 2, 0).cpu().numpy())

    H0, W0, H1, W1 = *viz_imgs[0].shape[:2], *viz_imgs[1].shape[:2]
    img0 = np.pad(viz_imgs[0], ((0, max(H1 - H0, 0)), (0, 0), (0, 0)), 'constant', constant_values=0)
    img1 = np.pad(viz_imgs[1], ((0, max(H0 - H1, 0)), (0, 0), (0, 0)), 'constant', constant_values=0)
    img = np.concatenate((img0, img1), axis=1)
    pl.figure()
    pl.imshow(img)
    cmap = pl.get_cmap('jet')
    for i in range(n_viz):
        (x0, y0), (x1, y1) = viz_matches_im0[i].T, viz_matches_im1[i].T
        pl.plot([x0, x1 + W0], [y0, y1], '-+', color=cmap(i / (n_viz - 1)), scalex=False, scaley=False)
    pl.show(block=True)
Training
In this section, we present a short demonstration to get started with training MASt3R.
Datasets
See Datasets section in DUSt3R
Demo
Like for the DUSt3R training demo, we're going to download and prepare the same subset of CO3Dv2 - Creative Commons Attribution-NonCommercial 4.0 International and launch the training code on it. It is the exact same process as DUSt3R. The demo model will be trained for a few epochs on a very small dataset. It will not be very good.
# download and prepare the co3d subset
mkdir -p data/co3d_subset
cd data/co3d_subset
git clone https://github.com/facebookresearch/co3d
cd co3d
python3 ./co3d/download_dataset.py --download_folder ../ --single_sequence_subset
rm ../*.zip
cd ../../..

python3 datasets_preprocess/preprocess_co3d.py --co3d_dir data/co3d_subset --output_dir data/co3d_subset_processed  --single_sequence_subset

# download the pretrained dust3r checkpoint
mkdir -p checkpoints/
wget https://download.europe.naverlabs.com/ComputerVision/DUSt3R/DUSt3R_ViTLarge_BaseDecoder_512_dpt.pth -P checkpoints/

# for this example we'll do fewer epochs, for the actual hyperparameters we used in the paper, see the next section: "Our Hyperparameters"
torchrun --nproc_per_node=4 train.py \
    --train_dataset "1000 @ Co3d(split='train', ROOT='data/co3d_subset_processed', aug_crop='auto', aug_monocular=0.005, aug_rot90='diff', mask_bg='rand', resolution=[(512, 384), (512, 336), (512, 288), (512, 256), (512, 160)], n_corres=8192, nneg=0.5, transform=ColorJitter)" \
    --test_dataset "100 @ Co3d(split='test', ROOT='data/co3d_subset_processed', resolution=(512,384), n_corres=1024, seed=777)" \
    --model "AsymmetricMASt3R(pos_embed='RoPE100', patch_embed_cls='ManyAR_PatchEmbed', img_size=(512, 512), head_type='catmlp+dpt', output_mode='pts3d+desc24', depth_mode=('exp', -inf, inf), conf_mode=('exp', 1, inf), enc_embed_dim=1024, enc_depth=24, enc_num_heads=16, dec_embed_dim=768, dec_depth=12, dec_num_heads=12, two_confs=True)" \
    --train_criterion "ConfLoss(Regr3D(L21, norm_mode='?avg_dis'), alpha=0.2) + 0.075*ConfMatchingLoss(MatchingLoss(InfoNCE(mode='proper', temperature=0.05), negatives_padding=0, blocksize=8192), alpha=10.0, confmode='mean')" \
    --test_criterion "Regr3D_ScaleShiftInv(L21, norm_mode='?avg_dis', gt_scale=True, sky_loss_value=0) + -1.*MatchingLoss(APLoss(nq='torch', fp=torch.float16), negatives_padding=12288)" \
    --pretrained "checkpoints/DUSt3R_ViTLarge_BaseDecoder_512_dpt.pth" \
    --lr 0.0001 --min_lr 1e-06 --warmup_epochs 1 --epochs 10 --batch_size 4 --accum_iter 4 \
    --save_freq 1 --keep_freq 5 --eval_freq 1 --disable_cudnn_benchmark \
    --output_dir "checkpoints/mast3r_demo"
Our Hyperparameters
We didn't release all the training datasets, but here are the commands we used for training our models:
# MASt3R_ViTLarge_BaseDecoder_512_catmlpdpt_metric - train mast3r with metric regression and matching loss
# we used cosxl to generate variations of DL3DV: "foggy", "night", "rainy", "snow", "sunny" but we were not convinced by it.

torchrun --nproc_per_node=8 train.py \
    --train_dataset "57_000 @ Habitat512(1_000_000, split='train', resolution=[(512, 384), (512, 336), (512, 288), (512, 256), (512, 160)], aug_crop='auto', aug_monocular=0.005, transform=ColorJitter, n_corres=8192, nneg=0.5) + 68_400 @ BlendedMVS(split='train', mask_sky=True, resolution=[(512, 384), (512, 336), (512, 288), (512, 256), (512, 160)], aug_crop='auto', aug_monocular=0.005, transform=ColorJitter, n_corres=8192, nneg=0.5) + 68_400 @ MegaDepth(split='train', mask_sky=True, resolution=[(512, 384), (512, 336), (512, 288), (512, 256), (512, 160)], aug_crop='auto', aug_monocular=0.005, transform=ColorJitter, n_corres=8192, nneg=0.5) + 45_600 @ ARKitScenes(split='train', resolution=[(512, 384), (512, 336), (512, 288), (512, 256), (512, 160)], aug_crop='auto', aug_monocular=0.005, transform=ColorJitter, n_corres=8192, nneg=0.5) + 22_800 @ Co3d(split='train', mask_bg='rand', resolution=[(512, 384), (512, 336), (512, 288), (512, 256), (512, 160)], aug_crop='auto', aug_monocular=0.005, transform=ColorJitter, n_corres=8192, nneg=0.5) + 22_800 @ StaticThings3D(mask_bg='rand', resolution=[(512, 384), (512, 336), (512, 288), (512, 256), (512, 160)], aug_crop='auto', aug_monocular=0.005, transform=ColorJitter, n_corres=8192, nneg=0.5) + 45_600 @ ScanNetpp(split='train', resolution=[(512, 384), (512, 336), (512, 288), (512, 256), (512, 160)], aug_crop='auto', aug_monocular=0.005, transform=ColorJitter, n_corres=8192, nneg=0.5) + 45_600 @ TartanAir(pairs_subset='', resolution=[(512, 384), (512, 336), (512, 288), (512, 256), (512, 160)], aug_crop='auto', aug_monocular=0.005, transform=ColorJitter, n_corres=8192, nneg=0.5) + 4_560 @ UnrealStereo4K(resolution=[(512, 384), (512, 336), (512, 288), (512, 256), (512, 160)], aug_crop='auto', aug_monocular=0.005, transform=ColorJitter, n_corres=8192, nneg=0.5) + 1_140 @ VirtualKitti(optical_center_is_centered=True, resolution=[(512, 384), (512, 336), (512, 288), (512, 256), (512, 160)], aug_crop='auto', aug_monocular=0.005, transform=ColorJitter, n_corres=8192, nneg=0.5) + 22_800 @ WildRgbd(split='train', mask_bg='rand', resolution=[(512, 384), (512, 336), (512, 288), (512, 256), (512, 160)], aug_crop='auto', aug_monocular=0.005, transform=ColorJitter, n_corres=8192, nneg=0.5) + 145_920 @ NianticMapFree(split='train', resolution=[(512, 384), (512, 336), (512, 288), (512, 256), (512, 160)], aug_crop='auto', aug_monocular=0.005, transform=ColorJitter, n_corres=8192, nneg=0.5) + 57_000 @ DL3DV(split='nlight', resolution=[(512, 384), (512, 336), (512, 288), (512, 256), (512, 160)], aug_crop='auto', aug_monocular=0.005, transform=ColorJitter, n_corres=8192, nneg=0.5) + 57_000 @ DL3DV(split='not-nlight', cosxl_augmentations=None, resolution=[(512, 384), (512, 336), (512, 288), (512, 256), (512, 160)], aug_crop='auto', aug_monocular=0.005, transform=ColorJitter, n_corres=8192, nneg=0.5) + 34_200 @ InternalUnreleasedDataset(resolution=[(512, 384), (512, 336), (512, 288), (512, 256), (512, 160)], aug_crop='auto', aug_monocular=0.005, transform=ColorJitter, n_corres=8192, nneg=0.5)" \
    --test_dataset "Habitat512(1_000, split='val', resolution=(512,384), seed=777, n_corres=1024) + 1_000 @ BlendedMVS(split='val', resolution=(512,384), mask_sky=True, seed=777, n_corres=1024) + 1_000 @ ARKitScenes(split='test', resolution=(512,384), seed=777, n_corres=1024) + 1_000 @ MegaDepth(split='val', mask_sky=True, resolution=(512,336), seed=777, n_corres=1024) + 1_000 @ Co3d(split='test', resolution=(512,384), mask_bg='rand', seed=777, n_corres=1024)" \
    --model "AsymmetricMASt3R(pos_embed='RoPE100', patch_embed_cls='ManyAR_PatchEmbed', img_size=(512, 512), head_type='catmlp+dpt', output_mode='pts3d+desc24', depth_mode=('exp', -inf, inf), conf_mode=('exp', 1, inf), enc_embed_dim=1024, enc_depth=24, enc_num_heads=16, dec_embed_dim=768, dec_depth=12, dec_num_heads=12, two_confs=True, desc_conf_mode=('exp', 0, inf))" \
    --train_criterion "ConfLoss(Regr3D(L21, norm_mode='?avg_dis'), alpha=0.2, loss_in_log=False) + 0.075*ConfMatchingLoss(MatchingLoss(InfoNCE(mode='proper', temperature=0.05), negatives_padding=0, blocksize=8192), alpha=10.0, confmode='mean')" \
    --test_criterion "Regr3D(L21, norm_mode='?avg_dis', gt_scale=True, sky_loss_value=0) + -1.*MatchingLoss(APLoss(nq='torch', fp=torch.float16), negatives_padding=12288)" \
    --pretrained "checkpoints/DUSt3R_ViTLarge_BaseDecoder_512_dpt.pth" \
    --lr 0.0001 --min_lr 1e-06 --warmup_epochs 8 --epochs 50 --batch_size 4 --accum_iter 2 \
    --save_freq 1 --keep_freq 5 --eval_freq 1 --print_freq=10 --disable_cudnn_benchmark \
    --output_dir "checkpoints/MASt3R_ViTLarge_BaseDecoder_512_catmlpdpt_metric"
Visual Localization
Dataset preparation
Example Commands
With visloc.py you can run our visual localization experiments on Aachen-Day-Night, InLoc, Cambridge Landmarks and 7 Scenes.
# Aachen-Day-Night-v1.1:
# scene in 'day' 'night'
# scene can also be 'all'
python3 visloc.py --model_name MASt3R_ViTLarge_BaseDecoder_512_catmlpdpt_metric --dataset "VislocAachenDayNight('/path/to/prepared/Aachen-Day-Night-v1.1/', subscene='${scene}', pairsfile='fire_top50', topk=20)" --pixel_tol 5 --pnp_mode poselib --reprojection_error_diag_ratio 0.008 --output_dir /path/to/output/Aachen-Day-Night-v1.1/${scene}/loc

# or with coarse to fine:

python3 visloc.py --model_name MASt3R_ViTLarge_BaseDecoder_512_catmlpdpt_metric --dataset "VislocAachenDayNight('/path/to/prepared/Aachen-Day-Night-v1.1/', subscene='${scene}', pairsfile='fire_top50', topk=20)" --pixel_tol 5 --pnp_mode poselib --reprojection_error_diag_ratio 0.008 --output_dir /path/to/output/Aachen-Day-Night-v1.1/${scene}/loc --coarse_to_fine --max_batch_size 48 --c2f_crop_with_homography

# InLoc
python3 visloc.py --model_name MASt3R_ViTLarge_BaseDecoder_512_catmlpdpt_metric --dataset "VislocInLoc('/path/to/prepared/InLoc/', pairsfile='pairs-query-netvlad40-temporal', topk=20)" --pixel_tol 5 --pnp_mode poselib --reprojection_error_diag_ratio 0.008 --output_dir /path/to/output/InLoc/loc

# or with coarse to fine:

python3 visloc.py --model_name MASt3R_ViTLarge_BaseDecoder_512_catmlpdpt_metric --dataset "VislocInLoc('/path/to/prepared/InLoc/', pairsfile='pairs-query-netvlad40-temporal', topk=20)" --pixel_tol 5 --pnp_mode poselib --reprojection_error_diag_ratio 0.008 --output_dir /path/to/output/InLoc/loc --coarse_to_fine --max_image_size 1200 --max_batch_size 48 --c2f_crop_with_homography

# 7-scenes:
# scene in 'chess' 'fire' 'heads' 'office' 'pumpkin' 'redkitchen' 'stairs'
python3 visloc.py --model_name MASt3R_ViTLarge_BaseDecoder_512_catmlpdpt_metric --dataset "VislocSevenScenes('/path/to/prepared/7-scenes/', subscene='${scene}', pairsfile='APGeM-LM18_top20', topk=1)" --pixel_tol 5 --pnp_mode poselib --reprojection_error_diag_ratio 0.008 --output_dir /path/to/output/7-scenes/${scene}/loc

# Cambridge Landmarks:
# scene in 'ShopFacade' 'GreatCourt' 'KingsCollege' 'OldHospital' 'StMarysChurch'
python3 visloc.py --model_name MASt3R_ViTLarge_BaseDecoder_512_catmlpdpt_metric --dataset "VislocCambridgeLandmarks('/path/to/prepared/Cambridge_Landmarks/', subscene='${scene}', pairsfile='APGeM-LM18_top20', topk=1)" --pixel_tol 5 --pnp_mode poselib --reprojection_error_diag_ratio 0.008 --output_dir /path/to/output/Cambridge_Landmarks/${scene}/loc


