Sharing demos with others
Now that you’ve built a demo, you’ll probably want to share it with others. Gradio demos can be shared in two ways: using a temporary share link or permanent hosting on Spaces.
We’ll cover both of these approaches shortly. But before you share your demo, you may want to polish it up 💅.
Polishing your Gradio demo:


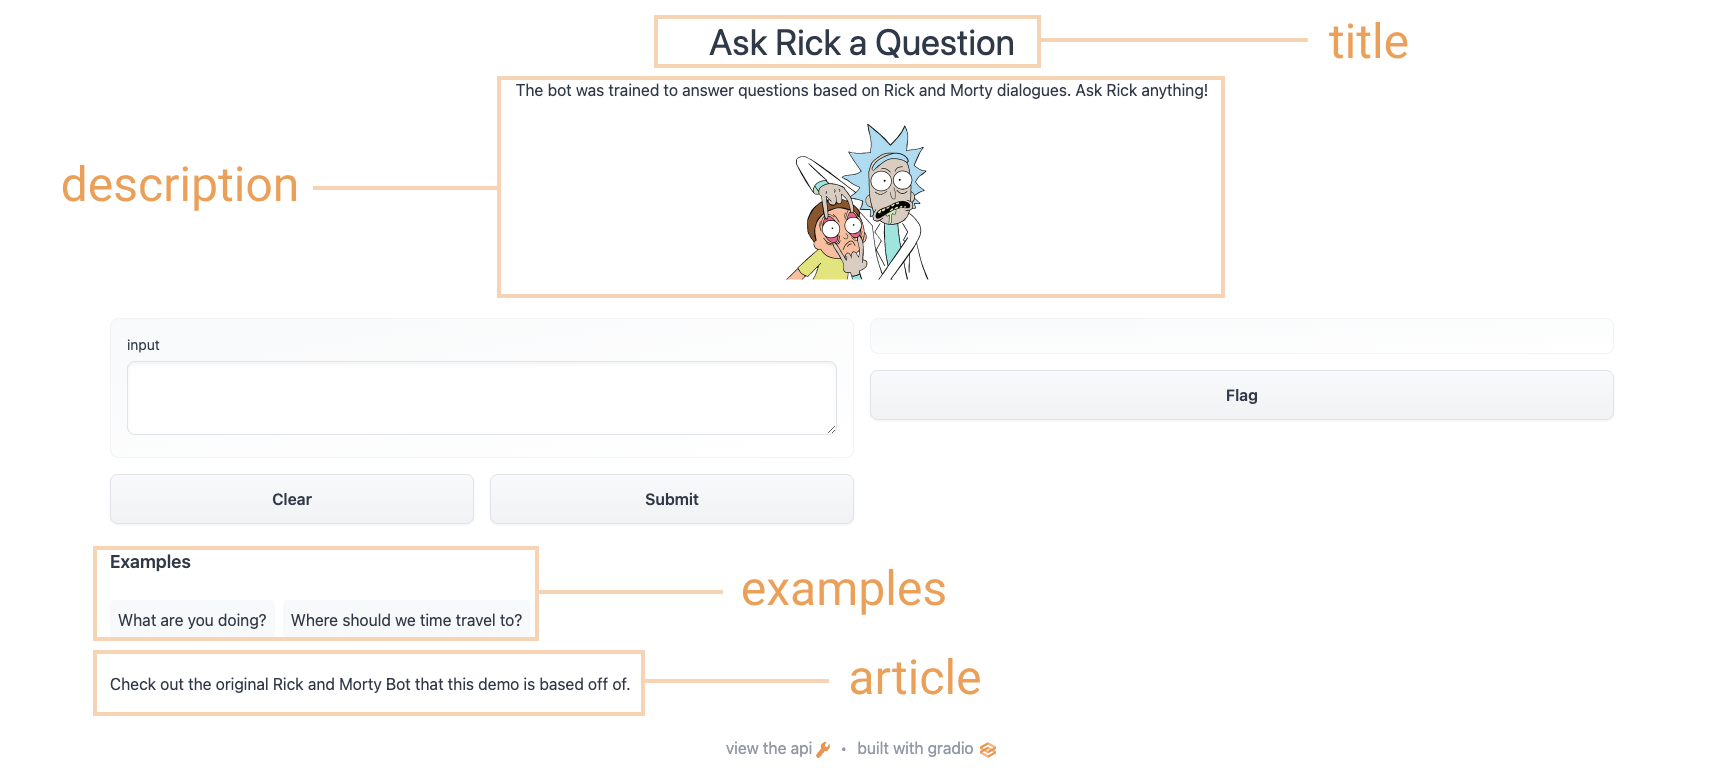
To add additional content to your demo, the Interface class supports some optional parameters:
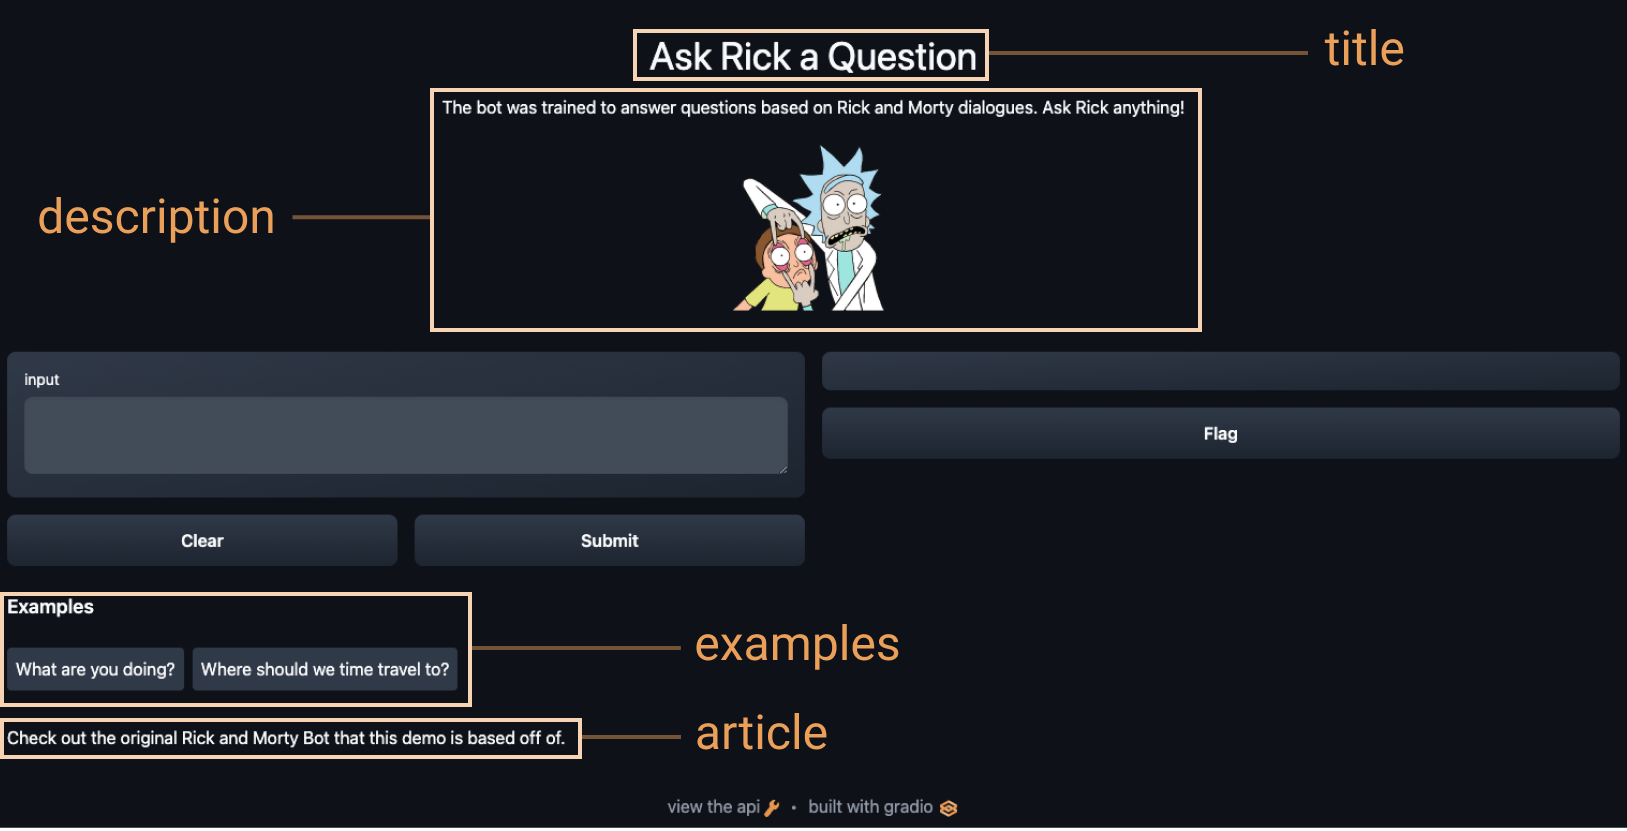
title: you can give a title to your demo, which appears above the input and output components.description: you can give a description (in text, Markdown, or HTML) for the interface, which appears above the input and output components and below the title.article: you can also write an expanded article (in text, Markdown, or HTML) explaining the interface. If provided, it appears below the input and output components.theme: don’t like the default colors? Set the theme to use one ofdefault,huggingface,grass,peach. You can also add thedark-prefix, e.g.dark-peachfor dark theme (or justdarkfor the default dark theme).examples: to make your demo way easier to use, you can provide some example inputs for the function. These appear below the UI components and can be used to populate the interface. These should be provided as a nested list, in which the outer list consists of samples and each inner list consists of an input corresponding to each input component.live: if you want to make your demo “live”, meaning that your model reruns every time the input changes, you can setlive=True. This makes sense to use with quick models (we’ll see an example at the end of this section) Using the options above, we end up with a more complete interface. Run the code below so you can chat with Rick and Morty:
title = "Ask Rick a Question"
description = """
The bot was trained to answer questions based on Rick and Morty dialogues. Ask Rick anything!
<img src="https://huggingface.co/spaces/course-demos/Rick_and_Morty_QA/resolve/main/rick.png" width=200px>
"""

article = "Check out [the original Rick and Morty Bot](https://huggingface.co/spaces/kingabzpro/Rick_and_Morty_Bot) that this demo is based off of."

gr.Interface(
    fn=predict,
    inputs="textbox",
    outputs="text",
    title=title,
    description=description,
    article=article,
    examples=[["What are you doing?"], ["Where should we time travel to?"]],
).launch()
Using the options above, we end up with a more complete interface. Try the interface below:
Sharing your demo with temporary links
Now that we have a working demo of our machine learning model, let’s learn how to easily share a link to our interface.
Interfaces can be easily shared publicly by setting share=True in the launch() method:
gr.Interface(classify_image, "image", "label").launch(share=True)This generates a public, shareable link that you can send to anybody! When you send this link, the user on the other side can try out the model in their browser for up to 72 hours. Because the processing happens on your device (as long as your device stays on!), you don’t have to worry about packaging any dependencies. If you’re working out of a Google Colab notebook, a share link is always automatically created. It usually looks something like this: XXXXX.gradio.app. Although the link is served through a Gradio link, we are only a proxy for your local server, and do not store any data sent through the interfaces.
Keep in mind, however, that these links are publicly accessible, meaning that anyone can use your model for prediction! Therefore, make sure not to expose any sensitive information through the functions you write, or allow any critical changes to occur on your device. If you set share=False (the default), only a local link is created.
Hosting your demo on Hugging Face Spaces
A share link that you can pass around to collegues is cool, but how can you permanently host your demo and have it exist in its own “space” on the internet?
Hugging Face Spaces provides the infrastructure to permanently host your Gradio model on the internet, for free! Spaces allows you to create and push to a (public or private) repo,
where your Gradio
interface code will exist in an app.py file. Read a step-by-step tutorial to get started, or watch an example video below.
✏️ Let’s apply it!
Using what we just learned in the sections so far, let’s create the sketch recognition demo we saw in section one of this chapter. Let’s add some customization to our interface and set share=True to create a public link we can pass around.
We can load the labels from class_names.txt and load the pre-trained pytorch model from pytorch_model.bin. Download these files by following the link and clicking download on the top left corner of the file preview. Let’s take a look at the code below to see how we use these files to load our model and create a predict() function:
from pathlib import Path
import torch
import gradio as gr
from torch import nn

LABELS = Path("class_names.txt").read_text().splitlines()

model = nn.Sequential(
    nn.Conv2d(1, 32, 3, padding="same"),
    nn.ReLU(),
    nn.MaxPool2d(2),
    nn.Conv2d(32, 64, 3, padding="same"),
    nn.ReLU(),
    nn.MaxPool2d(2),
    nn.Conv2d(64, 128, 3, padding="same"),
    nn.ReLU(),
    nn.MaxPool2d(2),
    nn.Flatten(),
    nn.Linear(1152, 256),
    nn.ReLU(),
    nn.Linear(256, len(LABELS)),
)
state_dict = torch.load("pytorch_model.bin", map_location="cpu")
model.load_state_dict(state_dict, strict=False)
model.eval()


def predict(im):
    x = torch.tensor(im, dtype=torch.float32).unsqueeze(0).unsqueeze(0) / 255.0
    with torch.no_grad():
        out = model(x)
    probabilities = torch.nn.functional.softmax(out[0], dim=0)
    values, indices = torch.topk(probabilities, 5)
    return {LABELS[i]: v.item() for i, v in zip(indices, values)}
Now that we have a predict() function. The next step is to define and launch our gradio interface:
interface = gr.Interface(
    predict,
    inputs="sketchpad",
    outputs="label",
    theme="huggingface",
    title="Sketch Recognition",
    description="Who wants to play Pictionary? Draw a common object like a shovel or a laptop, and the algorithm will guess in real time!",
    article="<p style='text-align: center'>Sketch Recognition | Demo Model</p>",
    live=True,
)
interface.launch(share=True)
Notice the live=True parameter in Interface, which means that the sketch demo makes
a prediction every time someone draws on the sketchpad (no submit button!).
Furthermore, we also set the share=True argument in the launch() method.
This will create a public link that you can
send to anyone! When you send this link, the user on the other side can try out the
sketch recognition model. To reiterate, you could also host the model on Hugging Face Spaces,
which is how we are able to embed the demo above.
Next up, we’ll cover other ways that Gradio can be used with the Hugging Face ecosystem!
