Fine-tune Mistral 7B v0.3 with PyTorch Training DLC using SFT on Vertex AI
Transformer Reinforcement Learning (TRL) is a framework developed by Hugging Face to fine-tune and align both transformer language and diffusion models using methods such as Supervised Fine-Tuning (SFT), Reward Modeling (RM), Proximal Policy Optimization (PPO), Direct Preference Optimization (DPO), and others. On the other hand, Vertex AI is a Machine Learning (ML) platform that lets you train and deploy ML models and AI applications, and customize large language models (LLMs) for use in your AI-powered applications.
This example showcases how to create a custom training job on Vertex AI running the Hugging Face PyTorch DLC for training, using the TRL CLI to full fine-tune a 7B LLM with SFT in a multi-GPU setting.
Setup / Configuration
First, you need to install gcloud in your local machine, which is the command-line tool for Google Cloud, following the instructions at Cloud SDK Documentation - Install the gcloud CLI.
Then, you also need to install the google-cloud-aiplatform Python SDK, required to programmatically create the Vertex AI model, register it, acreate the endpoint, and deploy it on Vertex AI.
!pip install --upgrade --quiet google-cloud-aiplatform
Optionally, to ease the usage of the commands within this tutorial, you need to set the following environment variables for GCP:
%env PROJECT_ID=your-project-id
%env LOCATION=your-location
%env BUCKET_URI=gs://hf-vertex-pipelines
%env CONTAINER_URI=us-docker.pkg.dev/deeplearning-platform-release/gcr.io/huggingface-pytorch-training-cu121.2-3.transformers.4-42.ubuntu2204.py310
Then you need to login into your GCP account and set the project ID to the one you want to use to register and deploy the models on Vertex AI.
!gcloud auth login
!gcloud auth application-default login  # For local development
!gcloud config set project $PROJECT_ID
Once you are logged in, you need to enable the necessary service APIs in GCP, such as the Vertex AI API, the Compute Engine API, and Google Container Registry related APIs.
!gcloud services enable aiplatform.googleapis.com
!gcloud services enable compute.googleapis.com
!gcloud services enable container.googleapis.com
!gcloud services enable containerregistry.googleapis.com
!gcloud services enable containerfilesystem.googleapis.com
Optional: Create bucket in GCS
You can use an existing bucket for storing the fine-tuning artifacts, if you already have a bucket, feel free to skip this step and jump onto the next one.
As the Vertex AI job will generate artifacts, you need to specify a Google Cloud Storage (GCS) Bucket to dump those artifacts into. So on, you need to create a GCS Bucket via the gcloud storage buckets create subcommand as follows:
!gcloud storage buckets create $BUCKET_URI --project $PROJECT_ID --location=$LOCATION --default-storage-class=STANDARD --uniform-bucket-level-accessPrepare CustomContainerTrainingJob
Once you have configured the environment and created the GCS Bucket (if applicable), you can proceed with the definition of the CustomContainerTrainingJob, which is a standard container job that runs on Vertex AI running a container, being the Hugging Face PyTorch DLC for training.
import os
from google.cloud import aiplatform

aiplatform.init(
    project=os.getenv("PROJECT_ID"),
    location=os.getenv("LOCATION"),
    staging_bucket=os.getenv("BUCKET_URI"),
)
Before proceeding with the definition of the CustomContainerTrainingJob, you need to define the accelerate configuration file that you want to use when running the trl sft command, required as you are in a multi-GPU environment, otherwise the default configuration will be used and may not be getting the most when running the fine-tuning job on multiple GPUs.
You need to define the DeepSpeed Zero3 configuration by creating the following deepspeed.yaml file locally, containing the configuration that will be used to run the SFT fine-tuning in a distributed setting on multiple GPUs. Some of the values defined within the following configuration file are:
mixed_precision=bf16as the fine-tuning will be inbfloat16num_processes=4as the fine-tuning will run on 4 A100 GPUsnum_machines=1andsame_network=trueas the GPUs are within the same single instance
Note that DeepSpeed Zero3 has been selected as the distributed configuration for accelerate, but any other can be used and configured via the accelerate config command, that will prompt the different configurations; or just explore some pre-defined configuration files in the Accelerate Config Zoo.
%%writefile "./assets/deepspeed.yaml"
compute_environment: LOCAL_MACHINE
debug: false
deepspeed_config:
  deepspeed_multinode_launcher: standard
  offload_optimizer_device: none
  offload_param_device: none
  zero3_init_flag: true
  zero3_save_16bit_model: true
  zero_stage: 3
distributed_type: DEEPSPEED
downcast_bf16: 'no'
machine_rank: 0
main_training_function: main
mixed_precision: bf16
num_machines: 1
num_processes: 4
rdzv_backend: static
same_network: true
tpu_env: []
tpu_use_cluster: false
tpu_use_sudo: false
use_cpu: false
You now need to define a CustomContainerTrainingJob that runs on the Hugging Face PyTorch DLC for training, that needs to run the following sequential steps:
- Create the
$HF_HOME/acceleratepath (if not existing already) as theaccelerateconfig will be dumped there. - Write the content of the
deepspeed.yamlconfiguration file into the cache under thedefault_config.yamlname (as that’sacceleratedefault path i.e. the configuration that will be used for the fine-tuning job). - Add the
trl sftcommand capturing the arguments that will be provided whenever the job runs.
The CustomContainerTrainingJob will override the default ENTRYPOINT provided within the container URI provided, so if the ENTRYPOINT is already suited to receive the arguments, then there’s no need to define a custom command.
job = aiplatform.CustomContainerTrainingJob(
    display_name="trl-full-sft",
    container_uri=os.getenv("CONTAINER_URI"),
    command=[
        "sh",
        "-c",
        " && ".join(
            (
                "mkdir -p $HF_HOME/accelerate",
                f"echo \"{open('./assets/deepspeed.yaml').read()}\" > $HF_HOME/accelerate/default_config.yaml",
                'exec trl sft "$@"',
            )
        ),
        "--",
    ],
)
Define CustomContainerTrainingJob Requirements
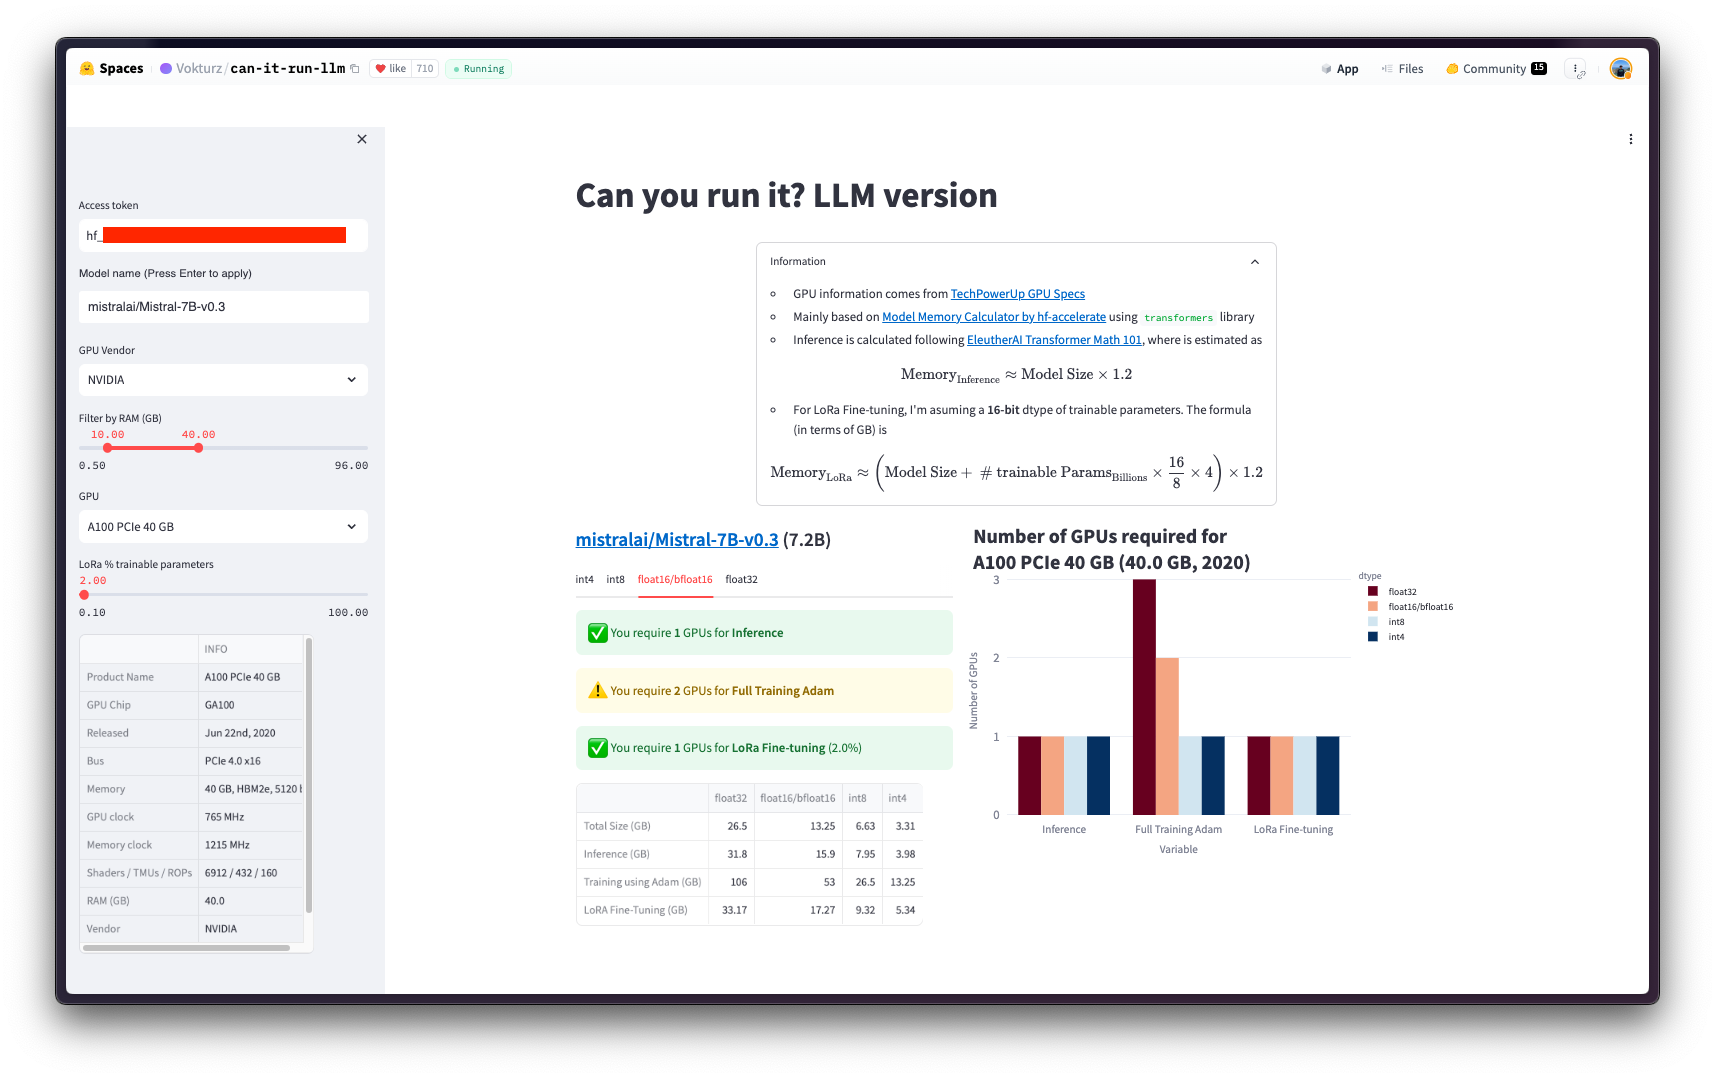
Before proceeding to the CustomContainerTrainingJob via the Hugging Face PyTorch DLC for training, you need to define first the configuration required for the job to run successfully i.e. which GPU is capable of fine-tuning mistralai/Mistral-7B-v0.3 in bfloat16.
As a rough calculation, you could assume that the amount of GPU VRAM required to fine-tune a model in half precision is about four times the model size (read more about it in Eleuther AI - Transformer Math 101).
Alternatively, if your model is uploaded to the Hugging Face Hub, you can check the numbers in the community space Vokturz/can-it-run-llm, which does those calculations for you, based the model to fine-tune and the available hardware.
Run CustomContainerTrainingJob
As mentioned before, the job will run the Supervised Fine-Tuning (SFT) with the TRL CLI on top of mistralai/Mistral-7B-v0.3 in bfloat16 using timdettmers/openassistant-guanaco, which is a subset from OpenAssistant/oasst1 with ~10k samples.
Once you have decided which resources to use to run the job, you need to define the hyper parameters accordingly to ensure that the selected instance is capable of running the job. Some of the hparams that you may want to look into to avoid running into OOM errors are the following:
- Optimizer: by default the AdamW optimizer will be used, but alternatively lower precision optimizers can be used to reduce the memory as well e.g.
adamw_bnb_8bit(for more information on 8-bit optimizers check https://huggingface.co/docs/bitsandbytes/main/en/optimizers). - Batch size: you can tweak this so as to use a lower batch size when running into OOM, or you can also tweak the gradient accumulation steps to simulate a similar batch size for updating the gradients, but providing less inputs within a batch a time e.g.
batch_size=8andgradient_accumulation=1is effectively the same asbatch_size=4andgradient_accumulation=2.
As the CustomContainerTrainingJob defines the command trl sft the arguments to be provided are listed either in the Python reference at trl.SFTConfig or via the trl sft --help command.
Read more about the TRL CLI at https://huggingface.co/docs/trl/en/clis.
Since GCS FUSE is used to mount the bucket as a directory within the running container job, the mounted path follows the formatting /gcs/<BUCKET_NAME>. More information at https://cloud.google.com/vertex-ai/docs/training/code-requirements. So the output_dir needs to be set to the mounted GCS Bucket, meaning that anything the SFTTrainer writes there will be automatically uploaded to the GCS Bucket.
args = [
    # MODEL
    "--model_name_or_path=mistralai/Mistral-7B-v0.3",
    "--torch_dtype=bfloat16",
    "--attn_implementation=flash_attention_2",
    # DATASET
    "--dataset_name=timdettmers/openassistant-guanaco",
    "--dataset_text_field=text",
    # TRAINER
    "--bf16",
    "--max_seq_length=1024",
    "--per_device_train_batch_size=2",
    "--gradient_accumulation_steps=4",
    "--gradient_checkpointing",
    "--gradient_checkpointing_use_reentrant",
    "--learning_rate=0.00002",
    "--lr_scheduler_type=cosine",
    "--optim=adamw_bnb_8bit",
    "--num_train_epochs=1",
    "--logging_steps=10",
    "--do_eval",
    "--eval_steps=100",
    "--save_strategy=epoch",
    "--report_to=none",
    f"--output_dir={os.getenv('BUCKET_URI').replace('gs://', '/gcs/')}/Mistral-7B-v0.3-SFT-Guanaco",
    "--overwrite_output_dir",
    "--seed=42",
    "--log_level=info",
]
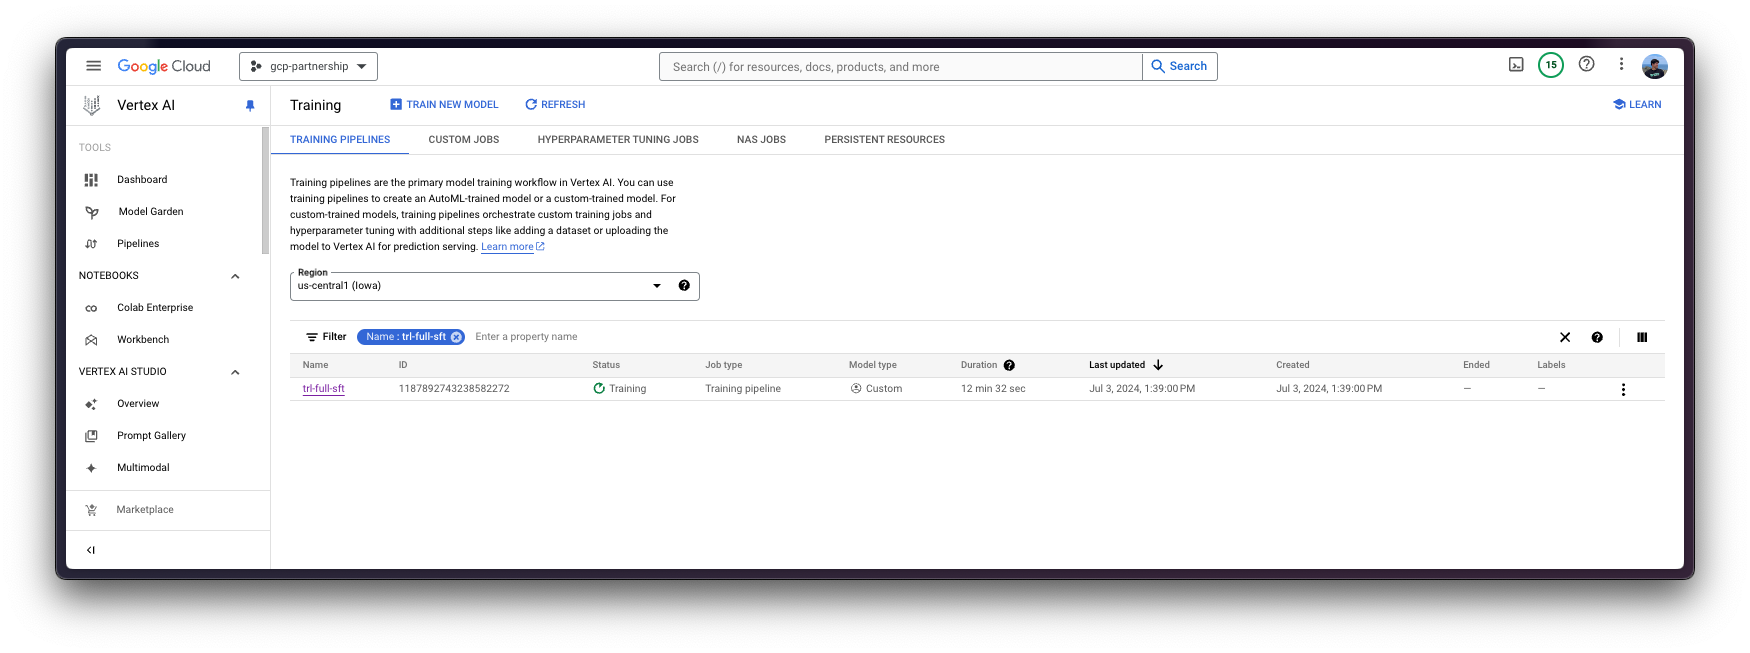
Then you need to call the submit method on the aiplatform.CustomContainerTrainingJob, which is a non-blocking method that will schedule the job without blocking the execution.
The arguments provided to the submit method are listed below:
argsdefines the list of arguments to be provided to thetrl sftcommand, provided astrl sft --arg_1=value ....replica_countdefines the number of replicas to run the job in, for training normally this value will be set to one.machine_type,accelerator_typeandaccelerator_countdefine the machine i.e. Compute Engine instance, the accelerator (if any), and the number of accelerators (ranging from 1 to 8); respectively. Themachine_typeand theaccelerator_typeare tied together, so you will need to select an instance that supports the accelerator that you are using and vice-versa. More information about the different instances at Compute Engine Documentation - GPU machine types, and about theaccelerator_typenaming at Vertex AI Documentation - MachineSpec.base_output_dirdefines the base directory that will be mounted within the running container from the GCS Bucket, conditioned by thestaging_bucketargument provided to theaiplatform.initinitially.(optional)
environment_variablesdefines the environment variables to define within the running container. As you are fine-tuning a gated model i.e.mistralai/Mistral-7B-v0.3, you need to set theHF_TOKENenvironment variable. Additionally, some other environment variables are defined to set the cache path (HF_HOME) and to ensure that the logging messages are streamed to Google Cloud Logs Explorer properly (TRL_USE_RICH,ACCELERATE_LOG_LEVEL,TRANSFORMERS_LOG_LEVEL, andTQDM_POSITION).(optional)
timeoutandcreate_request_timeoutdefine the timeouts in seconds before interrupting the job execution or the job creation request (time to allocate required resources and start the execution), respectively.(optional)
boot_disk_sizedefines the size in GiB of the boot disk, increased to store not only the model weights but also all the intermediate checkpoints if any; otherwise, it defaults to 100GiB which may not be sufficient in some cases.
!pip install --upgrade --quiet huggingface_hub
from huggingface_hub import interpreter_login

interpreter_login()from huggingface_hub import get_token
job.submit(
args=args,
replica_count=1,
machine_type="a2-highgpu-4g",
accelerator_type="NVIDIA_TESLA_A100",
accelerator_count=4,
base_output_dir=f"{os.getenv('BUCKET_URI')}/Mistral-7B-v0.3-SFT-Guanaco",
environment_variables={
"HF_HOME": "/root/.cache/huggingface",
"HF_TOKEN": get_token(),
"TRL_USE_RICH": "0",
"ACCELERATE_LOG_LEVEL": "INFO",
"TRANSFORMERS_LOG_LEVEL": "INFO",
"TQDM_POSITION": "-1",
},
timeout=60 * 60 * 3, # 3 hours (10800s)
create_request_timeout=60 * 10, # 10 minutes (600s)
boot_disk_size_gb=250,
)
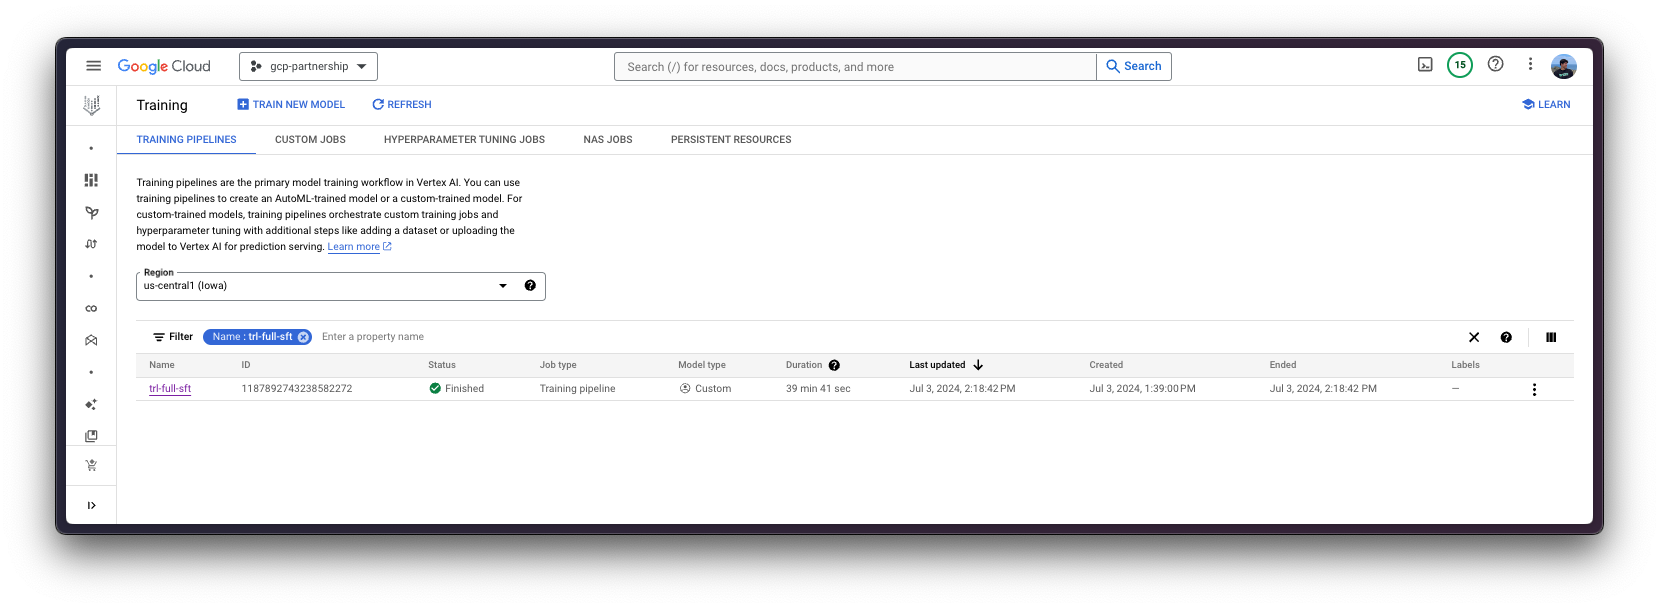
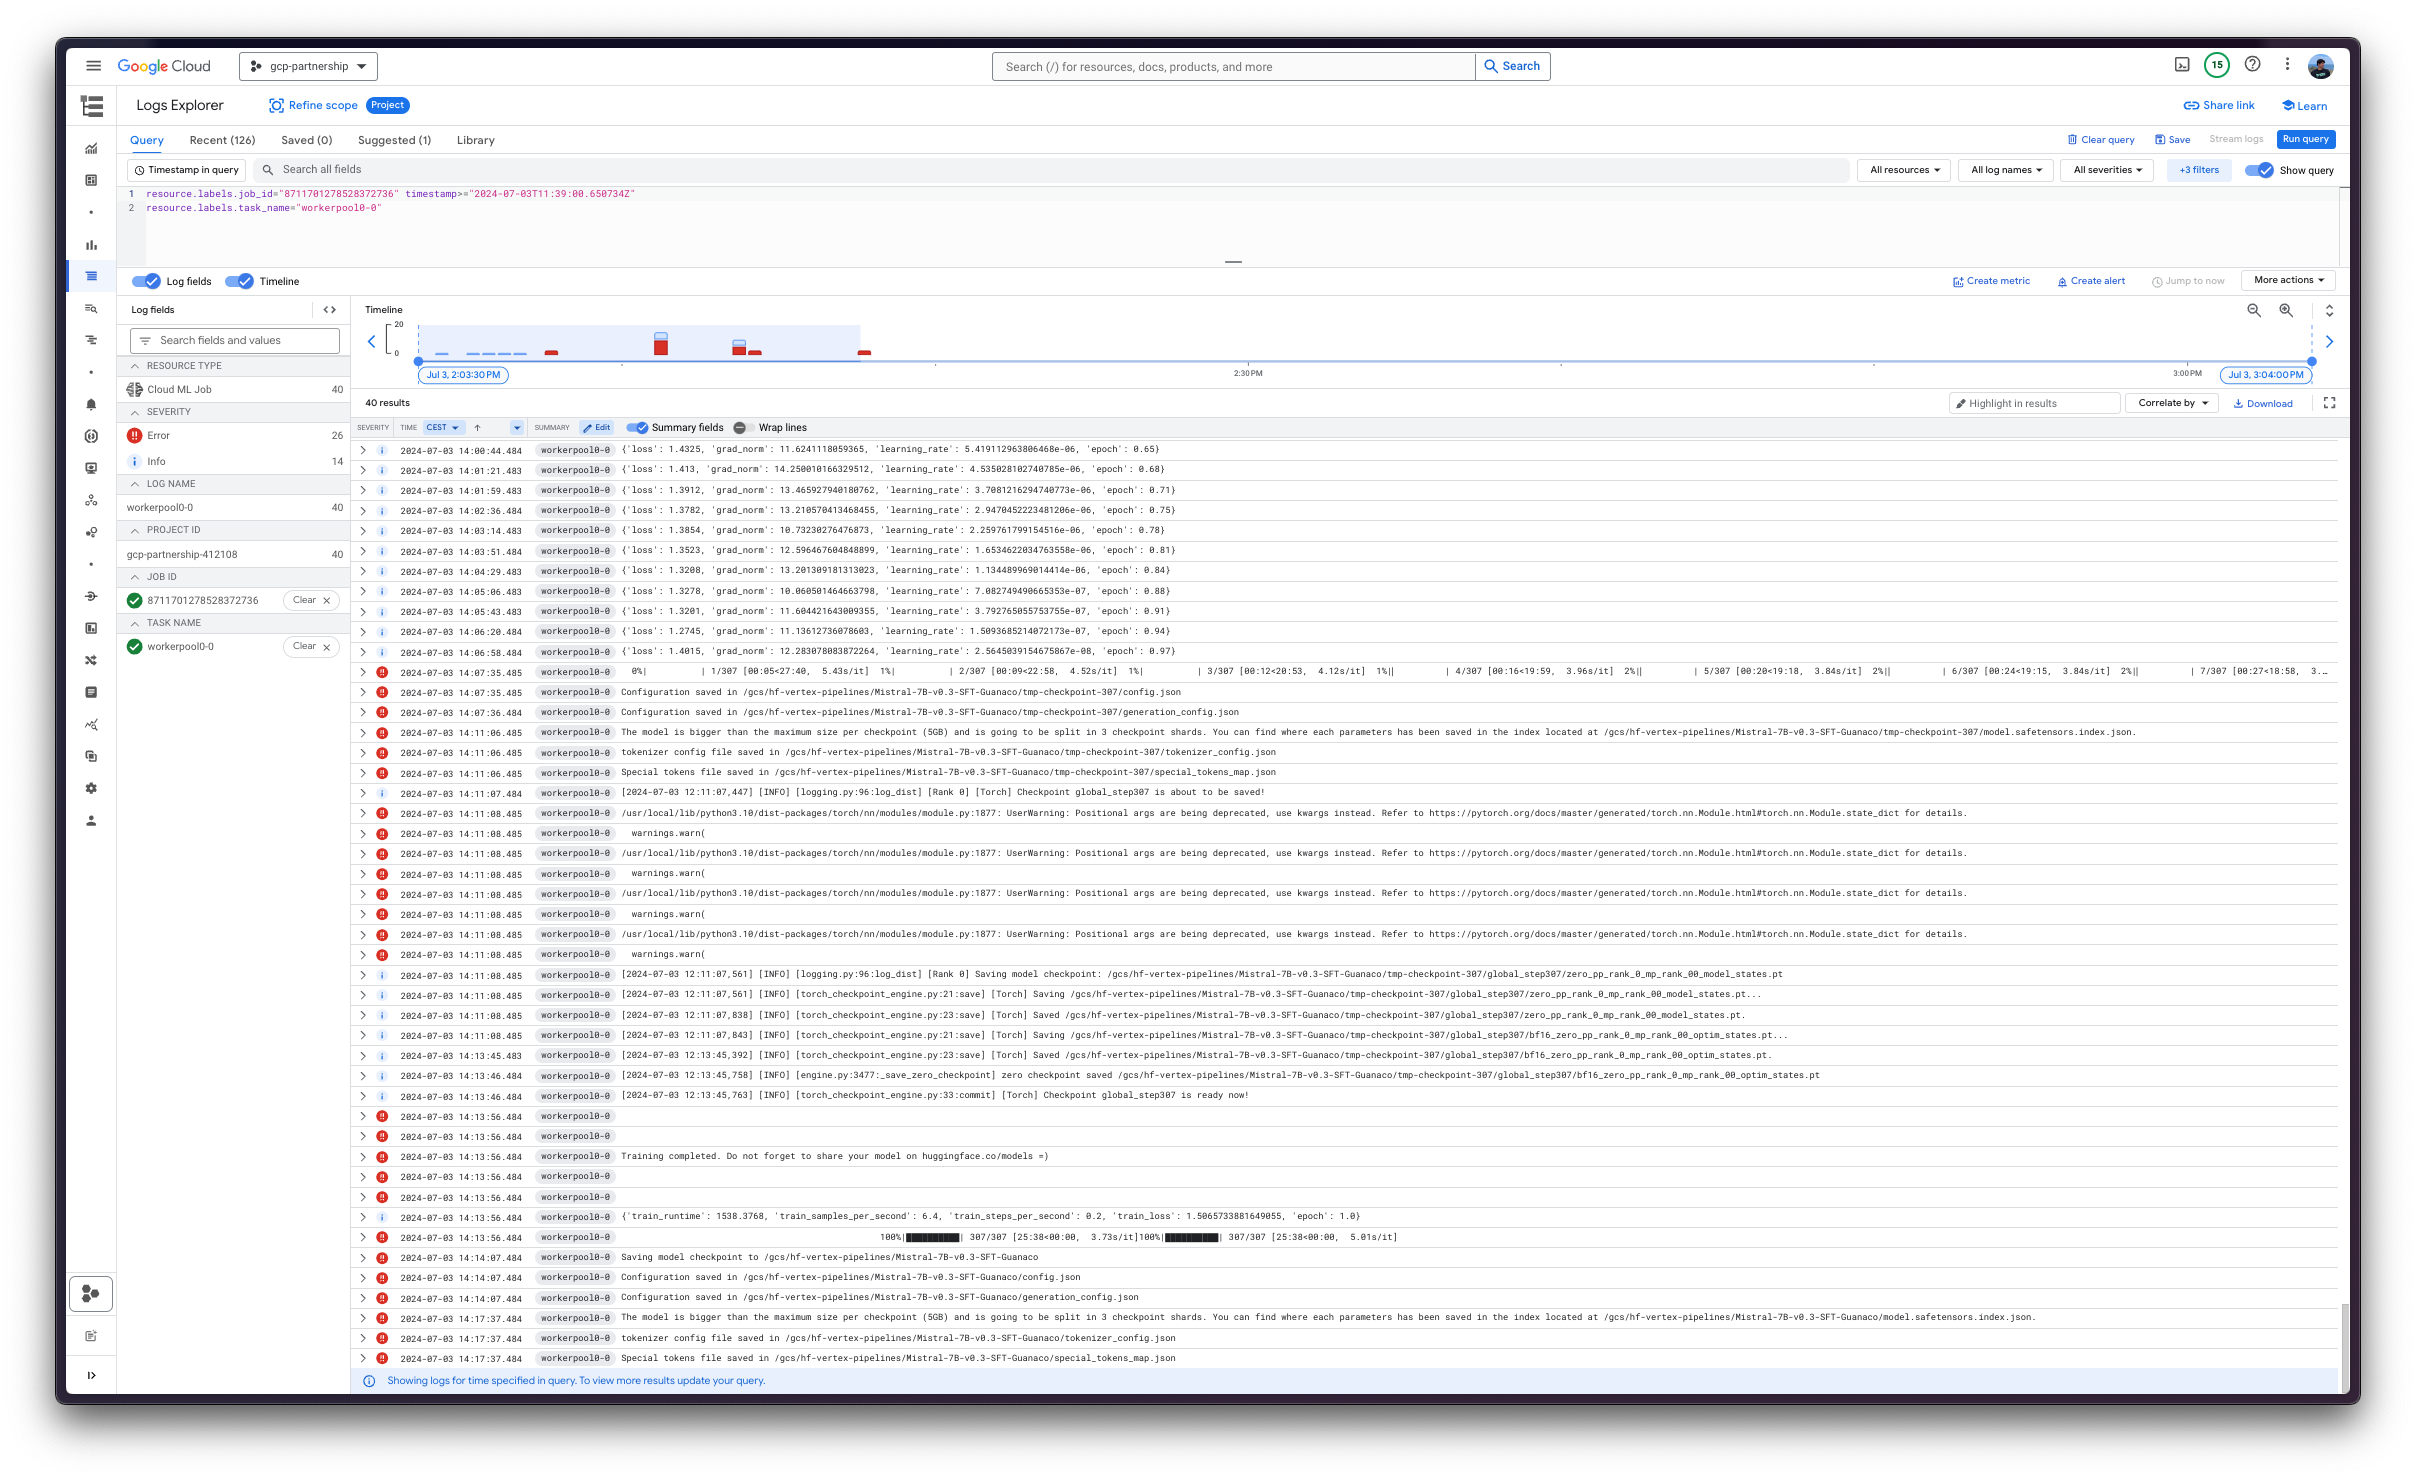
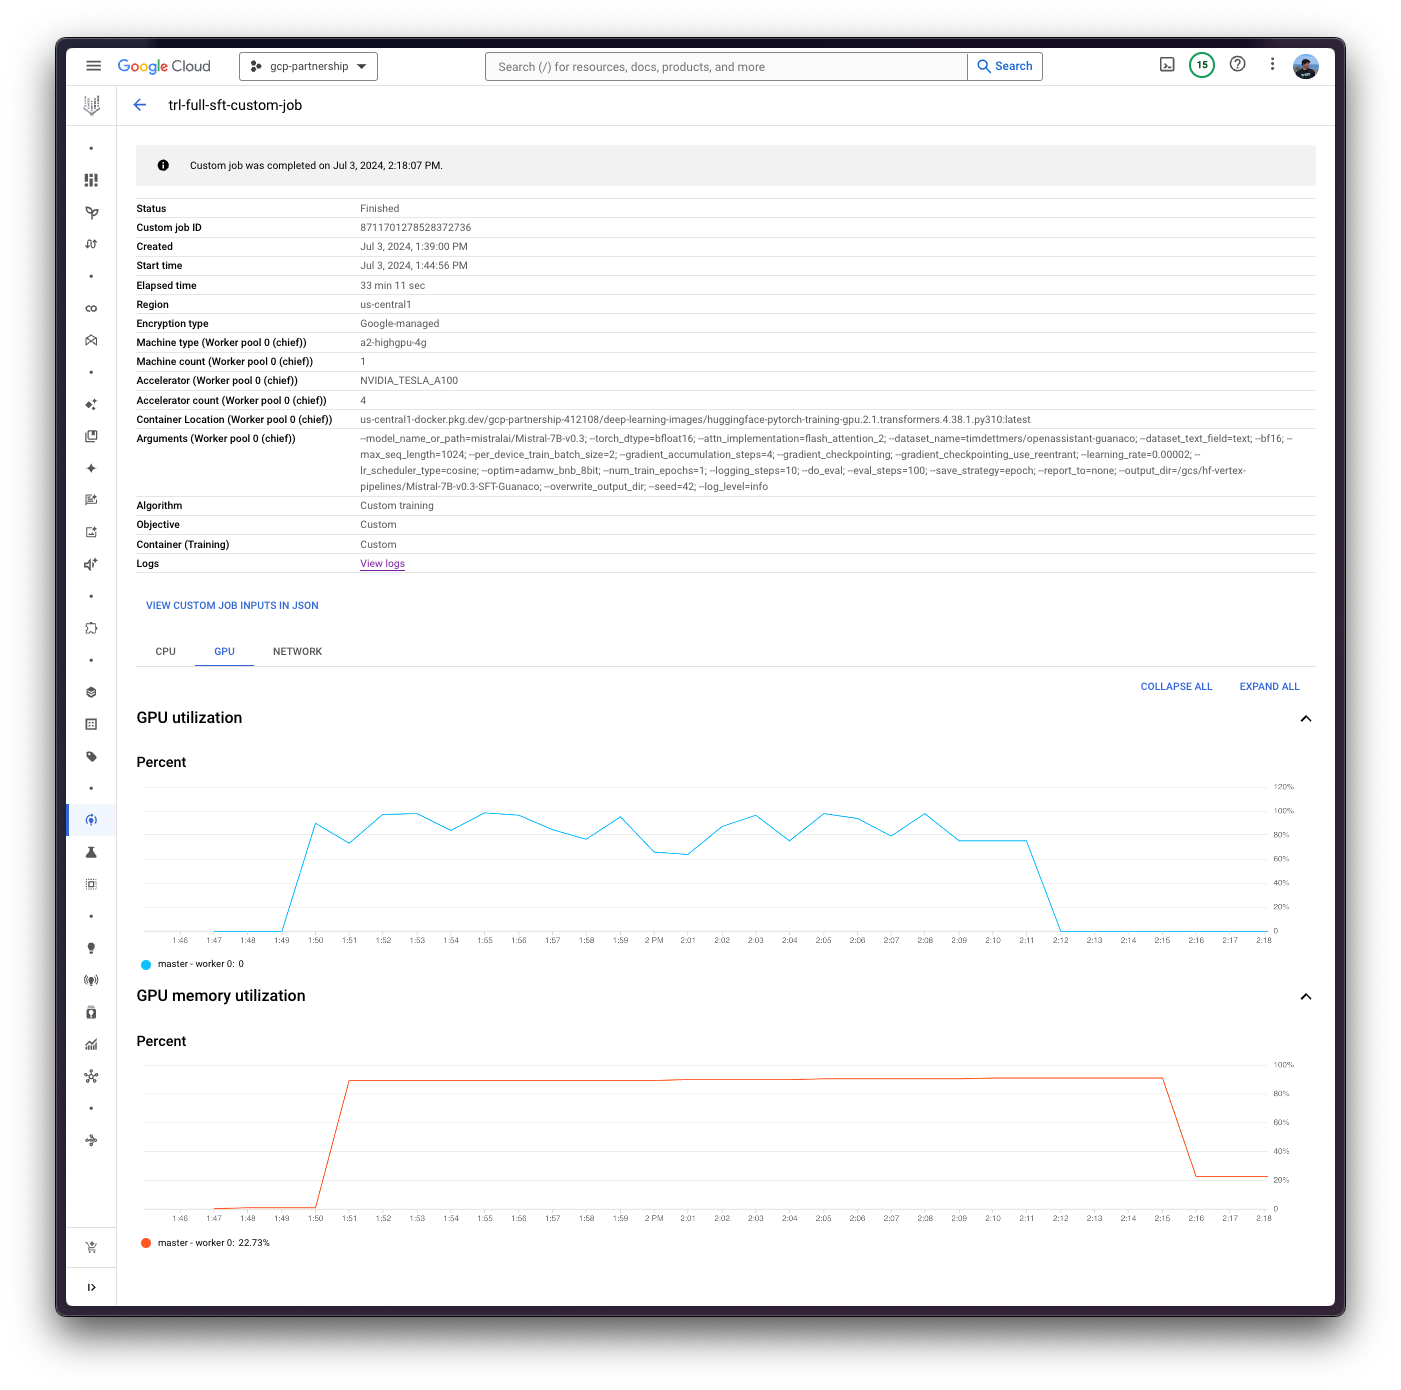
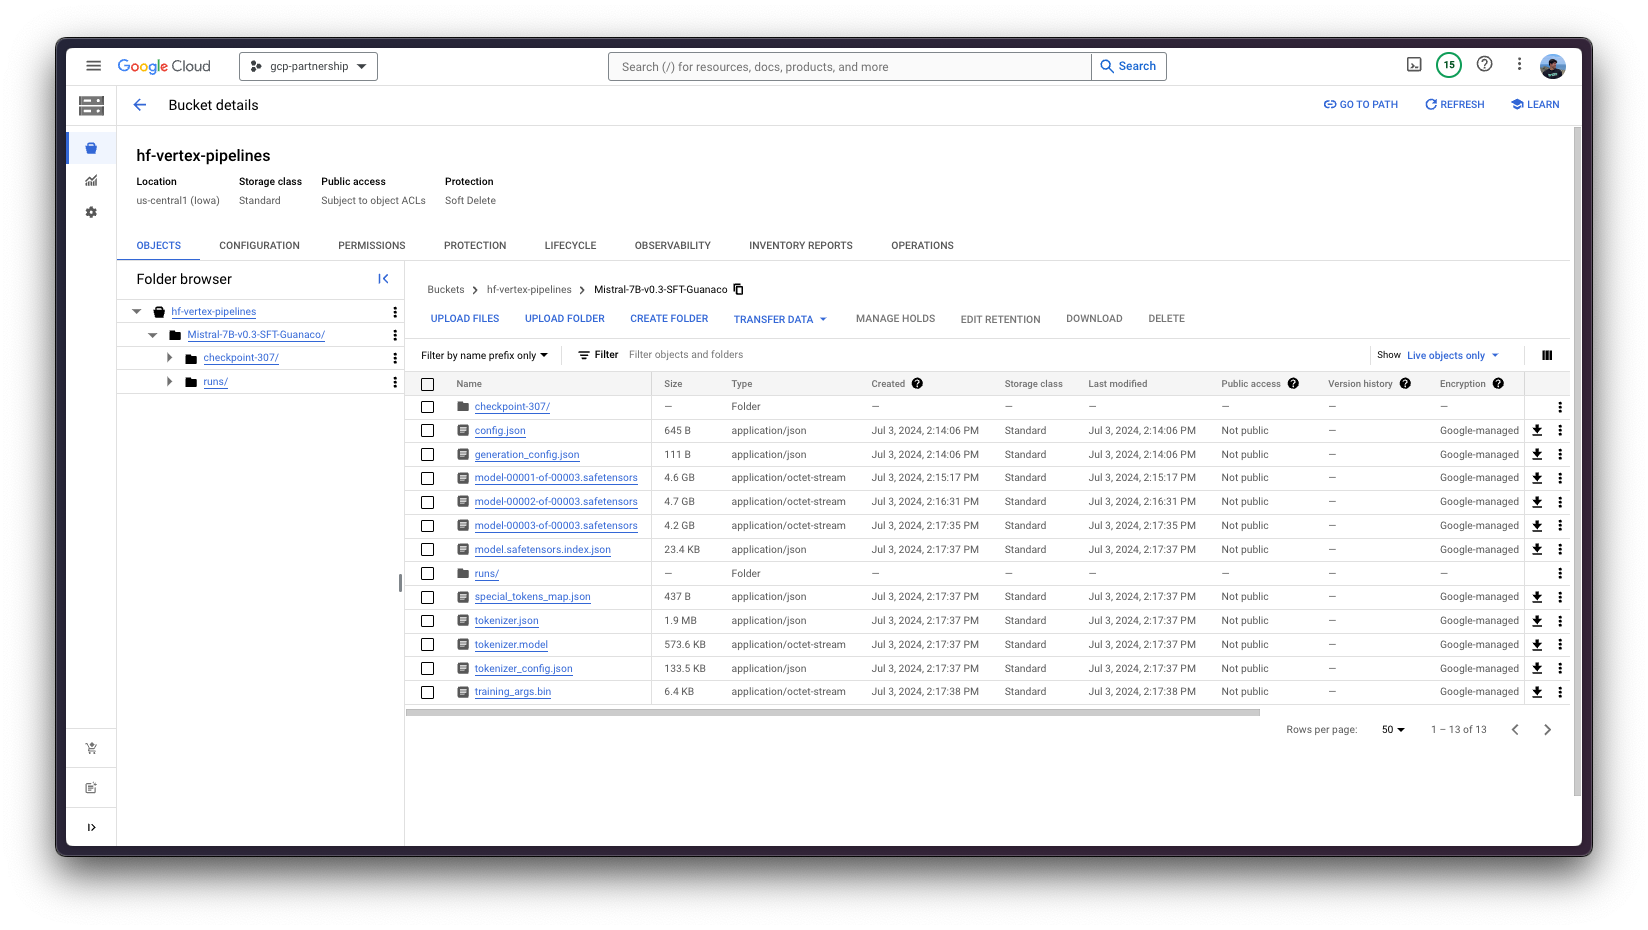
Finally, you can upload the fine-tuned model to the Hugging Face Hub, or just keep it within the Google Cloud Storage (GCS) Bucket. Later on, you will be able to run the inference on top of it via either the Hugging Face PyTorch DLC for inference via the pipeline in transformers , or via the Hugging Face DLC for TGI (as the model is fine-tuned for text-generation ).
📍 Find the complete example on GitHub here!