# Installation Before you start, you will need to setup your environment by installing the appropriate packages. `huggingface_hub` is tested on **Python 3.8+**. ## Install with pip It is highly recommended to install `huggingface_hub` in a [virtual environment](https://docs.python.org/3/library/venv.html). If you are unfamiliar with Python virtual environments, take a look at this [guide](https://packaging.python.org/en/latest/guides/installing-using-pip-and-virtual-environments/). A virtual environment makes it easier to manage different projects, and avoid compatibility issues between dependencies. Start by creating a virtual environment in your project directory: ```bash python -m venv .env ``` Activate the virtual environment. On Linux and macOS: ```bash source .env/bin/activate ``` Activate virtual environment on Windows: ```bash .env/Scripts/activate ``` Now you're ready to install `huggingface_hub` [from the PyPi registry](https://pypi.org/project/huggingface-hub/): ```bash pip install --upgrade huggingface_hub ``` Once done, [check installation](#check-installation) is working correctly. ### Install optional dependencies Some dependencies of `huggingface_hub` are [optional](https://setuptools.pypa.io/en/latest/userguide/dependency_management.html#optional-dependencies) because they are not required to run the core features of `huggingface_hub`. However, some features of the `huggingface_hub` may not be available if the optional dependencies aren't installed. You can install optional dependencies via `pip`: ```bash # Install dependencies for tensorflow-specific features # /!\ Warning: this is not equivalent to `pip install tensorflow` pip install 'huggingface_hub[tensorflow]' # Install dependencies for both torch-specific and CLI-specific features. pip install 'huggingface_hub[cli,torch]' ``` Here is the list of optional dependencies in `huggingface_hub`: - `cli`: provide a more convenient CLI interface for `huggingface_hub`. - `fastai`, `torch`, `tensorflow`: dependencies to run framework-specific features. - `dev`: dependencies to contribute to the lib. Includes `testing` (to run tests), `typing` (to run type checker) and `quality` (to run linters). ### Install from source In some cases, it is interesting to install `huggingface_hub` directly from source. This allows you to use the bleeding edge `main` version rather than the latest stable version. The `main` version is useful for staying up-to-date with the latest developments, for instance if a bug has been fixed since the last official release but a new release hasn't been rolled out yet. However, this means the `main` version may not always be stable. We strive to keep the `main` version operational, and most issues are usually resolved within a few hours or a day. If you run into a problem, please open an Issue so we can fix it even sooner! ```bash pip install git+https://github.com/huggingface/huggingface_hub ``` When installing from source, you can also specify a specific branch. This is useful if you want to test a new feature or a new bug-fix that has not been merged yet: ```bash pip install git+https://github.com/huggingface/huggingface_hub@my-feature-branch ``` Once done, [check installation](#check-installation) is working correctly. ### Editable install Installing from source allows you to setup an [editable install](https://pip.pypa.io/en/stable/topics/local-project-installs/#editable-installs). This is a more advanced installation if you plan to contribute to `huggingface_hub` and need to test changes in the code. You need to clone a local copy of `huggingface_hub` on your machine. ```bash # First, clone repo locally git clone https://github.com/huggingface/huggingface_hub.git # Then, install with -e flag cd huggingface_hub pip install -e . ``` These commands will link the folder you cloned the repository to and your Python library paths. Python will now look inside the folder you cloned to in addition to the normal library paths. For example, if your Python packages are typically installed in `./.venv/lib/python3.13/site-packages/`, Python will also search the folder you cloned `./huggingface_hub/`. ## Install with conda If you are more familiar with it, you can install `huggingface_hub` using the [conda-forge channel](https://anaconda.org/conda-forge/huggingface_hub): ```bash conda install -c conda-forge huggingface_hub ``` Once done, [check installation](#check-installation) is working correctly. ## Check installation Once installed, check that `huggingface_hub` works properly by running the following command: ```bash python -c "from huggingface_hub import model_info; print(model_info('gpt2'))" ``` This command will fetch information from the Hub about the [gpt2](https://huggingface.co/gpt2) model. Output should look like this: ```text Model Name: gpt2 Tags: ['pytorch', 'tf', 'jax', 'tflite', 'rust', 'safetensors', 'gpt2', 'text-generation', 'en', 'doi:10.57967/hf/0039', 'transformers', 'exbert', 'license:mit', 'has_space'] Task: text-generation ``` ## Windows limitations With our goal of democratizing good ML everywhere, we built `huggingface_hub` to be a cross-platform library and in particular to work correctly on both Unix-based and Windows systems. However, there are a few cases where `huggingface_hub` has some limitations when run on Windows. Here is an exhaustive list of known issues. Please let us know if you encounter any undocumented problem by opening [an issue on Github](https://github.com/huggingface/huggingface_hub/issues/new/choose). - `huggingface_hub`'s cache system relies on symlinks to efficiently cache files downloaded from the Hub. On Windows, you must activate developer mode or run your script as admin to enable symlinks. If they are not activated, the cache-system still works but in a non-optimized manner. Please read [the cache limitations](./guides/manage-cache#limitations) section for more details. - Filepaths on the Hub can have special characters (e.g. `"path/to?/my/file"`). Windows is more restrictive on [special characters](https://learn.microsoft.com/en-us/windows/win32/intl/character-sets-used-in-file-names) which makes it impossible to download those files on Windows. Hopefully this is a rare case. Please reach out to the repo owner if you think this is a mistake or to us to figure out a solution. ## Next steps Once `huggingface_hub` is properly installed on your machine, you might want [configure environment variables](package_reference/environment_variables) or [check one of our guides](guides/overview) to get started. # 🤗 Hub client library The `huggingface_hub` library allows you to interact with the [Hugging Face Hub](https://hf.co), a machine learning platform for creators and collaborators. Discover pre-trained models and datasets for your projects or play with the hundreds of machine learning apps hosted on the Hub. You can also create and share your own models and datasets with the community. The `huggingface_hub` library provides a simple way to do all these things with Python. Read the [quick start guide](quick-start) to get up and running with the `huggingface_hub` library. You will learn how to download files from the Hub, create a repository, and upload files to the Hub. Keep reading to learn more about how to manage your repositories on the 🤗 Hub, how to interact in discussions or even how to access the Inference API.
How-to guides

Practical guides to help you achieve a specific goal. Take a look at these guides to learn how to use huggingface_hub to solve real-world problems.

Reference

Exhaustive and technical description of huggingface_hub classes and methods.

Conceptual guides

High-level explanations for building a better understanding of huggingface_hub philosophy.

## Contribute All contributions to the `huggingface_hub` are welcomed and equally valued! 🤗 Besides adding or fixing existing issues in the code, you can also help improve the documentation by making sure it is accurate and up-to-date, help answer questions on issues, and request new features you think will improve the library. Take a look at the [contribution guide](https://github.com/huggingface/huggingface_hub/blob/main/CONTRIBUTING.md) to learn more about how to submit a new issue or feature request, how to submit a pull request, and how to test your contributions to make sure everything works as expected. Contributors should also be respectful of our [code of conduct](https://github.com/huggingface/huggingface_hub/blob/main/CODE_OF_CONDUCT.md) to create an inclusive and welcoming collaborative space for everyone. # Quickstart The [Hugging Face Hub](https://huggingface.co/) is the go-to place for sharing machine learning models, demos, datasets, and metrics. `huggingface_hub` library helps you interact with the Hub without leaving your development environment. You can create and manage repositories easily, download and upload files, and get useful model and dataset metadata from the Hub. ## Installation To get started, install the `huggingface_hub` library: ```bash pip install --upgrade huggingface_hub ``` For more details, check out the [installation](installation) guide. ## Download files Repositories on the Hub are git version controlled, and users can download a single file or the whole repository. You can use the `hf_hub_download()` function to download files. This function will download and cache a file on your local disk. The next time you need that file, it will load from your cache, so you don't need to re-download it. You will need the repository id and the filename of the file you want to download. For example, to download the [Pegasus](https://huggingface.co/google/pegasus-xsum) model configuration file: ```py >>> from huggingface_hub import hf_hub_download >>> hf_hub_download(repo_id="google/pegasus-xsum", filename="config.json") ``` To download a specific version of the file, use the `revision` parameter to specify the branch name, tag, or commit hash. If you choose to use the commit hash, it must be the full-length hash instead of the shorter 7-character commit hash: ```py >>> from huggingface_hub import hf_hub_download >>> hf_hub_download( ... repo_id="google/pegasus-xsum", ... filename="config.json", ... revision="4d33b01d79672f27f001f6abade33f22d993b151" ... ) ``` For more details and options, see the API reference for `hf_hub_download()`. ## Authentication In a lot of cases, you must be authenticated with a Hugging Face account to interact with the Hub: download private repos, upload files, create PRs,... [Create an account](https://huggingface.co/join) if you don't already have one, and then sign in to get your [User Access Token](https://huggingface.co/docs/hub/security-tokens) from your [Settings page](https://huggingface.co/settings/tokens). The User Access Token is used to authenticate your identity to the Hub. Tokens can have `read` or `write` permissions. Make sure to have a `write` access token if you want to create or edit a repository. Otherwise, it's best to generate a `read` token to reduce risk in case your token is inadvertently leaked. ### Login command The easiest way to authenticate is to save the token on your machine. You can do that from the terminal using the `login()` command: ```bash huggingface-cli login ``` The command will tell you if you are already logged in and prompt you for your token. The token is then validated and saved in your `HF_HOME` directory (defaults to `~/.cache/huggingface/token`). Any script or library interacting with the Hub will use this token when sending requests. Alternatively, you can programmatically login using `login()` in a notebook or a script: ```py >>> from huggingface_hub import login >>> login() ``` You can only be logged in to one account at a time. Logging in to a new account will automatically log you out of the previous one. To determine your currently active account, simply run the `huggingface-cli whoami` command. Once logged in, all requests to the Hub - even methods that don't necessarily require authentication - will use your access token by default. If you want to disable the implicit use of your token, you should set `HF_HUB_DISABLE_IMPLICIT_TOKEN=1` as an environment variable (see [reference](../package_reference/environment_variables#hfhubdisableimplicittoken)). ### Manage multiple tokens locally You can save multiple tokens on your machine by simply logging in with the `login()` command with each token. If you need to switch between these tokens locally, you can use the `auth switch` command: ```bash huggingface-cli auth switch ``` This command will prompt you to select a token by its name from a list of saved tokens. Once selected, the chosen token becomes the _active_ token, and it will be used for all interactions with the Hub. You can list all available access tokens on your machine with `huggingface-cli auth list`. ### Environment variable The environment variable `HF_TOKEN` can also be used to authenticate yourself. This is especially useful in a Space where you can set `HF_TOKEN` as a [Space secret](https://huggingface.co/docs/hub/spaces-overview#managing-secrets). **NEW:** Google Colaboratory lets you define [private keys](https://twitter.com/GoogleColab/status/1719798406195867814) for your notebooks. Define a `HF_TOKEN` secret to be automatically authenticated! Authentication via an environment variable or a secret has priority over the token stored on your machine. ### Method parameters Finally, it is also possible to authenticate by passing your token to any method that accepts `token` as a parameter. ``` from huggingface_hub import whoami user = whoami(token=...) ``` This is usually discouraged except in an environment where you don't want to store your token permanently or if you need to handle several tokens at once. Please be careful when passing tokens as a parameter. It is always best practice to load the token from a secure vault instead of hardcoding it in your codebase or notebook. Hardcoded tokens present a major leak risk if you share your code inadvertently. ## Create a repository Once you've registered and logged in, create a repository with the `create_repo()` function: ```py >>> from huggingface_hub import HfApi >>> api = HfApi() >>> api.create_repo(repo_id="super-cool-model") ``` If you want your repository to be private, then: ```py >>> from huggingface_hub import HfApi >>> api = HfApi() >>> api.create_repo(repo_id="super-cool-model", private=True) ``` Private repositories will not be visible to anyone except yourself. To create a repository or to push content to the Hub, you must provide a User Access Token that has the `write` permission. You can choose the permission when creating the token in your [Settings page](https://huggingface.co/settings/tokens). ## Upload files Use the `upload_file()` function to add a file to your newly created repository. You need to specify: 1. The path of the file to upload. 2. The path of the file in the repository. 3. The repository id of where you want to add the file. ```py >>> from huggingface_hub import HfApi >>> api = HfApi() >>> api.upload_file( ... path_or_fileobj="/home/lysandre/dummy-test/README.md", ... path_in_repo="README.md", ... repo_id="lysandre/test-model", ... ) ``` To upload more than one file at a time, take a look at the [Upload](./guides/upload) guide which will introduce you to several methods for uploading files (with or without git). ## Next steps The `huggingface_hub` library provides an easy way for users to interact with the Hub with Python. To learn more about how you can manage your files and repositories on the Hub, we recommend reading our [how-to guides](./guides/overview) to: - [Manage your repository](./guides/repository). - [Download](./guides/download) files from the Hub. - [Upload](./guides/upload) files to the Hub. - [Search the Hub](./guides/search) for your desired model or dataset. - [Access the Inference API](./guides/inference) for fast inference. # Git vs HTTP paradigm The `huggingface_hub` library is a library for interacting with the Hugging Face Hub, which is a collection of git-based repositories (models, datasets or Spaces). There are two main ways to access the Hub using `huggingface_hub`. The first approach, the so-called "git-based" approach, is led by the `Repository` class. This method uses a wrapper around the `git` command with additional functions specifically designed to interact with the Hub. The second option, called the "HTTP-based" approach, involves making HTTP requests using the `HfApi` client. Let's examine the pros and cons of each approach. ## Repository: the historical git-based approach At first, `huggingface_hub` was mostly built around the `Repository` class. It provides Python wrappers for common `git` commands such as `"git add"`, `"git commit"`, `"git push"`, `"git tag"`, `"git checkout"`, etc. The library also helps with setting credentials and tracking large files, which are often used in machine learning repositories. Additionally, the library allows you to execute its methods in the background, making it useful for uploading data during training. The main advantage of using a `Repository` is that it allows you to maintain a local copy of the entire repository on your machine. This can also be a disadvantage as it requires you to constantly update and maintain this local copy. This is similar to traditional software development where each developer maintains their own local copy and pushes changes when working on a feature. However, in the context of machine learning, this may not always be necessary as users may only need to download weights for inference or convert weights from one format to another without the need to clone the entire repository. `Repository` is now deprecated in favor of the http-based alternatives. Given its large adoption in legacy code, the complete removal of `Repository` will only happen in release `v1.0`. ## HfApi: a flexible and convenient HTTP client The `HfApi` class was developed to provide an alternative to local git repositories, which can be cumbersome to maintain, especially when dealing with large models or datasets. The `HfApi` class offers the same functionality as git-based approaches, such as downloading and pushing files and creating branches and tags, but without the need for a local folder that needs to be kept in sync. In addition to the functionalities already provided by `git`, the `HfApi` class offers additional features, such as the ability to manage repos, download files using caching for efficient reuse, search the Hub for repos and metadata, access community features such as discussions, PRs, and comments, and configure Spaces hardware and secrets. ## What should I use ? And when ? Overall, the **HTTP-based approach is the recommended way to use** `huggingface_hub` in all cases. `HfApi` allows to pull and push changes, work with PRs, tags and branches, interact with discussions and much more. Since the `0.16` release, the http-based methods can also run in the background, which was the last major advantage of the `Repository` class. However, not all git commands are available through `HfApi`. Some may never be implemented, but we are always trying to improve and close the gap. If you don't see your use case covered, please open [an issue on Github](https://github.com/huggingface/huggingface_hub)! We welcome feedback to help build the 🤗 ecosystem with and for our users. This preference of the http-based `HfApi` over the git-based `Repository` does not mean that git versioning will disappear from the Hugging Face Hub anytime soon. It will always be possible to use `git` commands locally in workflows where it makes sense. # Command Line Interface (CLI) The `huggingface_hub` Python package comes with a built-in CLI called `huggingface-cli`. This tool allows you to interact with the Hugging Face Hub directly from a terminal. For example, you can login to your account, create a repository, upload and download files, etc. It also comes with handy features to configure your machine or manage your cache. In this guide, we will have a look at the main features of the CLI and how to use them. ## Getting started First of all, let's install the CLI: ``` >>> pip install -U "huggingface_hub[cli]" ``` In the snippet above, we also installed the `[cli]` extra dependencies to make the user experience better, especially when using the `delete-cache` command. Once installed, you can check that the CLI is correctly setup: ``` >>> huggingface-cli --help usage: huggingface-cli [] positional arguments: {env,login,whoami,logout,repo,upload,download,lfs-enable-largefiles,lfs-multipart-upload,scan-cache,delete-cache,tag} huggingface-cli command helpers env Print information about the environment. login Log in using a token from huggingface.co/settings/tokens whoami Find out which huggingface.co account you are logged in as. logout Log out repo {create} Commands to interact with your huggingface.co repos. upload Upload a file or a folder to a repo on the Hub download Download files from the Hub lfs-enable-largefiles Configure your repository to enable upload of files > 5GB. scan-cache Scan cache directory. delete-cache Delete revisions from the cache directory. tag (create, list, delete) tags for a repo in the hub options: -h, --help show this help message and exit ``` If the CLI is correctly installed, you should see a list of all the options available in the CLI. If you get an error message such as `command not found: huggingface-cli`, please refer to the [Installation](../installation) guide. The `--help` option is very convenient for getting more details about a command. You can use it anytime to list all available options and their details. For example, `huggingface-cli upload --help` provides more information on how to upload files using the CLI. ### Alternative install #### Using pkgx [Pkgx](https://pkgx.sh) is a blazingly fast cross platform package manager that runs anything. You can install huggingface-cli using pkgx as follows: ```bash >>> pkgx install huggingface-cli ``` Or you can run huggingface-cli directly: ```bash >>> pkgx huggingface-cli --help ``` Check out the pkgx huggingface page [here](https://pkgx.dev/pkgs/huggingface.co/) for more details. #### Using Homebrew You can also install the CLI using [Homebrew](https://brew.sh/): ```bash >>> brew install huggingface-cli ``` Check out the Homebrew huggingface page [here](https://formulae.brew.sh/formula/huggingface-cli) for more details. ## huggingface-cli login In many cases, you must be logged in to a Hugging Face account to interact with the Hub (download private repos, upload files, create PRs, etc.). To do so, you need a [User Access Token](https://huggingface.co/docs/hub/security-tokens) from your [Settings page](https://huggingface.co/settings/tokens). The User Access Token is used to authenticate your identity to the Hub. Make sure to set a token with write access if you want to upload or modify content. Once you have your token, run the following command in your terminal: ```bash >>> huggingface-cli login ``` This command will prompt you for a token. Copy-paste yours and press *Enter*. Then, you'll be asked if the token should also be saved as a git credential. Press *Enter* again (default to yes) if you plan to use `git` locally. Finally, it will call the Hub to check that your token is valid and save it locally. ``` _| _| _| _| _|_|_| _|_|_| _|_|_| _| _| _|_|_| _|_|_|_| _|_| _|_|_| _|_|_|_| _| _| _| _| _| _| _| _|_| _| _| _| _| _| _| _| _|_|_|_| _| _| _| _|_| _| _|_| _| _| _| _| _| _|_| _|_|_| _|_|_|_| _| _|_|_| _| _| _| _| _| _| _| _| _| _| _|_| _| _| _| _| _| _| _| _| _| _|_| _|_|_| _|_|_| _|_|_| _| _| _|_|_| _| _| _| _|_|_| _|_|_|_| To log in, `huggingface_hub` requires a token generated from https://huggingface.co/settings/tokens . Enter your token (input will not be visible): Add token as git credential? (Y/n) Token is valid (permission: write). Your token has been saved in your configured git credential helpers (store). Your token has been saved to /home/wauplin/.cache/huggingface/token Login successful ``` Alternatively, if you want to log-in without being prompted, you can pass the token directly from the command line. To be more secure, we recommend passing your token as an environment variable to avoid pasting it in your command history. ```bash # Or using an environment variable >>> huggingface-cli login --token $HF_TOKEN --add-to-git-credential Token is valid (permission: write). The token `token_name` has been saved to /home/wauplin/.cache/huggingface/stored_tokens Your token has been saved in your configured git credential helpers (store). Your token has been saved to /home/wauplin/.cache/huggingface/token Login successful The current active token is: `token_name` ``` For more details about authentication, check out [this section](../quick-start#authentication). ## huggingface-cli whoami If you want to know if you are logged in, you can use `huggingface-cli whoami`. This command doesn't have any options and simply prints your username and the organizations you are a part of on the Hub: ```bash huggingface-cli whoami Wauplin orgs: huggingface,eu-test,OAuthTesters,hf-accelerate,HFSmolCluster ``` If you are not logged in, an error message will be printed. ## huggingface-cli logout This command logs you out. In practice, it will delete all tokens stored on your machine. If you want to remove a specific token, you can specify the token name as an argument. This command will not log you out if you are logged in using the `HF_TOKEN` environment variable (see [reference](../package_reference/environment_variables#hftoken)). If that is the case, you must unset the environment variable in your machine configuration. ## huggingface-cli download Use the `huggingface-cli download` command to download files from the Hub directly. Internally, it uses the same `hf_hub_download()` and `snapshot_download()` helpers described in the [Download](./download) guide and prints the returned path to the terminal. In the examples below, we will walk through the most common use cases. For a full list of available options, you can run: ```bash huggingface-cli download --help ``` ### Download a single file To download a single file from a repo, simply provide the repo_id and filename as follow: ```bash >>> huggingface-cli download gpt2 config.json downloading https://huggingface.co/gpt2/resolve/main/config.json to /home/wauplin/.cache/huggingface/hub/tmpwrq8dm5o (…)ingface.co/gpt2/resolve/main/config.json: 100%|██████████████████████████████████| 665/665 [00:00<00:00, 2.49MB/s] /home/wauplin/.cache/huggingface/hub/models--gpt2/snapshots/11c5a3d5811f50298f278a704980280950aedb10/config.json ``` The command will always print on the last line the path to the file on your local machine. ### Download an entire repository In some cases, you just want to download all the files from a repository. This can be done by just specifying the repo id: ```bash >>> huggingface-cli download HuggingFaceH4/zephyr-7b-beta Fetching 23 files: 0%| | 0/23 [00:00>> huggingface-cli download gpt2 config.json model.safetensors Fetching 2 files: 0%| | 0/2 [00:00>> huggingface-cli download stabilityai/stable-diffusion-xl-base-1.0 --include "*.safetensors" --exclude "*.fp16.*"* Fetching 8 files: 0%| | 0/8 [00:00>> huggingface-cli download HuggingFaceH4/ultrachat_200k --repo-type dataset # https://huggingface.co/spaces/HuggingFaceH4/zephyr-chat >>> huggingface-cli download HuggingFaceH4/zephyr-chat --repo-type space ... ``` ### Download a specific revision The examples above show how to download from the latest commit on the main branch. To download from a specific revision (commit hash, branch name or tag), use the `--revision` option: ```bash >>> huggingface-cli download bigcode/the-stack --repo-type dataset --revision v1.1 ... ``` ### Download to a local folder The recommended (and default) way to download files from the Hub is to use the cache-system. However, in some cases you want to download files and move them to a specific folder. This is useful to get a workflow closer to what git commands offer. You can do that using the `--local-dir` option. A `.cache/huggingface/` folder is created at the root of your local directory containing metadata about the downloaded files. This prevents re-downloading files if they're already up-to-date. If the metadata has changed, then the new file version is downloaded. This makes the `local-dir` optimized for pulling only the latest changes. For more details on how downloading to a local file works, check out the [download](./download.md#download-files-to-a-local-folder) guide. ```bash >>> huggingface-cli download adept/fuyu-8b model-00001-of-00002.safetensors --local-dir fuyu ... fuyu/model-00001-of-00002.safetensors ``` ### Specify cache directory If not using `--local-dir`, all files will be downloaded by default to the cache directory defined by the `HF_HOME` [environment variable](../package_reference/environment_variables#hfhome). You can specify a custom cache using `--cache-dir`: ```bash >>> huggingface-cli download adept/fuyu-8b --cache-dir ./path/to/cache ... ./path/to/cache/models--adept--fuyu-8b/snapshots/ddcacbcf5fdf9cc59ff01f6be6d6662624d9c745 ``` ### Specify a token To access private or gated repositories, you must use a token. By default, the token saved locally (using `huggingface-cli login`) will be used. If you want to authenticate explicitly, use the `--token` option: ```bash >>> huggingface-cli download gpt2 config.json --token=hf_**** /home/wauplin/.cache/huggingface/hub/models--gpt2/snapshots/11c5a3d5811f50298f278a704980280950aedb10/config.json ``` ### Quiet mode By default, the `huggingface-cli download` command will be verbose. It will print details such as warning messages, information about the downloaded files, and progress bars. If you want to silence all of this, use the `--quiet` option. Only the last line (i.e. the path to the downloaded files) is printed. This can prove useful if you want to pass the output to another command in a script. ```bash >>> huggingface-cli download gpt2 --quiet /home/wauplin/.cache/huggingface/hub/models--gpt2/snapshots/11c5a3d5811f50298f278a704980280950aedb10 ``` ### Download timeout On machines with slow connections, you might encounter timeout issues like this one: ```bash `requests.exceptions.ReadTimeout: (ReadTimeoutError("HTTPSConnectionPool(host='cdn-lfs-us-1.huggingface.co', port=443): Read timed out. (read timeout=10)"), '(Request ID: a33d910c-84c6-4514-8362-c705e2039d38)')` ``` To mitigate this issue, you can set the `HF_HUB_DOWNLOAD_TIMEOUT` environment variable to a higher value (default is 10): ```bash export HF_HUB_DOWNLOAD_TIMEOUT=30 ``` For more details, check out the [environment variables reference](../package_reference/environment_variables#hfhubdownloadtimeout).And rerun your download command. ## huggingface-cli upload Use the `huggingface-cli upload` command to upload files to the Hub directly. Internally, it uses the same `upload_file()` and `upload_folder()` helpers described in the [Upload](./upload) guide. In the examples below, we will walk through the most common use cases. For a full list of available options, you can run: ```bash >>> huggingface-cli upload --help ``` ### Upload an entire folder The default usage for this command is: ```bash # Usage: huggingface-cli upload [repo_id] [local_path] [path_in_repo] ``` To upload the current directory at the root of the repo, use: ```bash >>> huggingface-cli upload my-cool-model . . https://huggingface.co/Wauplin/my-cool-model/tree/main/ ``` If the repo doesn't exist yet, it will be created automatically. You can also upload a specific folder: ```bash >>> huggingface-cli upload my-cool-model ./models . https://huggingface.co/Wauplin/my-cool-model/tree/main/ ``` Finally, you can upload a folder to a specific destination on the repo: ```bash >>> huggingface-cli upload my-cool-model ./path/to/curated/data /data/train https://huggingface.co/Wauplin/my-cool-model/tree/main/data/train ``` ### Upload a single file You can also upload a single file by setting `local_path` to point to a file on your machine. If that's the case, `path_in_repo` is optional and will default to the name of your local file: ```bash >>> huggingface-cli upload Wauplin/my-cool-model ./models/model.safetensors https://huggingface.co/Wauplin/my-cool-model/blob/main/model.safetensors ``` If you want to upload a single file to a specific directory, set `path_in_repo` accordingly: ```bash >>> huggingface-cli upload Wauplin/my-cool-model ./models/model.safetensors /vae/model.safetensors https://huggingface.co/Wauplin/my-cool-model/blob/main/vae/model.safetensors ``` ### Upload multiple files To upload multiple files from a folder at once without uploading the entire folder, use the `--include` and `--exclude` patterns. It can also be combined with the `--delete` option to delete files on the repo while uploading new ones. In the example below, we sync the local Space by deleting remote files and uploading all files except the ones in `/logs`: ```bash # Sync local Space with Hub (upload new files except from logs/, delete removed files) >>> huggingface-cli upload Wauplin/space-example --repo-type=space --exclude="/logs/*" --delete="*" --commit-message="Sync local Space with Hub" ... ``` ### Upload to a dataset or Space To upload to a dataset or a Space, use the `--repo-type` option: ```bash >>> huggingface-cli upload Wauplin/my-cool-dataset ./data /train --repo-type=dataset ... ``` ### Upload to an organization To upload content to a repo owned by an organization instead of a personal repo, you must explicitly specify it in the `repo_id`: ```bash >>> huggingface-cli upload MyCoolOrganization/my-cool-model . . https://huggingface.co/MyCoolOrganization/my-cool-model/tree/main/ ``` ### Upload to a specific revision By default, files are uploaded to the `main` branch. If you want to upload files to another branch or reference, use the `--revision` option: ```bash # Upload files to a PR >>> huggingface-cli upload bigcode/the-stack . . --repo-type dataset --revision refs/pr/104 ... ``` **Note:** if `revision` does not exist and `--create-pr` is not set, a branch will be created automatically from the `main` branch. ### Upload and create a PR If you don't have the permission to push to a repo, you must open a PR and let the authors know about the changes you want to make. This can be done by setting the `--create-pr` option: ```bash # Create a PR and upload the files to it >>> huggingface-cli upload bigcode/the-stack . . --repo-type dataset --revision refs/pr/104 https://huggingface.co/datasets/bigcode/the-stack/blob/refs%2Fpr%2F104/ ``` ### Upload at regular intervals In some cases, you might want to push regular updates to a repo. For example, this is useful if you're training a model and you want to upload the logs folder every 10 minutes. You can do this using the `--every` option: ```bash # Upload new logs every 10 minutes huggingface-cli upload training-model logs/ --every=10 ``` ### Specify a commit message Use the `--commit-message` and `--commit-description` to set a custom message and description for your commit instead of the default one ```bash >>> huggingface-cli upload Wauplin/my-cool-model ./models . --commit-message="Epoch 34/50" --commit-description="Val accuracy: 68%. Check tensorboard for more details." ... https://huggingface.co/Wauplin/my-cool-model/tree/main ``` ### Specify a token To upload files, you must use a token. By default, the token saved locally (using `huggingface-cli login`) will be used. If you want to authenticate explicitly, use the `--token` option: ```bash >>> huggingface-cli upload Wauplin/my-cool-model ./models . --token=hf_**** ... https://huggingface.co/Wauplin/my-cool-model/tree/main ``` ### Quiet mode By default, the `huggingface-cli upload` command will be verbose. It will print details such as warning messages, information about the uploaded files, and progress bars. If you want to silence all of this, use the `--quiet` option. Only the last line (i.e. the URL to the uploaded files) is printed. This can prove useful if you want to pass the output to another command in a script. ```bash >>> huggingface-cli upload Wauplin/my-cool-model ./models . --quiet https://huggingface.co/Wauplin/my-cool-model/tree/main ``` ## huggingface-cli repo-files If you want to delete files from a Hugging Face repository, use the `huggingface-cli repo-files` command. ### Delete files The `huggingface-cli repo-files delete` sub-command allows you to delete files from a repository. Here are some usage examples. Delete a folder : ```bash >>> huggingface-cli repo-files Wauplin/my-cool-model delete folder/ Files correctly deleted from repo. Commit: https://huggingface.co/Wauplin/my-cool-mo... ``` Delete multiple files: ```bash >>> huggingface-cli repo-files Wauplin/my-cool-model delete file.txt folder/pytorch_model.bin Files correctly deleted from repo. Commit: https://huggingface.co/Wauplin/my-cool-mo... ``` Use Unix-style wildcards to delete sets of files: ```bash >>> huggingface-cli repo-files Wauplin/my-cool-model delete "*.txt" "folder/*.bin" Files correctly deleted from repo. Commit: https://huggingface.co/Wauplin/my-cool-mo... ``` ### Specify a token To delete files from a repo you must be authenticated and authorized. By default, the token saved locally (using `huggingface-cli login`) will be used. If you want to authenticate explicitly, use the `--token` option: ```bash >>> huggingface-cli repo-files --token=hf_**** Wauplin/my-cool-model delete file.txt ``` ## huggingface-cli scan-cache Scanning your cache directory is useful if you want to know which repos you have downloaded and how much space it takes on your disk. You can do that by running `huggingface-cli scan-cache`: ```bash >>> huggingface-cli scan-cache REPO ID REPO TYPE SIZE ON DISK NB FILES LAST_ACCESSED LAST_MODIFIED REFS LOCAL PATH --------------------------- --------- ------------ -------- ------------- ------------- ------------------- ------------------------------------------------------------------------- glue dataset 116.3K 15 4 days ago 4 days ago 2.4.0, main, 1.17.0 /home/wauplin/.cache/huggingface/hub/datasets--glue google/fleurs dataset 64.9M 6 1 week ago 1 week ago refs/pr/1, main /home/wauplin/.cache/huggingface/hub/datasets--google--fleurs Jean-Baptiste/camembert-ner model 441.0M 7 2 weeks ago 16 hours ago main /home/wauplin/.cache/huggingface/hub/models--Jean-Baptiste--camembert-ner bert-base-cased model 1.9G 13 1 week ago 2 years ago /home/wauplin/.cache/huggingface/hub/models--bert-base-cased t5-base model 10.1K 3 3 months ago 3 months ago main /home/wauplin/.cache/huggingface/hub/models--t5-base t5-small model 970.7M 11 3 days ago 3 days ago refs/pr/1, main /home/wauplin/.cache/huggingface/hub/models--t5-small Done in 0.0s. Scanned 6 repo(s) for a total of 3.4G. Got 1 warning(s) while scanning. Use -vvv to print details. ``` For more details about how to scan your cache directory, please refer to the [Manage your cache](./manage-cache#scan-cache-from-the-terminal) guide. ## huggingface-cli delete-cache `huggingface-cli delete-cache` is a tool that helps you delete parts of your cache that you don't use anymore. This is useful for saving and freeing disk space. To learn more about using this command, please refer to the [Manage your cache](./manage-cache#clean-cache-from-the-terminal) guide. ## huggingface-cli tag The `huggingface-cli tag` command allows you to tag, untag, and list tags for repositories. ### Tag a model To tag a repo, you need to provide the `repo_id` and the `tag` name: ```bash >>> huggingface-cli tag Wauplin/my-cool-model v1.0 You are about to create tag v1.0 on model Wauplin/my-cool-model Tag v1.0 created on Wauplin/my-cool-model ``` ### Tag a model at a specific revision If you want to tag a specific revision, you can use the `--revision` option. By default, the tag will be created on the `main` branch: ```bash >>> huggingface-cli tag Wauplin/my-cool-model v1.0 --revision refs/pr/104 You are about to create tag v1.0 on model Wauplin/my-cool-model Tag v1.0 created on Wauplin/my-cool-model ``` ### Tag a dataset or a Space If you want to tag a dataset or Space, you must specify the `--repo-type` option: ```bash >>> huggingface-cli tag bigcode/the-stack v1.0 --repo-type dataset You are about to create tag v1.0 on dataset bigcode/the-stack Tag v1.0 created on bigcode/the-stack ``` ### List tags To list all tags for a repository, use the `-l` or `--list` option: ```bash >>> huggingface-cli tag Wauplin/gradio-space-ci -l --repo-type space Tags for space Wauplin/gradio-space-ci: 0.2.2 0.2.1 0.2.0 0.1.2 0.0.2 0.0.1 ``` ### Delete a tag To delete a tag, use the `-d` or `--delete` option: ```bash >>> huggingface-cli tag -d Wauplin/my-cool-model v1.0 You are about to delete tag v1.0 on model Wauplin/my-cool-model Proceed? [Y/n] y Tag v1.0 deleted on Wauplin/my-cool-model ``` You can also pass `-y` to skip the confirmation step. ## huggingface-cli env The `huggingface-cli env` command prints details about your machine setup. This is useful when you open an issue on [GitHub](https://github.com/huggingface/huggingface_hub) to help the maintainers investigate your problem. ```bash >>> huggingface-cli env Copy-and-paste the text below in your GitHub issue. - huggingface_hub version: 0.19.0.dev0 - Platform: Linux-6.2.0-36-generic-x86_64-with-glibc2.35 - Python version: 3.10.12 - Running in iPython ?: No - Running in notebook ?: No - Running in Google Colab ?: No - Token path ?: /home/wauplin/.cache/huggingface/token - Has saved token ?: True - Who am I ?: Wauplin - Configured git credential helpers: store - FastAI: N/A - Tensorflow: 2.11.0 - Torch: 1.12.1 - Jinja2: 3.1.2 - Graphviz: 0.20.1 - Pydot: 1.4.2 - Pillow: 9.2.0 - hf_transfer: 0.1.3 - gradio: 4.0.2 - tensorboard: 2.6 - numpy: 1.23.2 - pydantic: 2.4.2 - aiohttp: 3.8.4 - ENDPOINT: https://huggingface.co - HF_HUB_CACHE: /home/wauplin/.cache/huggingface/hub - HF_ASSETS_CACHE: /home/wauplin/.cache/huggingface/assets - HF_TOKEN_PATH: /home/wauplin/.cache/huggingface/token - HF_HUB_OFFLINE: False - HF_HUB_DISABLE_TELEMETRY: False - HF_HUB_DISABLE_PROGRESS_BARS: None - HF_HUB_DISABLE_SYMLINKS_WARNING: False - HF_HUB_DISABLE_EXPERIMENTAL_WARNING: False - HF_HUB_DISABLE_IMPLICIT_TOKEN: False - HF_HUB_ENABLE_HF_TRANSFER: False - HF_HUB_ETAG_TIMEOUT: 10 - HF_HUB_DOWNLOAD_TIMEOUT: 10 ``` # Manage `huggingface_hub` cache-system ## Understand caching The Hugging Face Hub cache-system is designed to be the central cache shared across libraries that depend on the Hub. It has been updated in v0.8.0 to prevent re-downloading same files between revisions. The caching system is designed as follows: ``` ├─ ├─ ├─ ``` The `` is usually your user's home directory. However, it is customizable with the `cache_dir` argument on all methods, or by specifying either `HF_HOME` or `HF_HUB_CACHE` environment variable. Models, datasets and spaces share a common root. Each of these repositories contains the repository type, the namespace (organization or username) if it exists and the repository name: ``` ├─ models--julien-c--EsperBERTo-small ├─ models--lysandrejik--arxiv-nlp ├─ models--bert-base-cased ├─ datasets--glue ├─ datasets--huggingface--DataMeasurementsFiles ├─ spaces--dalle-mini--dalle-mini ``` It is within these folders that all files will now be downloaded from the Hub. Caching ensures that a file isn't downloaded twice if it already exists and wasn't updated; but if it was updated, and you're asking for the latest file, then it will download the latest file (while keeping the previous file intact in case you need it again). In order to achieve this, all folders contain the same skeleton: ``` ├─ datasets--glue │ ├─ refs │ ├─ blobs │ ├─ snapshots ... ``` Each folder is designed to contain the following: ### Refs The `refs` folder contains files which indicates the latest revision of the given reference. For example, if we have previously fetched a file from the `main` branch of a repository, the `refs` folder will contain a file named `main`, which will itself contain the commit identifier of the current head. If the latest commit of `main` has `aaaaaa` as identifier, then it will contain `aaaaaa`. If that same branch gets updated with a new commit, that has `bbbbbb` as an identifier, then re-downloading a file from that reference will update the `refs/main` file to contain `bbbbbb`. ### Blobs The `blobs` folder contains the actual files that we have downloaded. The name of each file is their hash. ### Snapshots The `snapshots` folder contains symlinks to the blobs mentioned above. It is itself made up of several folders: one per known revision! In the explanation above, we had initially fetched a file from the `aaaaaa` revision, before fetching a file from the `bbbbbb` revision. In this situation, we would now have two folders in the `snapshots` folder: `aaaaaa` and `bbbbbb`. In each of these folders, live symlinks that have the names of the files that we have downloaded. For example, if we had downloaded the `README.md` file at revision `aaaaaa`, we would have the following path: ``` //snapshots/aaaaaa/README.md ``` That `README.md` file is actually a symlink linking to the blob that has the hash of the file. By creating the skeleton this way we open the mechanism to file sharing: if the same file was fetched in revision `bbbbbb`, it would have the same hash and the file would not need to be re-downloaded. ### .no_exist (advanced) In addition to the `blobs`, `refs` and `snapshots` folders, you might also find a `.no_exist` folder in your cache. This folder keeps track of files that you've tried to download once but don't exist on the Hub. Its structure is the same as the `snapshots` folder with 1 subfolder per known revision: ``` //.no_exist/aaaaaa/config_that_does_not_exist.json ``` Unlike the `snapshots` folder, files are simple empty files (no symlinks). In this example, the file `"config_that_does_not_exist.json"` does not exist on the Hub for the revision `"aaaaaa"`. As it only stores empty files, this folder is neglectable in term of disk usage. So now you might wonder, why is this information even relevant? In some cases, a framework tries to load optional files for a model. Saving the non-existence of optional files makes it faster to load a model as it saves 1 HTTP call per possible optional file. This is for example the case in `transformers` where each tokenizer can support additional files. The first time you load the tokenizer on your machine, it will cache which optional files exist (and which doesn't) to make the loading time faster for the next initializations. To test if a file is cached locally (without making any HTTP request), you can use the `try_to_load_from_cache()` helper. It will either return the filepath (if exists and cached), the object `_CACHED_NO_EXIST` (if non-existence is cached) or `None` (if we don't know). ```python from huggingface_hub import try_to_load_from_cache, _CACHED_NO_EXIST filepath = try_to_load_from_cache() if isinstance(filepath, str): # file exists and is cached ... elif filepath is _CACHED_NO_EXIST: # non-existence of file is cached ... else: # file is not cached ... ``` ### In practice In practice, your cache should look like the following tree: ```text [ 96] . └── [ 160] models--julien-c--EsperBERTo-small ├── [ 160] blobs │ ├── [321M] 403450e234d65943a7dcf7e05a771ce3c92faa84dd07db4ac20f592037a1e4bd │ ├── [ 398] 7cb18dc9bafbfcf74629a4b760af1b160957a83e │ └── [1.4K] d7edf6bd2a681fb0175f7735299831ee1b22b812 ├── [ 96] refs │ └── [ 40] main └── [ 128] snapshots ├── [ 128] 2439f60ef33a0d46d85da5001d52aeda5b00ce9f │ ├── [ 52] README.md -> ../../blobs/d7edf6bd2a681fb0175f7735299831ee1b22b812 │ └── [ 76] pytorch_model.bin -> ../../blobs/403450e234d65943a7dcf7e05a771ce3c92faa84dd07db4ac20f592037a1e4bd └── [ 128] bbc77c8132af1cc5cf678da3f1ddf2de43606d48 ├── [ 52] README.md -> ../../blobs/7cb18dc9bafbfcf74629a4b760af1b160957a83e └── [ 76] pytorch_model.bin -> ../../blobs/403450e234d65943a7dcf7e05a771ce3c92faa84dd07db4ac20f592037a1e4bd ``` ### Limitations In order to have an efficient cache-system, `huggingface-hub` uses symlinks. However, symlinks are not supported on all machines. This is a known limitation especially on Windows. When this is the case, `huggingface_hub` do not use the `blobs/` directory but directly stores the files in the `snapshots/` directory instead. This workaround allows users to download and cache files from the Hub exactly the same way. Tools to inspect and delete the cache (see below) are also supported. However, the cache-system is less efficient as a single file might be downloaded several times if multiple revisions of the same repo is downloaded. If you want to benefit from the symlink-based cache-system on a Windows machine, you either need to [activate Developer Mode](https://docs.microsoft.com/en-us/windows/apps/get-started/enable-your-device-for-development) or to run Python as an administrator. When symlinks are not supported, a warning message is displayed to the user to alert them they are using a degraded version of the cache-system. This warning can be disabled by setting the `HF_HUB_DISABLE_SYMLINKS_WARNING` environment variable to true. ## Caching assets In addition to caching files from the Hub, downstream libraries often requires to cache other files related to HF but not handled directly by `huggingface_hub` (example: file downloaded from GitHub, preprocessed data, logs,...). In order to cache those files, called `assets`, one can use `cached_assets_path()`. This small helper generates paths in the HF cache in a unified way based on the name of the library requesting it and optionally on a namespace and a subfolder name. The goal is to let every downstream libraries manage its assets its own way (e.g. no rule on the structure) as long as it stays in the right assets folder. Those libraries can then leverage tools from `huggingface_hub` to manage the cache, in particular scanning and deleting parts of the assets from a CLI command. ```py from huggingface_hub import cached_assets_path assets_path = cached_assets_path(library_name="datasets", namespace="SQuAD", subfolder="download") something_path = assets_path / "something.json" # Do anything you like in your assets folder ! ``` `cached_assets_path()` is the recommended way to store assets but is not mandatory. If your library already uses its own cache, feel free to use it! ### Assets in practice In practice, your assets cache should look like the following tree: ```text assets/ └── datasets/ │ ├── SQuAD/ │ │ ├── downloaded/ │ │ ├── extracted/ │ │ └── processed/ │ ├── Helsinki-NLP--tatoeba_mt/ │ ├── downloaded/ │ ├── extracted/ │ └── processed/ └── transformers/ ├── default/ │ ├── something/ ├── bert-base-cased/ │ ├── default/ │ └── training/ hub/ └── models--julien-c--EsperBERTo-small/ ├── blobs/ │ ├── (...) │ ├── (...) ├── refs/ │ └── (...) └── [ 128] snapshots/ ├── 2439f60ef33a0d46d85da5001d52aeda5b00ce9f/ │ ├── (...) └── bbc77c8132af1cc5cf678da3f1ddf2de43606d48/ └── (...) ``` ## Scan your cache At the moment, cached files are never deleted from your local directory: when you download a new revision of a branch, previous files are kept in case you need them again. Therefore it can be useful to scan your cache directory in order to know which repos and revisions are taking the most disk space. `huggingface_hub` provides an helper to do so that can be used via `huggingface-cli` or in a python script. ### Scan cache from the terminal The easiest way to scan your HF cache-system is to use the `scan-cache` command from `huggingface-cli` tool. This command scans the cache and prints a report with information like repo id, repo type, disk usage, refs and full local path. The snippet below shows a scan report in a folder in which 4 models and 2 datasets are cached. ```text ➜ huggingface-cli scan-cache REPO ID REPO TYPE SIZE ON DISK NB FILES LAST_ACCESSED LAST_MODIFIED REFS LOCAL PATH --------------------------- --------- ------------ -------- ------------- ------------- ------------------- ------------------------------------------------------------------------- glue dataset 116.3K 15 4 days ago 4 days ago 2.4.0, main, 1.17.0 /home/wauplin/.cache/huggingface/hub/datasets--glue google/fleurs dataset 64.9M 6 1 week ago 1 week ago refs/pr/1, main /home/wauplin/.cache/huggingface/hub/datasets--google--fleurs Jean-Baptiste/camembert-ner model 441.0M 7 2 weeks ago 16 hours ago main /home/wauplin/.cache/huggingface/hub/models--Jean-Baptiste--camembert-ner bert-base-cased model 1.9G 13 1 week ago 2 years ago /home/wauplin/.cache/huggingface/hub/models--bert-base-cased t5-base model 10.1K 3 3 months ago 3 months ago main /home/wauplin/.cache/huggingface/hub/models--t5-base t5-small model 970.7M 11 3 days ago 3 days ago refs/pr/1, main /home/wauplin/.cache/huggingface/hub/models--t5-small Done in 0.0s. Scanned 6 repo(s) for a total of 3.4G. Got 1 warning(s) while scanning. Use -vvv to print details. ``` To get a more detailed report, use the `--verbose` option. For each repo, you get a list of all revisions that have been downloaded. As explained above, the files that don't change between 2 revisions are shared thanks to the symlinks. This means that the size of the repo on disk is expected to be less than the sum of the size of each of its revisions. For example, here `bert-base-cased` has 2 revisions of 1.4G and 1.5G but the total disk usage is only 1.9G. ```text ➜ huggingface-cli scan-cache -v REPO ID REPO TYPE REVISION SIZE ON DISK NB FILES LAST_MODIFIED REFS LOCAL PATH --------------------------- --------- ---------------------------------------- ------------ -------- ------------- ----------- ---------------------------------------------------------------------------------------------------------------------------- glue dataset 9338f7b671827df886678df2bdd7cc7b4f36dffd 97.7K 14 4 days ago main, 2.4.0 /home/wauplin/.cache/huggingface/hub/datasets--glue/snapshots/9338f7b671827df886678df2bdd7cc7b4f36dffd glue dataset f021ae41c879fcabcf823648ec685e3fead91fe7 97.8K 14 1 week ago 1.17.0 /home/wauplin/.cache/huggingface/hub/datasets--glue/snapshots/f021ae41c879fcabcf823648ec685e3fead91fe7 google/fleurs dataset 129b6e96cf1967cd5d2b9b6aec75ce6cce7c89e8 25.4K 3 2 weeks ago refs/pr/1 /home/wauplin/.cache/huggingface/hub/datasets--google--fleurs/snapshots/129b6e96cf1967cd5d2b9b6aec75ce6cce7c89e8 google/fleurs dataset 24f85a01eb955224ca3946e70050869c56446805 64.9M 4 1 week ago main /home/wauplin/.cache/huggingface/hub/datasets--google--fleurs/snapshots/24f85a01eb955224ca3946e70050869c56446805 Jean-Baptiste/camembert-ner model dbec8489a1c44ecad9da8a9185115bccabd799fe 441.0M 7 16 hours ago main /home/wauplin/.cache/huggingface/hub/models--Jean-Baptiste--camembert-ner/snapshots/dbec8489a1c44ecad9da8a9185115bccabd799fe bert-base-cased model 378aa1bda6387fd00e824948ebe3488630ad8565 1.5G 9 2 years ago /home/wauplin/.cache/huggingface/hub/models--bert-base-cased/snapshots/378aa1bda6387fd00e824948ebe3488630ad8565 bert-base-cased model a8d257ba9925ef39f3036bfc338acf5283c512d9 1.4G 9 3 days ago main /home/wauplin/.cache/huggingface/hub/models--bert-base-cased/snapshots/a8d257ba9925ef39f3036bfc338acf5283c512d9 t5-base model 23aa4f41cb7c08d4b05c8f327b22bfa0eb8c7ad9 10.1K 3 1 week ago main /home/wauplin/.cache/huggingface/hub/models--t5-base/snapshots/23aa4f41cb7c08d4b05c8f327b22bfa0eb8c7ad9 t5-small model 98ffebbb27340ec1b1abd7c45da12c253ee1882a 726.2M 6 1 week ago refs/pr/1 /home/wauplin/.cache/huggingface/hub/models--t5-small/snapshots/98ffebbb27340ec1b1abd7c45da12c253ee1882a t5-small model d0a119eedb3718e34c648e594394474cf95e0617 485.8M 6 4 weeks ago /home/wauplin/.cache/huggingface/hub/models--t5-small/snapshots/d0a119eedb3718e34c648e594394474cf95e0617 t5-small model d78aea13fa7ecd06c29e3e46195d6341255065d5 970.7M 9 1 week ago main /home/wauplin/.cache/huggingface/hub/models--t5-small/snapshots/d78aea13fa7ecd06c29e3e46195d6341255065d5 Done in 0.0s. Scanned 6 repo(s) for a total of 3.4G. Got 1 warning(s) while scanning. Use -vvv to print details. ``` #### Grep example Since the output is in tabular format, you can combine it with any `grep`-like tools to filter the entries. Here is an example to filter only revisions from the "t5-small" model on a Unix-based machine. ```text ➜ eval "huggingface-cli scan-cache -v" | grep "t5-small" t5-small model 98ffebbb27340ec1b1abd7c45da12c253ee1882a 726.2M 6 1 week ago refs/pr/1 /home/wauplin/.cache/huggingface/hub/models--t5-small/snapshots/98ffebbb27340ec1b1abd7c45da12c253ee1882a t5-small model d0a119eedb3718e34c648e594394474cf95e0617 485.8M 6 4 weeks ago /home/wauplin/.cache/huggingface/hub/models--t5-small/snapshots/d0a119eedb3718e34c648e594394474cf95e0617 t5-small model d78aea13fa7ecd06c29e3e46195d6341255065d5 970.7M 9 1 week ago main /home/wauplin/.cache/huggingface/hub/models--t5-small/snapshots/d78aea13fa7ecd06c29e3e46195d6341255065d5 ``` ### Scan cache from Python For a more advanced usage, use `scan_cache_dir()` which is the python utility called by the CLI tool. You can use it to get a detailed report structured around 4 dataclasses: - `HFCacheInfo`: complete report returned by `scan_cache_dir()` - `CachedRepoInfo`: information about a cached repo - `CachedRevisionInfo`: information about a cached revision (e.g. "snapshot") inside a repo - `CachedFileInfo`: information about a cached file in a snapshot Here is a simple usage example. See reference for details. ```py >>> from huggingface_hub import scan_cache_dir >>> hf_cache_info = scan_cache_dir() HFCacheInfo( size_on_disk=3398085269, repos=frozenset({ CachedRepoInfo( repo_id='t5-small', repo_type='model', repo_path=PosixPath(...), size_on_disk=970726914, nb_files=11, last_accessed=1662971707.3567169, last_modified=1662971107.3567169, revisions=frozenset({ CachedRevisionInfo( commit_hash='d78aea13fa7ecd06c29e3e46195d6341255065d5', size_on_disk=970726339, snapshot_path=PosixPath(...), # No `last_accessed` as blobs are shared among revisions last_modified=1662971107.3567169, files=frozenset({ CachedFileInfo( file_name='config.json', size_on_disk=1197 file_path=PosixPath(...), blob_path=PosixPath(...), blob_last_accessed=1662971707.3567169, blob_last_modified=1662971107.3567169, ), CachedFileInfo(...), ... }), ), CachedRevisionInfo(...), ... }), ), CachedRepoInfo(...), ... }), warnings=[ CorruptedCacheException("Snapshots dir doesn't exist in cached repo: ..."), CorruptedCacheException(...), ... ], ) ``` ## Clean your cache Scanning your cache is interesting but what you really want to do next is usually to delete some portions to free up some space on your drive. This is possible using the `delete-cache` CLI command. One can also programmatically use the `delete_revisions()` helper from `HFCacheInfo` object returned when scanning the cache. ### Delete strategy To delete some cache, you need to pass a list of revisions to delete. The tool will define a strategy to free up the space based on this list. It returns a `DeleteCacheStrategy` object that describes which files and folders will be deleted. The `DeleteCacheStrategy` allows give you how much space is expected to be freed. Once you agree with the deletion, you must execute it to make the deletion effective. In order to avoid discrepancies, you cannot edit a strategy object manually. The strategy to delete revisions is the following: - the `snapshot` folder containing the revision symlinks is deleted. - blobs files that are targeted only by revisions to be deleted are deleted as well. - if a revision is linked to 1 or more `refs`, references are deleted. - if all revisions from a repo are deleted, the entire cached repository is deleted. Revision hashes are unique across all repositories. This means you don't need to provide any `repo_id` or `repo_type` when removing revisions. If a revision is not found in the cache, it will be silently ignored. Besides, if a file or folder cannot be found while trying to delete it, a warning will be logged but no error is thrown. The deletion continues for other paths contained in the `DeleteCacheStrategy` object. ### Clean cache from the terminal The easiest way to delete some revisions from your HF cache-system is to use the `delete-cache` command from `huggingface-cli` tool. The command has two modes. By default, a TUI (Terminal User Interface) is displayed to the user to select which revisions to delete. This TUI is currently in beta as it has not been tested on all platforms. If the TUI doesn't work on your machine, you can disable it using the `--disable-tui` flag. #### Using the TUI This is the default mode. To use it, you first need to install extra dependencies by running the following command: ``` pip install huggingface_hub["cli"] ``` Then run the command: ``` huggingface-cli delete-cache ``` You should now see a list of revisions that you can select/deselect:
Instructions: - Press keyboard arrow keys `` and `` to move the cursor. - Press `` to toggle (select/unselect) an item. - When a revision is selected, the first line is updated to show you how much space will be freed. - Press `` to confirm your selection. - If you want to cancel the operation and quit, you can select the first item ("None of the following"). If this item is selected, the delete process will be cancelled, no matter what other items are selected. Otherwise you can also press `` to quit the TUI. Once you've selected the revisions you want to delete and pressed ``, a last confirmation message will be prompted. Press `` again and the deletion will be effective. If you want to cancel, enter `n`. ```txt ✗ huggingface-cli delete-cache --dir ~/.cache/huggingface/hub ? Select revisions to delete: 2 revision(s) selected. ? 2 revisions selected counting for 3.1G. Confirm deletion ? Yes Start deletion. Done. Deleted 1 repo(s) and 0 revision(s) for a total of 3.1G. ``` #### Without TUI As mentioned above, the TUI mode is currently in beta and is optional. It may be the case that it doesn't work on your machine or that you don't find it convenient. Another approach is to use the `--disable-tui` flag. The process is very similar as you will be asked to manually review the list of revisions to delete. However, this manual step will not take place in the terminal directly but in a temporary file generated on the fly and that you can manually edit. This file has all the instructions you need in the header. Open it in your favorite text editor. To select/deselect a revision, simply comment/uncomment it with a `#`. Once the manual review is done and the file is edited, you can save it. Go back to your terminal and press ``. By default it will compute how much space would be freed with the updated list of revisions. You can continue to edit the file or confirm with `"y"`. ```sh huggingface-cli delete-cache --disable-tui ``` Example of command file: ```txt # INSTRUCTIONS # ------------ # This is a temporary file created by running `huggingface-cli delete-cache` with the # `--disable-tui` option. It contains a set of revisions that can be deleted from your # local cache directory. # # Please manually review the revisions you want to delete: # - Revision hashes can be commented out with '#'. # - Only non-commented revisions in this file will be deleted. # - Revision hashes that are removed from this file are ignored as well. # - If `CANCEL_DELETION` line is uncommented, the all cache deletion is cancelled and # no changes will be applied. # # Once you've manually reviewed this file, please confirm deletion in the terminal. This # file will be automatically removed once done. # ------------ # KILL SWITCH # ------------ # Un-comment following line to completely cancel the deletion process # CANCEL_DELETION # ------------ # REVISIONS # ------------ # Dataset chrisjay/crowd-speech-africa (761.7M, used 5 days ago) ebedcd8c55c90d39fd27126d29d8484566cd27ca # Refs: main # modified 5 days ago # Dataset oscar (3.3M, used 4 days ago) # 916f956518279c5e60c63902ebdf3ddf9fa9d629 # Refs: main # modified 4 days ago # Dataset wikiann (804.1K, used 2 weeks ago) 89d089624b6323d69dcd9e5eb2def0551887a73a # Refs: main # modified 2 weeks ago # Dataset z-uo/male-LJSpeech-italian (5.5G, used 5 days ago) # 9cfa5647b32c0a30d0adfca06bf198d82192a0d1 # Refs: main # modified 5 days ago ``` ### Clean cache from Python For more flexibility, you can also use the `delete_revisions()` method programmatically. Here is a simple example. See reference for details. ```py >>> from huggingface_hub import scan_cache_dir >>> delete_strategy = scan_cache_dir().delete_revisions( ... "81fd1d6e7847c99f5862c9fb81387956d99ec7aa" ... "e2983b237dccf3ab4937c97fa717319a9ca1a96d", ... "6c0e6080953db56375760c0471a8c5f2929baf11", ... ) >>> print("Will free " + delete_strategy.expected_freed_size_str) Will free 8.6G >>> delete_strategy.execute() Cache deletion done. Saved 8.6G. ``` # Inference Endpoints Inference Endpoints provides a secure production solution to easily deploy any `transformers`, `sentence-transformers`, and `diffusers` models on a dedicated and autoscaling infrastructure managed by Hugging Face. An Inference Endpoint is built from a model from the [Hub](https://huggingface.co/models). In this guide, we will learn how to programmatically manage Inference Endpoints with `huggingface_hub`. For more information about the Inference Endpoints product itself, check out its [official documentation](https://huggingface.co/docs/inference-endpoints/index). This guide assumes `huggingface_hub` is correctly installed and that your machine is logged in. Check out the [Quick Start guide](https://huggingface.co/docs/huggingface_hub/quick-start#quickstart) if that's not the case yet. The minimal version supporting Inference Endpoints API is `v0.19.0`. ## Create an Inference Endpoint The first step is to create an Inference Endpoint using `create_inference_endpoint()`: ```py >>> from huggingface_hub import create_inference_endpoint >>> endpoint = create_inference_endpoint( ... "my-endpoint-name", ... repository="gpt2", ... framework="pytorch", ... task="text-generation", ... accelerator="cpu", ... vendor="aws", ... region="us-east-1", ... type="protected", ... instance_size="x2", ... instance_type="intel-icl" ... ) ``` In this example, we created a `protected` Inference Endpoint named `"my-endpoint-name"`, to serve [gpt2](https://huggingface.co/gpt2) for `text-generation`. A `protected` Inference Endpoint means your token is required to access the API. We also need to provide additional information to configure the hardware requirements, such as vendor, region, accelerator, instance type, and size. You can check out the list of available resources [here](https://api.endpoints.huggingface.cloud/#/v2%3A%3Aprovider/list_vendors). Alternatively, you can create an Inference Endpoint manually using the [Web interface](https://ui.endpoints.huggingface.co/new) for convenience. Refer to this [guide](https://huggingface.co/docs/inference-endpoints/guides/advanced) for details on advanced settings and their usage. The value returned by `create_inference_endpoint()` is an `InferenceEndpoint` object: ```py >>> endpoint InferenceEndpoint(name='my-endpoint-name', namespace='Wauplin', repository='gpt2', status='pending', url=None) ``` It's a dataclass that holds information about the endpoint. You can access important attributes such as `name`, `repository`, `status`, `task`, `created_at`, `updated_at`, etc. If you need it, you can also access the raw response from the server with `endpoint.raw`. Once your Inference Endpoint is created, you can find it on your [personal dashboard](https://ui.endpoints.huggingface.co/). ![](https://huggingface.co/datasets/huggingface/documentation-images/resolve/main/huggingface_hub/inference_endpoints_created.png) #### Using a custom image By default the Inference Endpoint is built from a docker image provided by Hugging Face. However, it is possible to specify any docker image using the `custom_image` parameter. A common use case is to run LLMs using the [text-generation-inference](https://github.com/huggingface/text-generation-inference) framework. This can be done like this: ```python # Start an Inference Endpoint running Zephyr-7b-beta on TGI >>> from huggingface_hub import create_inference_endpoint >>> endpoint = create_inference_endpoint( ... "aws-zephyr-7b-beta-0486", ... repository="HuggingFaceH4/zephyr-7b-beta", ... framework="pytorch", ... task="text-generation", ... accelerator="gpu", ... vendor="aws", ... region="us-east-1", ... type="protected", ... instance_size="x1", ... instance_type="nvidia-a10g", ... custom_image={ ... "health_route": "/health", ... "env": { ... "MAX_BATCH_PREFILL_TOKENS": "2048", ... "MAX_INPUT_LENGTH": "1024", ... "MAX_TOTAL_TOKENS": "1512", ... "MODEL_ID": "/repository" ... }, ... "url": "ghcr.io/huggingface/text-generation-inference:1.1.0", ... }, ... ) ``` The value to pass as `custom_image` is a dictionary containing a url to the docker container and configuration to run it. For more details about it, checkout the [Swagger documentation](https://api.endpoints.huggingface.cloud/#/v2%3A%3Aendpoint/create_endpoint). ### Get or list existing Inference Endpoints In some cases, you might need to manage Inference Endpoints you created previously. If you know the name, you can fetch it using `get_inference_endpoint()`, which returns an `InferenceEndpoint` object. Alternatively, you can use `list_inference_endpoints()` to retrieve a list of all Inference Endpoints. Both methods accept an optional `namespace` parameter. You can set the `namespace` to any organization you are a part of. Otherwise, it defaults to your username. ```py >>> from huggingface_hub import get_inference_endpoint, list_inference_endpoints # Get one >>> get_inference_endpoint("my-endpoint-name") InferenceEndpoint(name='my-endpoint-name', namespace='Wauplin', repository='gpt2', status='pending', url=None) # List all endpoints from an organization >>> list_inference_endpoints(namespace="huggingface") [InferenceEndpoint(name='aws-starchat-beta', namespace='huggingface', repository='HuggingFaceH4/starchat-beta', status='paused', url=None), ...] # List all endpoints from all organizations the user belongs to >>> list_inference_endpoints(namespace="*") [InferenceEndpoint(name='aws-starchat-beta', namespace='huggingface', repository='HuggingFaceH4/starchat-beta', status='paused', url=None), ...] ``` ## Check deployment status In the rest of this guide, we will assume that we have a `InferenceEndpoint` object called `endpoint`. You might have noticed that the endpoint has a `status` attribute of type `InferenceEndpointStatus`. When the Inference Endpoint is deployed and accessible, the status should be `"running"` and the `url` attribute is set: ```py >>> endpoint InferenceEndpoint(name='my-endpoint-name', namespace='Wauplin', repository='gpt2', status='running', url='https://jpj7k2q4j805b727.us-east-1.aws.endpoints.huggingface.cloud') ``` Before reaching a `"running"` state, the Inference Endpoint typically goes through an `"initializing"` or `"pending"` phase. You can fetch the new state of the endpoint by running `fetch()`. Like every other method from `InferenceEndpoint` that makes a request to the server, the internal attributes of `endpoint` are mutated in place: ```py >>> endpoint.fetch() InferenceEndpoint(name='my-endpoint-name', namespace='Wauplin', repository='gpt2', status='pending', url=None) ``` Instead of fetching the Inference Endpoint status while waiting for it to run, you can directly call `wait()`. This helper takes as input a `timeout` and a `fetch_every` parameter (in seconds) and will block the thread until the Inference Endpoint is deployed. Default values are respectively `None` (no timeout) and `5` seconds. ```py # Pending endpoint >>> endpoint InferenceEndpoint(name='my-endpoint-name', namespace='Wauplin', repository='gpt2', status='pending', url=None) # Wait 10s => raises a InferenceEndpointTimeoutError >>> endpoint.wait(timeout=10) raise InferenceEndpointTimeoutError("Timeout while waiting for Inference Endpoint to be deployed.") huggingface_hub._inference_endpoints.InferenceEndpointTimeoutError: Timeout while waiting for Inference Endpoint to be deployed. # Wait more >>> endpoint.wait() InferenceEndpoint(name='my-endpoint-name', namespace='Wauplin', repository='gpt2', status='running', url='https://jpj7k2q4j805b727.us-east-1.aws.endpoints.huggingface.cloud') ``` If `timeout` is set and the Inference Endpoint takes too much time to load, a `InferenceEndpointTimeoutError` timeout error is raised. ## Run inference Once your Inference Endpoint is up and running, you can finally run inference on it! `InferenceEndpoint` has two properties `client` and `async_client` returning respectively an `InferenceClient` and an `AsyncInferenceClient` objects. ```py # Run text_generation task: >>> endpoint.client.text_generation("I am") ' not a fan of the idea of a "big-budget" movie. I think it\'s a' # Or in an asyncio context: >>> await endpoint.async_client.text_generation("I am") ``` If the Inference Endpoint is not running, an `InferenceEndpointError` exception is raised: ```py >>> endpoint.client huggingface_hub._inference_endpoints.InferenceEndpointError: Cannot create a client for this Inference Endpoint as it is not yet deployed. Please wait for the Inference Endpoint to be deployed using `endpoint.wait()` and try again. ``` For more details about how to use the `InferenceClient`, check out the [Inference guide](../guides/inference). ## Manage lifecycle Now that we saw how to create an Inference Endpoint and run inference on it, let's see how to manage its lifecycle. In this section, we will see methods like `pause()`, `resume()`, `scale_to_zero()`, `update()` and `delete()`. All of those methods are aliases added to `InferenceEndpoint` for convenience. If you prefer, you can also use the generic methods defined in `HfApi`: `pause_inference_endpoint()`, `resume_inference_endpoint()`, `scale_to_zero_inference_endpoint()`, `update_inference_endpoint()`, and `delete_inference_endpoint()`. ### Pause or scale to zero To reduce costs when your Inference Endpoint is not in use, you can choose to either pause it using `pause()` or scale it to zero using `scale_to_zero()`. An Inference Endpoint that is *paused* or *scaled to zero* doesn't cost anything. The difference between those two is that a *paused* endpoint needs to be explicitly *resumed* using `resume()`. On the contrary, a *scaled to zero* endpoint will automatically start if an inference call is made to it, with an additional cold start delay. An Inference Endpoint can also be configured to scale to zero automatically after a certain period of inactivity. ```py # Pause and resume endpoint >>> endpoint.pause() InferenceEndpoint(name='my-endpoint-name', namespace='Wauplin', repository='gpt2', status='paused', url=None) >>> endpoint.resume() InferenceEndpoint(name='my-endpoint-name', namespace='Wauplin', repository='gpt2', status='pending', url=None) >>> endpoint.wait().client.text_generation(...) ... # Scale to zero >>> endpoint.scale_to_zero() InferenceEndpoint(name='my-endpoint-name', namespace='Wauplin', repository='gpt2', status='scaledToZero', url='https://jpj7k2q4j805b727.us-east-1.aws.endpoints.huggingface.cloud') # Endpoint is not 'running' but still has a URL and will restart on first call. ``` ### Update model or hardware requirements In some cases, you might also want to update your Inference Endpoint without creating a new one. You can either update the hosted model or the hardware requirements to run the model. You can do this using `update()`: ```py # Change target model >>> endpoint.update(repository="gpt2-large") InferenceEndpoint(name='my-endpoint-name', namespace='Wauplin', repository='gpt2-large', status='pending', url=None) # Update number of replicas >>> endpoint.update(min_replica=2, max_replica=6) InferenceEndpoint(name='my-endpoint-name', namespace='Wauplin', repository='gpt2-large', status='pending', url=None) # Update to larger instance >>> endpoint.update(accelerator="cpu", instance_size="x4", instance_type="intel-icl") InferenceEndpoint(name='my-endpoint-name', namespace='Wauplin', repository='gpt2-large', status='pending', url=None) ``` ### Delete the endpoint Finally if you won't use the Inference Endpoint anymore, you can simply call `~InferenceEndpoint.delete()`. This is a non-revertible action that will completely remove the endpoint, including its configuration, logs and usage metrics. You cannot restore a deleted Inference Endpoint. ## An end-to-end example A typical use case of Inference Endpoints is to process a batch of jobs at once to limit the infrastructure costs. You can automate this process using what we saw in this guide: ```py >>> import asyncio >>> from huggingface_hub import create_inference_endpoint # Start endpoint + wait until initialized >>> endpoint = create_inference_endpoint(name="batch-endpoint",...).wait() # Run inference >>> client = endpoint.client >>> results = [client.text_generation(...) for job in jobs] # Or with asyncio >>> async_client = endpoint.async_client >>> results = asyncio.gather(*[async_client.text_generation(...) for job in jobs]) # Pause endpoint >>> endpoint.pause() ``` Or if your Inference Endpoint already exists and is paused: ```py >>> import asyncio >>> from huggingface_hub import get_inference_endpoint # Get endpoint + wait until initialized >>> endpoint = get_inference_endpoint("batch-endpoint").resume().wait() # Run inference >>> async_client = endpoint.async_client >>> results = asyncio.gather(*[async_client.text_generation(...) for job in jobs]) # Pause endpoint >>> endpoint.pause() ``` # How-to guides In this section, you will find practical guides to help you achieve a specific goal. Take a look at these guides to learn how to use huggingface_hub to solve real-world problems: # Download files from the Hub The `huggingface_hub` library provides functions to download files from the repositories stored on the Hub. You can use these functions independently or integrate them into your own library, making it more convenient for your users to interact with the Hub. This guide will show you how to: * Download and cache a single file. * Download and cache an entire repository. * Download files to a local folder. ## Download a single file The `hf_hub_download()` function is the main function for downloading files from the Hub. It downloads the remote file, caches it on disk (in a version-aware way), and returns its local file path. The returned filepath is a pointer to the HF local cache. Therefore, it is important to not modify the file to avoid having a corrupted cache. If you are interested in getting to know more about how files are cached, please refer to our [caching guide](./manage-cache). ### From latest version Select the file to download using the `repo_id`, `repo_type` and `filename` parameters. By default, the file will be considered as being part of a `model` repo. ```python >>> from huggingface_hub import hf_hub_download >>> hf_hub_download(repo_id="lysandre/arxiv-nlp", filename="config.json") '/root/.cache/huggingface/hub/models--lysandre--arxiv-nlp/snapshots/894a9adde21d9a3e3843e6d5aeaaf01875c7fade/config.json' # Download from a dataset >>> hf_hub_download(repo_id="google/fleurs", filename="fleurs.py", repo_type="dataset") '/root/.cache/huggingface/hub/datasets--google--fleurs/snapshots/199e4ae37915137c555b1765c01477c216287d34/fleurs.py' ``` ### From specific version By default, the latest version from the `main` branch is downloaded. However, in some cases you want to download a file at a particular version (e.g. from a specific branch, a PR, a tag or a commit hash). To do so, use the `revision` parameter: ```python # Download from the `v1.0` tag >>> hf_hub_download(repo_id="lysandre/arxiv-nlp", filename="config.json", revision="v1.0") # Download from the `test-branch` branch >>> hf_hub_download(repo_id="lysandre/arxiv-nlp", filename="config.json", revision="test-branch") # Download from Pull Request #3 >>> hf_hub_download(repo_id="lysandre/arxiv-nlp", filename="config.json", revision="refs/pr/3") # Download from a specific commit hash >>> hf_hub_download(repo_id="lysandre/arxiv-nlp", filename="config.json", revision="877b84a8f93f2d619faa2a6e514a32beef88ab0a") ``` **Note:** When using the commit hash, it must be the full-length hash instead of a 7-character commit hash. ### Construct a download URL In case you want to construct the URL used to download a file from a repo, you can use `hf_hub_url()` which returns a URL. Note that it is used internally by `hf_hub_download()`. ## Download an entire repository `snapshot_download()` downloads an entire repository at a given revision. It uses internally `hf_hub_download()` which means all downloaded files are also cached on your local disk. Downloads are made concurrently to speed-up the process. To download a whole repository, just pass the `repo_id` and `repo_type`: ```python >>> from huggingface_hub import snapshot_download >>> snapshot_download(repo_id="lysandre/arxiv-nlp") '/home/lysandre/.cache/huggingface/hub/models--lysandre--arxiv-nlp/snapshots/894a9adde21d9a3e3843e6d5aeaaf01875c7fade' # Or from a dataset >>> snapshot_download(repo_id="google/fleurs", repo_type="dataset") '/home/lysandre/.cache/huggingface/hub/datasets--google--fleurs/snapshots/199e4ae37915137c555b1765c01477c216287d34' ``` `snapshot_download()` downloads the latest revision by default. If you want a specific repository revision, use the `revision` parameter: ```python >>> from huggingface_hub import snapshot_download >>> snapshot_download(repo_id="lysandre/arxiv-nlp", revision="refs/pr/1") ``` ### Filter files to download `snapshot_download()` provides an easy way to download a repository. However, you don't always want to download the entire content of a repository. For example, you might want to prevent downloading all `.bin` files if you know you'll only use the `.safetensors` weights. You can do that using `allow_patterns` and `ignore_patterns` parameters. These parameters accept either a single pattern or a list of patterns. Patterns are Standard Wildcards (globbing patterns) as documented [here](https://tldp.org/LDP/GNU-Linux-Tools-Summary/html/x11655.htm). The pattern matching is based on [`fnmatch`](https://docs.python.org/3/library/fnmatch.html). For example, you can use `allow_patterns` to only download JSON configuration files: ```python >>> from huggingface_hub import snapshot_download >>> snapshot_download(repo_id="lysandre/arxiv-nlp", allow_patterns="*.json") ``` On the other hand, `ignore_patterns` can exclude certain files from being downloaded. The following example ignores the `.msgpack` and `.h5` file extensions: ```python >>> from huggingface_hub import snapshot_download >>> snapshot_download(repo_id="lysandre/arxiv-nlp", ignore_patterns=["*.msgpack", "*.h5"]) ``` Finally, you can combine both to precisely filter your download. Here is an example to download all json and markdown files except `vocab.json`. ```python >>> from huggingface_hub import snapshot_download >>> snapshot_download(repo_id="gpt2", allow_patterns=["*.md", "*.json"], ignore_patterns="vocab.json") ``` ## Download file(s) to a local folder By default, we recommend using the [cache system](./manage-cache) to download files from the Hub. You can specify a custom cache location using the `cache_dir` parameter in `hf_hub_download()` and `snapshot_download()`, or by setting the [`HF_HOME`](../package_reference/environment_variables#hf_home) environment variable. However, if you need to download files to a specific folder, you can pass a `local_dir` parameter to the download function. This is useful to get a workflow closer to what the `git` command offers. The downloaded files will maintain their original file structure within the specified folder. For example, if `filename="data/train.csv"` and `local_dir="path/to/folder"`, the resulting filepath will be `"path/to/folder/data/train.csv"`. A `.cache/huggingface/` folder is created at the root of your local directory containing metadata about the downloaded files. This prevents re-downloading files if they're already up-to-date. If the metadata has changed, then the new file version is downloaded. This makes the `local_dir` optimized for pulling only the latest changes. After completing the download, you can safely remove the `.cache/huggingface/` folder if you no longer need it. However, be aware that re-running your script without this folder may result in longer recovery times, as metadata will be lost. Rest assured that your local data will remain intact and unaffected. Don't worry about the `.cache/huggingface/` folder when committing changes to the Hub! This folder is automatically ignored by both `git` and `upload_folder()`. ## Download from the CLI You can use the `huggingface-cli download` command from the terminal to directly download files from the Hub. Internally, it uses the same `hf_hub_download()` and `snapshot_download()` helpers described above and prints the returned path to the terminal. ```bash >>> huggingface-cli download gpt2 config.json /home/wauplin/.cache/huggingface/hub/models--gpt2/snapshots/11c5a3d5811f50298f278a704980280950aedb10/config.json ``` You can download multiple files at once which displays a progress bar and returns the snapshot path in which the files are located: ```bash >>> huggingface-cli download gpt2 config.json model.safetensors Fetching 2 files: 100%|████████████████████████████████████████████| 2/2 [00:00<00:00, 23831.27it/s] /home/wauplin/.cache/huggingface/hub/models--gpt2/snapshots/11c5a3d5811f50298f278a704980280950aedb10 ``` For more details about the CLI download command, please refer to the [CLI guide](./cli#huggingface-cli-download). ## Faster downloads If you are running on a machine with high bandwidth, you can increase your download speed with [`hf_transfer`](https://github.com/huggingface/hf_transfer), a Rust-based library developed to speed up file transfers with the Hub. To enable it: 1. Specify the `hf_transfer` extra when installing `huggingface_hub` (e.g. `pip install huggingface_hub[hf_transfer]`). 2. Set `HF_HUB_ENABLE_HF_TRANSFER=1` as an environment variable. `hf_transfer` is a power user tool! It is tested and production-ready, but it lacks user-friendly features like advanced error handling or proxies. For more details, please take a look at this [section](https://huggingface.co/docs/huggingface_hub/hf_transfer). # Interact with Discussions and Pull Requests The `huggingface_hub` library provides a Python interface to interact with Pull Requests and Discussions on the Hub. Visit [the dedicated documentation page](https://huggingface.co/docs/hub/repositories-pull-requests-discussions) for a deeper view of what Discussions and Pull Requests on the Hub are, and how they work under the hood. ## Retrieve Discussions and Pull Requests from the Hub The `HfApi` class allows you to retrieve Discussions and Pull Requests on a given repo: ```python >>> from huggingface_hub import get_repo_discussions >>> for discussion in get_repo_discussions(repo_id="bigscience/bloom"): ... print(f"{discussion.num} - {discussion.title}, pr: {discussion.is_pull_request}") # 11 - Add Flax weights, pr: True # 10 - Update README.md, pr: True # 9 - Training languages in the model card, pr: True # 8 - Update tokenizer_config.json, pr: True # 7 - Slurm training script, pr: False [...] ``` `HfApi.get_repo_discussions` supports filtering by author, type (Pull Request or Discussion) and status (`open` or `closed`): ```python >>> from huggingface_hub import get_repo_discussions >>> for discussion in get_repo_discussions( ... repo_id="bigscience/bloom", ... author="ArthurZ", ... discussion_type="pull_request", ... discussion_status="open", ... ): ... print(f"{discussion.num} - {discussion.title} by {discussion.author}, pr: {discussion.is_pull_request}") # 19 - Add Flax weights by ArthurZ, pr: True ``` `HfApi.get_repo_discussions` returns a [generator](https://docs.python.org/3.7/howto/functional.html#generators) that yields `Discussion` objects. To get all the Discussions in a single list, run: ```python >>> from huggingface_hub import get_repo_discussions >>> discussions_list = list(get_repo_discussions(repo_id="bert-base-uncased")) ``` The `Discussion` object returned by `HfApi.get_repo_discussions()` contains high-level overview of the Discussion or Pull Request. You can also get more detailed information using `HfApi.get_discussion_details()`: ```python >>> from huggingface_hub import get_discussion_details >>> get_discussion_details( ... repo_id="bigscience/bloom-1b3", ... discussion_num=2 ... ) DiscussionWithDetails( num=2, author='cakiki', title='Update VRAM memory for the V100s', status='open', is_pull_request=True, events=[ DiscussionComment(type='comment', author='cakiki', ...), DiscussionCommit(type='commit', author='cakiki', summary='Update VRAM memory for the V100s', oid='1256f9d9a33fa8887e1c1bf0e09b4713da96773a', ...), ], conflicting_files=[], target_branch='refs/heads/main', merge_commit_oid=None, diff='diff --git a/README.md b/README.md\nindex a6ae3b9294edf8d0eda0d67c7780a10241242a7e..3a1814f212bc3f0d3cc8f74bdbd316de4ae7b9e3 100644\n--- a/README.md\n+++ b/README.md\n@@ -132,7 +132,7 [...]', ) ``` `HfApi.get_discussion_details()` returns a `DiscussionWithDetails` object, which is a subclass of `Discussion` with more detailed information about the Discussion or Pull Request. Information includes all the comments, status changes, and renames of the Discussion via `DiscussionWithDetails.events`. In case of a Pull Request, you can retrieve the raw git diff with `DiscussionWithDetails.diff`. All the commits of the Pull Requests are listed in `DiscussionWithDetails.events`. ## Create and edit a Discussion or Pull Request programmatically The `HfApi` class also offers ways to create and edit Discussions and Pull Requests. You will need an [access token](https://huggingface.co/docs/hub/security-tokens) to create and edit Discussions or Pull Requests. The simplest way to propose changes on a repo on the Hub is via the `create_commit()` API: just set the `create_pr` parameter to `True`. This parameter is also available on other methods that wrap `create_commit()`: * `upload_file()` * `upload_folder()` * `delete_file()` * `delete_folder()` * `metadata_update()` ```python >>> from huggingface_hub import metadata_update >>> metadata_update( ... repo_id="username/repo_name", ... metadata={"tags": ["computer-vision", "awesome-model"]}, ... create_pr=True, ... ) ``` You can also use `HfApi.create_discussion()` (respectively `HfApi.create_pull_request()`) to create a Discussion (respectively a Pull Request) on a repo. Opening a Pull Request this way can be useful if you need to work on changes locally. Pull Requests opened this way will be in `"draft"` mode. ```python >>> from huggingface_hub import create_discussion, create_pull_request >>> create_discussion( ... repo_id="username/repo-name", ... title="Hi from the huggingface_hub library!", ... token="", ... ) DiscussionWithDetails(...) >>> create_pull_request( ... repo_id="username/repo-name", ... title="Hi from the huggingface_hub library!", ... token="", ... ) DiscussionWithDetails(..., is_pull_request=True) ``` Managing Pull Requests and Discussions can be done entirely with the `HfApi` class. For example: * `comment_discussion()` to add comments * `edit_discussion_comment()` to edit comments * `rename_discussion()` to rename a Discussion or Pull Request * `change_discussion_status()` to open or close a Discussion / Pull Request * `merge_pull_request()` to merge a Pull Request Visit the `HfApi` documentation page for an exhaustive reference of all available methods. ## Push changes to a Pull Request *Coming soon !* ## See also For a more detailed reference, visit the [Discussions and Pull Requests](../package_reference/community) and the [hf_api](../package_reference/hf_api) documentation page. # Run Inference on servers Inference is the process of using a trained model to make predictions on new data. As this process can be compute-intensive, running on a dedicated server can be an interesting option. The `huggingface_hub` library provides an easy way to call a service that runs inference for hosted models. There are several services you can connect to: - [Inference API](https://huggingface.co/docs/api-inference/index): a service that allows you to run accelerated inference on Hugging Face's infrastructure for free. This service is a fast way to get started, test different models, and prototype AI products. - [Inference Endpoints](https://huggingface.co/docs/inference-endpoints/index): a product to easily deploy models to production. Inference is run by Hugging Face in a dedicated, fully managed infrastructure on a cloud provider of your choice. These services can be called with the `InferenceClient` object. It acts as a replacement for the legacy `InferenceApi` client, adding specific support for tasks and handling inference on both [Inference API](https://huggingface.co/docs/api-inference/index) and [Inference Endpoints](https://huggingface.co/docs/inference-endpoints/index). Learn how to migrate to the new client in the [Legacy InferenceAPI client](#legacy-inferenceapi-client) section. `InferenceClient` is a Python client making HTTP calls to our APIs. If you want to make the HTTP calls directly using your preferred tool (curl, postman,...), please refer to the [Inference API](https://huggingface.co/docs/api-inference/index) or to the [Inference Endpoints](https://huggingface.co/docs/inference-endpoints/index) documentation pages. For web development, a [JS client](https://huggingface.co/docs/huggingface.js/inference/README) has been released. If you are interested in game development, you might have a look at our [C# project](https://github.com/huggingface/unity-api). ## Getting started Let's get started with a text-to-image task: ```python >>> from huggingface_hub import InferenceClient >>> client = InferenceClient() >>> image = client.text_to_image("An astronaut riding a horse on the moon.") >>> image.save("astronaut.png") # 'image' is a PIL.Image object ``` In the example above, we initialized an `InferenceClient` with the default parameters. The only thing you need to know is the [task](#supported-tasks) you want to perform. By default, the client will connect to the Inference API and select a model to complete the task. In our example, we generated an image from a text prompt. The returned value is a `PIL.Image` object that can be saved to a file. For more details, check out the `text_to_image()` documentation. Let's now see an example using the [~`InferenceClient.chat_completion`] API. This task uses an LLM to generate a response from a list of messages: ```python >>> from huggingface_hub import InferenceClient >>> messages = [{"role": "user", "content": "What is the capital of France?"}] >>> client = InferenceClient("meta-llama/Meta-Llama-3-8B-Instruct") >>> client.chat_completion(messages, max_tokens=100) ChatCompletionOutput( choices=[ ChatCompletionOutputComplete( finish_reason='eos_token', index=0, message=ChatCompletionOutputMessage( role='assistant', content='The capital of France is Paris.', name=None, tool_calls=None ), logprobs=None ) ], created=1719907176, id='', model='meta-llama/Meta-Llama-3-8B-Instruct', object='text_completion', system_fingerprint='2.0.4-sha-f426a33', usage=ChatCompletionOutputUsage( completion_tokens=8, prompt_tokens=17, total_tokens=25 ) ) ``` In this example, we specified which model we want to use (`"meta-llama/Meta-Llama-3-8B-Instruct"`). You can find a list of compatible models [on this page](https://huggingface.co/models?other=conversational&sort=likes). We then gave a list of messages to complete (here, a single question) and passed an additional parameter to API (`max_token=100`). The output is a `ChatCompletionOutput` object that follows the OpenAI specification. The generated content can be accessed with `output.choices[0].message.content`. For more details, check out the `chat_completion()` documentation. The API is designed to be simple. Not all parameters and options are available or described for the end user. Check out [this page](https://huggingface.co/docs/api-inference/detailed_parameters) if you are interested in learning more about all the parameters available for each task. ### Using a specific model What if you want to use a specific model? You can specify it either as a parameter or directly at an instance level: ```python >>> from huggingface_hub import InferenceClient # Initialize client for a specific model >>> client = InferenceClient(model="prompthero/openjourney-v4") >>> client.text_to_image(...) # Or use a generic client but pass your model as an argument >>> client = InferenceClient() >>> client.text_to_image(..., model="prompthero/openjourney-v4") ``` There are more than 200k models on the Hugging Face Hub! Each task in the `InferenceClient` comes with a recommended model. Be aware that the HF recommendation can change over time without prior notice. Therefore it is best to explicitly set a model once you are decided. Also, in most cases you'll be interested in finding a model specific to _your_ needs. Visit the [Models](https://huggingface.co/models) page on the Hub to explore your possibilities. ### Using a specific URL The examples we saw above use the Serverless Inference API. This proves to be very useful for prototyping and testing things quickly. Once you're ready to deploy your model to production, you'll need to use a dedicated infrastructure. That's where [Inference Endpoints](https://huggingface.co/docs/inference-endpoints/index) comes into play. It allows you to deploy any model and expose it as a private API. Once deployed, you'll get a URL that you can connect to using exactly the same code as before, changing only the `model` parameter: ```python >>> from huggingface_hub import InferenceClient >>> client = InferenceClient(model="https://uu149rez6gw9ehej.eu-west-1.aws.endpoints.huggingface.cloud/deepfloyd-if") # or >>> client = InferenceClient() >>> client.text_to_image(..., model="https://uu149rez6gw9ehej.eu-west-1.aws.endpoints.huggingface.cloud/deepfloyd-if") ``` ### Authentication Calls made with the `InferenceClient` can be authenticated using a [User Access Token](https://huggingface.co/docs/hub/security-tokens). By default, it will use the token saved on your machine if you are logged in (check out [how to authenticate](https://huggingface.co/docs/huggingface_hub/quick-start#authentication)). If you are not logged in, you can pass your token as an instance parameter: ```python >>> from huggingface_hub import InferenceClient >>> client = InferenceClient(token="hf_***") ``` Authentication is NOT mandatory when using the Inference API. However, authenticated users get a higher free-tier to play with the service. Token is also mandatory if you want to run inference on your private models or on private endpoints. ## OpenAI compatibility The `chat_completion` task follows [OpenAI's Python client](https://github.com/openai/openai-python) syntax. What does it mean for you? It means that if you are used to play with `OpenAI`'s APIs you will be able to switch to `huggingface_hub.InferenceClient` to work with open-source models by updating just 2 line of code! ```diff - from openai import OpenAI + from huggingface_hub import InferenceClient - client = OpenAI( + client = InferenceClient( base_url=..., api_key=..., ) output = client.chat.completions.create( model="meta-llama/Meta-Llama-3-8B-Instruct", messages=[ {"role": "system", "content": "You are a helpful assistant."}, {"role": "user", "content": "Count to 10"}, ], stream=True, max_tokens=1024, ) for chunk in output: print(chunk.choices[0].delta.content) ``` And that's it! The only required changes are to replace `from openai import OpenAI` by `from huggingface_hub import InferenceClient` and `client = OpenAI(...)` by `client = InferenceClient(...)`. You can choose any LLM model from the Hugging Face Hub by passing its model id as `model` parameter. [Here is a list](https://huggingface.co/models?pipeline_tag=text-generation&other=conversational,text-generation-inference&sort=trending) of supported models. For authentication, you should pass a valid [User Access Token](https://huggingface.co/settings/tokens) as `api_key` or authenticate using `huggingface_hub` (see the [authentication guide](https://huggingface.co/docs/huggingface_hub/quick-start#authentication)). All input parameters and output format are strictly the same. In particular, you can pass `stream=True` to receive tokens as they are generated. You can also use the `AsyncInferenceClient` to run inference using `asyncio`: ```diff import asyncio - from openai import AsyncOpenAI + from huggingface_hub import AsyncInferenceClient - client = AsyncOpenAI() + client = AsyncInferenceClient() async def main(): stream = await client.chat.completions.create( model="meta-llama/Meta-Llama-3-8B-Instruct", messages=[{"role": "user", "content": "Say this is a test"}], stream=True, ) async for chunk in stream: print(chunk.choices[0].delta.content or "", end="") asyncio.run(main()) ``` You might wonder why using `InferenceClient` instead of OpenAI's client? There are a few reasons for that: 1. `InferenceClient` is configured for Hugging Face services. You don't need to provide a `base_url` to run models on the serverless Inference API. You also don't need to provide a `token` or `api_key` if your machine is already correctly logged in. 2. `InferenceClient` is tailored for both Text-Generation-Inference (TGI) and `transformers` frameworks, meaning you are assured it will always be on-par with the latest updates. 3. `InferenceClient` is integrated with our Inference Endpoints service, making it easier to launch an Inference Endpoint, check its status and run inference on it. Check out the [Inference Endpoints](./inference_endpoints.md) guide for more details. `InferenceClient.chat.completions.create` is simply an alias for `InferenceClient.chat_completion`. Check out the package reference of `chat_completion()` for more details. `base_url` and `api_key` parameters when instantiating the client are also aliases for `model` and `token`. These aliases have been defined to reduce friction when switching from `OpenAI` to `InferenceClient`. ## Supported tasks `InferenceClient`'s goal is to provide the easiest interface to run inference on Hugging Face models. It has a simple API that supports the most common tasks. Here is a list of the currently supported tasks: | Domain | Task | Supported | Documentation | |--------|--------------------------------|--------------|------------------------------------| | Audio | [Audio Classification](https://huggingface.co/tasks/audio-classification) | ✅ | `audio_classification()` | | Audio | [Audio-to-Audio](https://huggingface.co/tasks/audio-to-audio) | ✅ | `audio_to_audio()` | | | [Automatic Speech Recognition](https://huggingface.co/tasks/automatic-speech-recognition) | ✅ | `automatic_speech_recognition()` | | | [Text-to-Speech](https://huggingface.co/tasks/text-to-speech) | ✅ | `text_to_speech()` | | Computer Vision | [Image Classification](https://huggingface.co/tasks/image-classification) | ✅ | `image_classification()` | | | [Image Segmentation](https://huggingface.co/tasks/image-segmentation) | ✅ | `image_segmentation()` | | | [Image-to-Image](https://huggingface.co/tasks/image-to-image) | ✅ | `image_to_image()` | | | [Image-to-Text](https://huggingface.co/tasks/image-to-text) | ✅ | `image_to_text()` | | | [Object Detection](https://huggingface.co/tasks/object-detection) | ✅ | `object_detection()` | | | [Text-to-Image](https://huggingface.co/tasks/text-to-image) | ✅ | `text_to_image()` | | | [Zero-Shot-Image-Classification](https://huggingface.co/tasks/zero-shot-image-classification) | ✅ | `zero_shot_image_classification()` | | Multimodal | [Documentation Question Answering](https://huggingface.co/tasks/document-question-answering) | ✅ | `document_question_answering()` | | [Visual Question Answering](https://huggingface.co/tasks/visual-question-answering) | ✅ | `visual_question_answering()` | | NLP | Conversational | | *deprecated*, use Chat Completion | | | [Chat Completion](https://huggingface.co/tasks/text-generation) | ✅ | `chat_completion()` | | | [Feature Extraction](https://huggingface.co/tasks/feature-extraction) | ✅ | `feature_extraction()` | | | [Fill Mask](https://huggingface.co/tasks/fill-mask) | ✅ | `fill_mask()` | | | [Question Answering](https://huggingface.co/tasks/question-answering) | ✅ | `question_answering()` | | [Sentence Similarity](https://huggingface.co/tasks/sentence-similarity) | ✅ | `sentence_similarity()` | | | [Summarization](https://huggingface.co/tasks/summarization) | ✅ | `summarization()` | | | [Table Question Answering](https://huggingface.co/tasks/table-question-answering) | ✅ | `table_question_answering()` | | | [Text Classification](https://huggingface.co/tasks/text-classification) | ✅ | `text_classification()` | | | [Text Generation](https://huggingface.co/tasks/text-generation) | ✅ | `text_generation()` | | | [Token Classification](https://huggingface.co/tasks/token-classification) | ✅ | `token_classification()` | | | [Translation](https://huggingface.co/tasks/translation) | ✅ | `translation()` | | | [Zero Shot Classification](https://huggingface.co/tasks/zero-shot-classification) | ✅ | `zero_shot_classification()` | | Tabular | [Tabular Classification](https://huggingface.co/tasks/tabular-classification) | ✅ | `tabular_classification()` | | | [Tabular Regression](https://huggingface.co/tasks/tabular-regression) | ✅ | `tabular_regression()` | Check out the [Tasks](https://huggingface.co/tasks) page to learn more about each task, how to use them, and the most popular models for each task. ## Custom requests However, it is not always possible to cover all use cases. For custom requests, the `InferenceClient.post()` method gives you the flexibility to send any request to the Inference API. For example, you can specify how to parse the inputs and outputs. In the example below, the generated image is returned as raw bytes instead of parsing it as a `PIL Image`. This can be helpful if you don't have `Pillow` installed in your setup and just care about the binary content of the image. `InferenceClient.post()` is also useful to handle tasks that are not yet officially supported. ```python >>> from huggingface_hub import InferenceClient >>> client = InferenceClient() >>> response = client.post(json={"inputs": "An astronaut riding a horse on the moon."}, model="stabilityai/stable-diffusion-2-1") >>> response.content # raw bytes b'...' ``` ## Async client An async version of the client is also provided, based on `asyncio` and `aiohttp`. You can either install `aiohttp` directly or use the `[inference]` extra: ```sh pip install --upgrade huggingface_hub[inference] # or # pip install aiohttp ``` After installation all async API endpoints are available via `AsyncInferenceClient`. Its initialization and APIs are strictly the same as the sync-only version. ```py # Code must be run in an asyncio concurrent context. # $ python -m asyncio >>> from huggingface_hub import AsyncInferenceClient >>> client = AsyncInferenceClient() >>> image = await client.text_to_image("An astronaut riding a horse on the moon.") >>> image.save("astronaut.png") >>> async for token in await client.text_generation("The Huggingface Hub is", stream=True): ... print(token, end="") a platform for sharing and discussing ML-related content. ``` For more information about the `asyncio` module, please refer to the [official documentation](https://docs.python.org/3/library/asyncio.html). ## Advanced tips In the above section, we saw the main aspects of `InferenceClient`. Let's dive into some more advanced tips. ### Timeout When doing inference, there are two main causes for a timeout: - The inference process takes a long time to complete. - The model is not available, for example when Inference API is loading it for the first time. `InferenceClient` has a global `timeout` parameter to handle those two aspects. By default, it is set to `None`, meaning that the client will wait indefinitely for the inference to complete. If you want more control in your workflow, you can set it to a specific value in seconds. If the timeout delay expires, an `InferenceTimeoutError` is raised. You can catch it and handle it in your code: ```python >>> from huggingface_hub import InferenceClient, InferenceTimeoutError >>> client = InferenceClient(timeout=30) >>> try: ... client.text_to_image(...) ... except InferenceTimeoutError: ... print("Inference timed out after 30s.") ``` ### Binary inputs Some tasks require binary inputs, for example, when dealing with images or audio files. In this case, `InferenceClient` tries to be as permissive as possible and accept different types: - raw `bytes` - a file-like object, opened as binary (`with open("audio.flac", "rb") as f: ...`) - a path (`str` or `Path`) pointing to a local file - a URL (`str`) pointing to a remote file (e.g. `https://...`). In this case, the file will be downloaded locally before sending it to the Inference API. ```py >>> from huggingface_hub import InferenceClient >>> client = InferenceClient() >>> client.image_classification("https://upload.wikimedia.org/wikipedia/commons/thumb/4/43/Cute_dog.jpg/320px-Cute_dog.jpg") [{'score': 0.9779096841812134, 'label': 'Blenheim spaniel'}, ...] ``` ## Legacy InferenceAPI client `InferenceClient` acts as a replacement for the legacy `InferenceApi` client. It adds specific support for tasks and handles inference on both [Inference API](https://huggingface.co/docs/api-inference/index) and [Inference Endpoints](https://huggingface.co/docs/inference-endpoints/index). Here is a short guide to help you migrate from `InferenceApi` to `InferenceClient`. ### Initialization Change from ```python >>> from huggingface_hub import InferenceApi >>> inference = InferenceApi(repo_id="bert-base-uncased", token=API_TOKEN) ``` to ```python >>> from huggingface_hub import InferenceClient >>> inference = InferenceClient(model="bert-base-uncased", token=API_TOKEN) ``` ### Run on a specific task Change from ```python >>> from huggingface_hub import InferenceApi >>> inference = InferenceApi(repo_id="paraphrase-xlm-r-multilingual-v1", task="feature-extraction") >>> inference(...) ``` to ```python >>> from huggingface_hub import InferenceClient >>> inference = InferenceClient() >>> inference.feature_extraction(..., model="paraphrase-xlm-r-multilingual-v1") ``` This is the recommended way to adapt your code to `InferenceClient`. It lets you benefit from the task-specific methods like `feature_extraction`. ### Run custom request Change from ```python >>> from huggingface_hub import InferenceApi >>> inference = InferenceApi(repo_id="bert-base-uncased") >>> inference(inputs="The goal of life is [MASK].") [{'sequence': 'the goal of life is life.', 'score': 0.10933292657136917, 'token': 2166, 'token_str': 'life'}] ``` to ```python >>> from huggingface_hub import InferenceClient >>> client = InferenceClient() >>> response = client.post(json={"inputs": "The goal of life is [MASK]."}, model="bert-base-uncased") >>> response.json() [{'sequence': 'the goal of life is life.', 'score': 0.10933292657136917, 'token': 2166, 'token_str': 'life'}] ``` ### Run with parameters Change from ```python >>> from huggingface_hub import InferenceApi >>> inference = InferenceApi(repo_id="typeform/distilbert-base-uncased-mnli") >>> inputs = "Hi, I recently bought a device from your company but it is not working as advertised and I would like to get reimbursed!" >>> params = {"candidate_labels":["refund", "legal", "faq"]} >>> inference(inputs, params) {'sequence': 'Hi, I recently bought a device from your company but it is not working as advertised and I would like to get reimbursed!', 'labels': ['refund', 'faq', 'legal'], 'scores': [0.9378499388694763, 0.04914155602455139, 0.013008488342165947]} ``` to ```python >>> from huggingface_hub import InferenceClient >>> client = InferenceClient() >>> inputs = "Hi, I recently bought a device from your company but it is not working as advertised and I would like to get reimbursed!" >>> params = {"candidate_labels":["refund", "legal", "faq"]} >>> response = client.post(json={"inputs": inputs, "parameters": params}, model="typeform/distilbert-base-uncased-mnli") >>> response.json() {'sequence': 'Hi, I recently bought a device from your company but it is not working as advertised and I would like to get reimbursed!', 'labels': ['refund', 'faq', 'legal'], 'scores': [0.9378499388694763, 0.04914155602455139, 0.013008488342165947]} ``` # Manage your Space In this guide, we will see how to manage your Space runtime ([secrets](https://huggingface.co/docs/hub/spaces-overview#managing-secrets), [hardware](https://huggingface.co/docs/hub/spaces-gpus), and [storage](https://huggingface.co/docs/hub/spaces-storage#persistent-storage)) using `huggingface_hub`. ## A simple example: configure secrets and hardware. Here is an end-to-end example to create and setup a Space on the Hub. **1. Create a Space on the Hub.** ```py >>> from huggingface_hub import HfApi >>> repo_id = "Wauplin/my-cool-training-space" >>> api = HfApi() # For example with a Gradio SDK >>> api.create_repo(repo_id=repo_id, repo_type="space", space_sdk="gradio") ``` **1. (bis) Duplicate a Space.** This can prove useful if you want to build up from an existing Space instead of starting from scratch. It is also useful is you want control over the configuration/settings of a public Space. See `duplicate_space()` for more details. ```py >>> api.duplicate_space("multimodalart/dreambooth-training") ``` **2. Upload your code using your preferred solution.** Here is an example to upload the local folder `src/` from your machine to your Space: ```py >>> api.upload_folder(repo_id=repo_id, repo_type="space", folder_path="src/") ``` At this step, your app should already be running on the Hub for free ! However, you might want to configure it further with secrets and upgraded hardware. **3. Configure secrets and variables** Your Space might require some secret keys, token or variables to work. See [docs](https://huggingface.co/docs/hub/spaces-overview#managing-secrets) for more details. For example, an HF token to upload an image dataset to the Hub once generated from your Space. ```py >>> api.add_space_secret(repo_id=repo_id, key="HF_TOKEN", value="hf_api_***") >>> api.add_space_variable(repo_id=repo_id, key="MODEL_REPO_ID", value="user/repo") ``` Secrets and variables can be deleted as well: ```py >>> api.delete_space_secret(repo_id=repo_id, key="HF_TOKEN") >>> api.delete_space_variable(repo_id=repo_id, key="MODEL_REPO_ID") ``` From within your Space, secrets are available as environment variables (or Streamlit Secrets Management if using Streamlit). No need to fetch them via the API! Any change in your Space configuration (secrets or hardware) will trigger a restart of your app. **Bonus: set secrets and variables when creating or duplicating the Space!** Secrets and variables can be set when creating or duplicating a space: ```py >>> api.create_repo( ... repo_id=repo_id, ... repo_type="space", ... space_sdk="gradio", ... space_secrets=[{"key"="HF_TOKEN", "value"="hf_api_***"}, ...], ... space_variables=[{"key"="MODEL_REPO_ID", "value"="user/repo"}, ...], ... ) ``` ```py >>> api.duplicate_space( ... from_id=repo_id, ... secrets=[{"key"="HF_TOKEN", "value"="hf_api_***"}, ...], ... variables=[{"key"="MODEL_REPO_ID", "value"="user/repo"}, ...], ... ) ``` **4. Configure the hardware** By default, your Space will run on a CPU environment for free. You can upgrade the hardware to run it on GPUs. A payment card or a community grant is required to access upgrade your Space. See [docs](https://huggingface.co/docs/hub/spaces-gpus) for more details. ```py # Use `SpaceHardware` enum >>> from huggingface_hub import SpaceHardware >>> api.request_space_hardware(repo_id=repo_id, hardware=SpaceHardware.T4_MEDIUM) # Or simply pass a string value >>> api.request_space_hardware(repo_id=repo_id, hardware="t4-medium") ``` Hardware updates are not done immediately as your Space has to be reloaded on our servers. At any time, you can check on which hardware your Space is running to see if your request has been met. ```py >>> runtime = api.get_space_runtime(repo_id=repo_id) >>> runtime.stage "RUNNING_BUILDING" >>> runtime.hardware "cpu-basic" >>> runtime.requested_hardware "t4-medium" ``` You now have a Space fully configured. Make sure to downgrade your Space back to "cpu-classic" when you are done using it. **Bonus: request hardware when creating or duplicating the Space!** Upgraded hardware will be automatically assigned to your Space once it's built. ```py >>> api.create_repo( ... repo_id=repo_id, ... repo_type="space", ... space_sdk="gradio" ... space_hardware="cpu-upgrade", ... space_storage="small", ... space_sleep_time="7200", # 2 hours in secs ... ) ``` ```py >>> api.duplicate_space( ... from_id=repo_id, ... hardware="cpu-upgrade", ... storage="small", ... sleep_time="7200", # 2 hours in secs ... ) ``` **5. Pause and restart your Space** By default if your Space is running on an upgraded hardware, it will never be stopped. However to avoid getting billed, you might want to pause it when you are not using it. This is possible using `pause_space()`. A paused Space will be inactive until the owner of the Space restarts it, either with the UI or via API using `restart_space()`. For more details about paused mode, please refer to [this section](https://huggingface.co/docs/hub/spaces-gpus#pause) ```py # Pause your Space to avoid getting billed >>> api.pause_space(repo_id=repo_id) # (...) # Restart it when you need it >>> api.restart_space(repo_id=repo_id) ``` Another possibility is to set a timeout for your Space. If your Space is inactive for more than the timeout duration, it will go to sleep. Any visitor landing on your Space will start it back up. You can set a timeout using `set_space_sleep_time()`. For more details about sleeping mode, please refer to [this section](https://huggingface.co/docs/hub/spaces-gpus#sleep-time). ```py # Put your Space to sleep after 1h of inactivity >>> api.set_space_sleep_time(repo_id=repo_id, sleep_time=3600) ``` Note: if you are using a 'cpu-basic' hardware, you cannot configure a custom sleep time. Your Space will automatically be paused after 48h of inactivity. **Bonus: set a sleep time while requesting hardware** Upgraded hardware will be automatically assigned to your Space once it's built. ```py >>> api.request_space_hardware(repo_id=repo_id, hardware=SpaceHardware.T4_MEDIUM, sleep_time=3600) ``` **Bonus: set a sleep time when creating or duplicating the Space!** ```py >>> api.create_repo( ... repo_id=repo_id, ... repo_type="space", ... space_sdk="gradio" ... space_hardware="t4-medium", ... space_sleep_time="3600", ... ) ``` ```py >>> api.duplicate_space( ... from_id=repo_id, ... hardware="t4-medium", ... sleep_time="3600", ... ) ``` **6. Add persistent storage to your Space** You can choose the storage tier of your choice to access disk space that persists across restarts of your Space. This means you can read and write from disk like you would with a traditional hard drive. See [docs](https://huggingface.co/docs/hub/spaces-storage#persistent-storage) for more details. ```py >>> from huggingface_hub import SpaceStorage >>> api.request_space_storage(repo_id=repo_id, storage=SpaceStorage.LARGE) ``` You can also delete your storage, losing all the data permanently. ```py >>> api.delete_space_storage(repo_id=repo_id) ``` Note: You cannot decrease the storage tier of your space once it's been granted. To do so, you must delete the storage first then request the new desired tier. **Bonus: request storage when creating or duplicating the Space!** ```py >>> api.create_repo( ... repo_id=repo_id, ... repo_type="space", ... space_sdk="gradio" ... space_storage="large", ... ) ``` ```py >>> api.duplicate_space( ... from_id=repo_id, ... storage="large", ... ) ``` ## More advanced: temporarily upgrade your Space ! Spaces allow for a lot of different use cases. Sometimes, you might want to temporarily run a Space on a specific hardware, do something and then shut it down. In this section, we will explore how to benefit from Spaces to finetune a model on demand. This is only one way of solving this particular problem. It has to be taken as a suggestion and adapted to your use case. Let's assume we have a Space to finetune a model. It is a Gradio app that takes as input a model id and a dataset id. The workflow is as follows: 0. (Prompt the user for a model and a dataset) 1. Load the model from the Hub. 2. Load the dataset from the Hub. 3. Finetune the model on the dataset. 4. Upload the new model to the Hub. Step 3. requires a custom hardware but you don't want your Space to be running all the time on a paid GPU. A solution is to dynamically request hardware for the training and shut it down afterwards. Since requesting hardware restarts your Space, your app must somehow "remember" the current task it is performing. There are multiple ways of doing this. In this guide we will see one solution using a Dataset as "task scheduler". ### App skeleton Here is what your app would look like. On startup, check if a task is scheduled and if yes, run it on the correct hardware. Once done, set back hardware to the free-plan CPU and prompt the user for a new task. Such a workflow does not support concurrent access as normal demos. In particular, the interface will be disabled when training occurs. It is preferable to set your repo as private to ensure you are the only user. ```py # Space will need your token to request hardware: set it as a Secret ! HF_TOKEN = os.environ.get("HF_TOKEN") # Space own repo_id TRAINING_SPACE_ID = "Wauplin/dreambooth-training" from huggingface_hub import HfApi, SpaceHardware api = HfApi(token=HF_TOKEN) # On Space startup, check if a task is scheduled. If yes, finetune the model. If not, # display an interface to request a new task. task = get_task() if task is None: # Start Gradio app def gradio_fn(task): # On user request, add task and request hardware add_task(task) api.request_space_hardware(repo_id=TRAINING_SPACE_ID, hardware=SpaceHardware.T4_MEDIUM) gr.Interface(fn=gradio_fn, ...).launch() else: runtime = api.get_space_runtime(repo_id=TRAINING_SPACE_ID) # Check if Space is loaded with a GPU. if runtime.hardware == SpaceHardware.T4_MEDIUM: # If yes, finetune base model on dataset ! train_and_upload(task) # Then, mark the task as "DONE" mark_as_done(task) # DO NOT FORGET: set back CPU hardware api.request_space_hardware(repo_id=TRAINING_SPACE_ID, hardware=SpaceHardware.CPU_BASIC) else: api.request_space_hardware(repo_id=TRAINING_SPACE_ID, hardware=SpaceHardware.T4_MEDIUM) ``` ### Task scheduler Scheduling tasks can be done in many ways. Here is an example how it could be done using a simple CSV stored as a Dataset. ```py # Dataset ID in which a `tasks.csv` file contains the tasks to perform. # Here is a basic example for `tasks.csv` containing inputs (base model and dataset) # and status (PENDING or DONE). # multimodalart/sd-fine-tunable,Wauplin/concept-1,DONE # multimodalart/sd-fine-tunable,Wauplin/concept-2,PENDING TASK_DATASET_ID = "Wauplin/dreambooth-task-scheduler" def _get_csv_file(): return hf_hub_download(repo_id=TASK_DATASET_ID, filename="tasks.csv", repo_type="dataset", token=HF_TOKEN) def get_task(): with open(_get_csv_file()) as csv_file: csv_reader = csv.reader(csv_file, delimiter=',') for row in csv_reader: if row[2] == "PENDING": return row[0], row[1] # model_id, dataset_id def add_task(task): model_id, dataset_id = task with open(_get_csv_file()) as csv_file: with open(csv_file, "r") as f: tasks = f.read() api.upload_file( repo_id=repo_id, repo_type=repo_type, path_in_repo="tasks.csv", # Quick and dirty way to add a task path_or_fileobj=(tasks + f"\n{model_id},{dataset_id},PENDING").encode() ) def mark_as_done(task): model_id, dataset_id = task with open(_get_csv_file()) as csv_file: with open(csv_file, "r") as f: tasks = f.read() api.upload_file( repo_id=repo_id, repo_type=repo_type, path_in_repo="tasks.csv", # Quick and dirty way to set the task as DONE path_or_fileobj=tasks.replace( f"{model_id},{dataset_id},PENDING", f"{model_id},{dataset_id},DONE" ).encode() ) ``` # Search the Hub In this tutorial, you will learn how to search models, datasets and spaces on the Hub using `huggingface_hub`. ## How to list repositories ? `huggingface_hub` library includes an HTTP client `HfApi` to interact with the Hub. Among other things, it can list models, datasets and spaces stored on the Hub: ```py >>> from huggingface_hub import HfApi >>> api = HfApi() >>> models = api.list_models() ``` The output of `list_models()` is an iterator over the models stored on the Hub. Similarly, you can use `list_datasets()` to list datasets and `list_spaces()` to list Spaces. ## How to filter repositories ? Listing repositories is great but now you might want to filter your search. The list helpers have several attributes like: - `filter` - `author` - `search` - ... Let's see an example to get all models on the Hub that does image classification, have been trained on the imagenet dataset and that runs with PyTorch. ```py models = hf_api.list_models( task="image-classification", library="pytorch", trained_dataset="imagenet", ) ``` While filtering, you can also sort the models and take only the top results. For example, the following example fetches the top 5 most downloaded datasets on the Hub: ```py >>> list(list_datasets(sort="downloads", direction=-1, limit=5)) [DatasetInfo( id='argilla/databricks-dolly-15k-curated-en', author='argilla', sha='4dcd1dedbe148307a833c931b21ca456a1fc4281', last_modified=datetime.datetime(2023, 10, 2, 12, 32, 53, tzinfo=datetime.timezone.utc), private=False, downloads=8889377, (...) ``` To explore available filters on the Hub, visit [models](https://huggingface.co/models) and [datasets](https://huggingface.co/datasets) pages in your browser, search for some parameters and look at the values in the URL. # Integrate any ML framework with the Hub The Hugging Face Hub makes hosting and sharing models with the community easy. It supports [dozens of libraries](https://huggingface.co/docs/hub/models-libraries) in the Open Source ecosystem. We are always working on expanding this support to push collaborative Machine Learning forward. The `huggingface_hub` library plays a key role in this process, allowing any Python script to easily push and load files. There are four main ways to integrate a library with the Hub: 1. **Push to Hub:** implement a method to upload a model to the Hub. This includes the model weights, as well as [the model card](https://huggingface.co/docs/huggingface_hub/how-to-model-cards) and any other relevant information or data necessary to run the model (for example, training logs). This method is often called `push_to_hub()`. 2. **Download from Hub:** implement a method to load a model from the Hub. The method should download the model configuration/weights and load the model. This method is often called `from_pretrained` or `load_from_hub()`. 3. **Inference API:** use our servers to run inference on models supported by your library for free. 4. **Widgets:** display a widget on the landing page of your models on the Hub. It allows users to quickly try a model from the browser. In this guide, we will focus on the first two topics. We will present the two main approaches you can use to integrate a library, with their advantages and drawbacks. Everything is summarized at the end of the guide to help you choose between the two. Please keep in mind that these are only guidelines that you are free to adapt to you requirements. If you are interested in Inference and Widgets, you can follow [this guide](https://huggingface.co/docs/hub/models-adding-libraries#set-up-the-inference-api). In both cases, you can reach out to us if you are integrating a library with the Hub and want to be listed [in our docs](https://huggingface.co/docs/hub/models-libraries). ## A flexible approach: helpers The first approach to integrate a library to the Hub is to actually implement the `push_to_hub` and `from_pretrained` methods by yourself. This gives you full flexibility on which files you need to upload/download and how to handle inputs specific to your framework. You can refer to the two [upload files](./upload) and [download files](./download) guides to learn more about how to do that. This is, for example how the FastAI integration is implemented (see `push_to_hub_fastai()` and `from_pretrained_fastai()`). Implementation can differ between libraries, but the workflow is often similar. ### from_pretrained This is how a `from_pretrained` method usually looks like: ```python def from_pretrained(model_id: str) -> MyModelClass: # Download model from Hub cached_model = hf_hub_download( repo_id=repo_id, filename="model.pkl", library_name="fastai", library_version=get_fastai_version(), ) # Load model return load_model(cached_model) ``` ### push_to_hub The `push_to_hub` method often requires a bit more complexity to handle repo creation, generate the model card and save weights. A common approach is to save all of these files in a temporary folder, upload it and then delete it. ```python def push_to_hub(model: MyModelClass, repo_name: str) -> None: api = HfApi() # Create repo if not existing yet and get the associated repo_id repo_id = api.create_repo(repo_name, exist_ok=True) # Save all files in a temporary directory and push them in a single commit with TemporaryDirectory() as tmpdir: tmpdir = Path(tmpdir) # Save weights save_model(model, tmpdir / "model.safetensors") # Generate model card card = generate_model_card(model) (tmpdir / "README.md").write_text(card) # Save logs # Save figures # Save evaluation metrics # ... # Push to hub return api.upload_folder(repo_id=repo_id, folder_path=tmpdir) ``` This is of course only an example. If you are interested in more complex manipulations (delete remote files, upload weights on the fly, persist weights locally, etc.) please refer to the [upload files](./upload) guide. ### Limitations While being flexible, this approach has some drawbacks, especially in terms of maintenance. Hugging Face users are often used to additional features when working with `huggingface_hub`. For example, when loading files from the Hub, it is common to offer parameters like: - `token`: to download from a private repo - `revision`: to download from a specific branch - `cache_dir`: to cache files in a specific directory - `force_download`/`local_files_only`: to reuse the cache or not - `proxies`: configure HTTP session When pushing models, similar parameters are supported: - `commit_message`: custom commit message - `private`: create a private repo if missing - `create_pr`: create a PR instead of pushing to `main` - `branch`: push to a branch instead of the `main` branch - `allow_patterns`/`ignore_patterns`: filter which files to upload - `token` - ... All of these parameters can be added to the implementations we saw above and passed to the `huggingface_hub` methods. However, if a parameter changes or a new feature is added, you will need to update your package. Supporting those parameters also means more documentation to maintain on your side. To see how to mitigate these limitations, let's jump to our next section **class inheritance**. ## A more complex approach: class inheritance As we saw above, there are two main methods to include in your library to integrate it with the Hub: upload files (`push_to_hub`) and download files (`from_pretrained`). You can implement those methods by yourself but it comes with caveats. To tackle this, `huggingface_hub` provides a tool that uses class inheritance. Let's see how it works! In a lot of cases, a library already implements its model using a Python class. The class contains the properties of the model and methods to load, run, train, and evaluate it. Our approach is to extend this class to include upload and download features using mixins. A [Mixin](https://stackoverflow.com/a/547714) is a class that is meant to extend an existing class with a set of specific features using multiple inheritance. `huggingface_hub` provides its own mixin, the `ModelHubMixin`. The key here is to understand its behavior and how to customize it. The `ModelHubMixin` class implements 3 *public* methods (`push_to_hub`, `save_pretrained` and `from_pretrained`). Those are the methods that your users will call to load/save models with your library. `ModelHubMixin` also defines 2 *private* methods (`_save_pretrained` and `_from_pretrained`). Those are the ones you must implement. So to integrate your library, you should: 1. Make your Model class inherit from `ModelHubMixin`. 2. Implement the private methods: - `_save_pretrained()`: method taking as input a path to a directory and saving the model to it. You must write all the logic to dump your model in this method: model card, model weights, configuration files, training logs, and figures. Any relevant information for this model must be handled by this method. [Model Cards](https://huggingface.co/docs/hub/model-cards) are particularly important to describe your model. Check out [our implementation guide](./model-cards) for more details. - `_from_pretrained()`: **class method** taking as input a `model_id` and returning an instantiated model. The method must download the relevant files and load them. 3. You are done! The advantage of using `ModelHubMixin` is that once you take care of the serialization/loading of the files, you are ready to go. You don't need to worry about stuff like repo creation, commits, PRs, or revisions. The `ModelHubMixin` also ensures public methods are documented and type annotated, and you'll be able to view your model's download count on the Hub. All of this is handled by the `ModelHubMixin` and available to your users. ### A concrete example: PyTorch A good example of what we saw above is `PyTorchModelHubMixin`, our integration for the PyTorch framework. This is a ready-to-use integration. #### How to use it? Here is how any user can load/save a PyTorch model from/to the Hub: ```python >>> import torch >>> import torch.nn as nn >>> from huggingface_hub import PyTorchModelHubMixin # Define your Pytorch model exactly the same way you are used to >>> class MyModel( ... nn.Module, ... PyTorchModelHubMixin, # multiple inheritance ... library_name="keras-nlp", ... tags=["keras"], ... repo_url="https://github.com/keras-team/keras-nlp", ... docs_url="https://keras.io/keras_nlp/", ... # ^ optional metadata to generate model card ... ): ... def __init__(self, hidden_size: int = 512, vocab_size: int = 30000, output_size: int = 4): ... super().__init__() ... self.param = nn.Parameter(torch.rand(hidden_size, vocab_size)) ... self.linear = nn.Linear(output_size, vocab_size) ... def forward(self, x): ... return self.linear(x + self.param) # 1. Create model >>> model = MyModel(hidden_size=128) # Config is automatically created based on input + default values >>> model.param.shape[0] 128 # 2. (optional) Save model to local directory >>> model.save_pretrained("path/to/my-awesome-model") # 3. Push model weights to the Hub >>> model.push_to_hub("my-awesome-model") # 4. Initialize model from the Hub => config has been preserved >>> model = MyModel.from_pretrained("username/my-awesome-model") >>> model.param.shape[0] 128 # Model card has been correctly populated >>> from huggingface_hub import ModelCard >>> card = ModelCard.load("username/my-awesome-model") >>> card.data.tags ["keras", "pytorch_model_hub_mixin", "model_hub_mixin"] >>> card.data.library_name "keras-nlp" ``` #### Implementation The implementation is actually very straightforward, and the full implementation can be found [here](https://github.com/huggingface/huggingface_hub/blob/main/src/huggingface_hub/hub_mixin.py). 1. First, inherit your class from `ModelHubMixin`: ```python from huggingface_hub import ModelHubMixin class PyTorchModelHubMixin(ModelHubMixin): (...) ``` 2. Implement the `_save_pretrained` method: ```py from huggingface_hub import ModelHubMixin class PyTorchModelHubMixin(ModelHubMixin): (...) def _save_pretrained(self, save_directory: Path) -> None: """Save weights from a Pytorch model to a local directory.""" save_model_as_safetensor(self.module, str(save_directory / SAFETENSORS_SINGLE_FILE)) ``` 3. Implement the `_from_pretrained` method: ```python class PyTorchModelHubMixin(ModelHubMixin): (...) @classmethod # Must be a classmethod! def _from_pretrained( cls, *, model_id: str, revision: str, cache_dir: str, force_download: bool, proxies: Optional[Dict], resume_download: bool, local_files_only: bool, token: Union[str, bool, None], map_location: str = "cpu", # additional argument strict: bool = False, # additional argument **model_kwargs, ): """Load Pytorch pretrained weights and return the loaded model.""" model = cls(**model_kwargs) if os.path.isdir(model_id): print("Loading weights from local directory") model_file = os.path.join(model_id, SAFETENSORS_SINGLE_FILE) return cls._load_as_safetensor(model, model_file, map_location, strict) model_file = hf_hub_download( repo_id=model_id, filename=SAFETENSORS_SINGLE_FILE, revision=revision, cache_dir=cache_dir, force_download=force_download, proxies=proxies, resume_download=resume_download, token=token, local_files_only=local_files_only, ) return cls._load_as_safetensor(model, model_file, map_location, strict) ``` And that's it! Your library now enables users to upload and download files to and from the Hub. ### Advanced usage In the section above, we quickly discussed how the `ModelHubMixin` works. In this section, we will see some of its more advanced features to improve your library integration with the Hugging Face Hub. #### Model card `ModelHubMixin` generates the model card for you. Model cards are files that accompany the models and provide important information about them. Under the hood, model cards are simple Markdown files with additional metadata. Model cards are essential for discoverability, reproducibility, and sharing! Check out the [Model Cards guide](https://huggingface.co/docs/hub/model-cards) for more details. Generating model cards semi-automatically is a good way to ensure that all models pushed with your library will share common metadata: `library_name`, `tags`, `license`, `pipeline_tag`, etc. This makes all models backed by your library easily searchable on the Hub and provides some resource links for users landing on the Hub. You can define the metadata directly when inheriting from `ModelHubMixin`: ```py class UniDepthV1( nn.Module, PyTorchModelHubMixin, library_name="unidepth", repo_url="https://github.com/lpiccinelli-eth/UniDepth", docs_url=..., pipeline_tag="depth-estimation", license="cc-by-nc-4.0", tags=["monocular-metric-depth-estimation", "arxiv:1234.56789"] ): ... ``` By default, a generic model card will be generated with the info you've provided (example: [pyp1/VoiceCraft_giga830M](https://huggingface.co/pyp1/VoiceCraft_giga830M)). But you can define your own model card template as well! In this example, all models pushed with the `VoiceCraft` class will automatically include a citation section and license details. For more details on how to define a model card template, please check the [Model Cards guide](./model-cards). ```py MODEL_CARD_TEMPLATE = """ --- # For reference on model card metadata, see the spec: https://github.com/huggingface/hub-docs/blob/main/modelcard.md?plain=1 # Doc / guide: https://huggingface.co/docs/hub/model-cards {{ card_data }} --- This is a VoiceCraft model. For more details, please check out the official Github repo: https://github.com/jasonppy/VoiceCraft. This model is shared under a Attribution-NonCommercial-ShareAlike 4.0 International license. ## Citation @article{peng2024voicecraft, author = {Peng, Puyuan and Huang, Po-Yao and Li, Daniel and Mohamed, Abdelrahman and Harwath, David}, title = {VoiceCraft: Zero-Shot Speech Editing and Text-to-Speech in the Wild}, journal = {arXiv}, year = {2024}, } """ class VoiceCraft( nn.Module, PyTorchModelHubMixin, library_name="voicecraft", model_card_template=MODEL_CARD_TEMPLATE, ... ): ... ``` Finally, if you want to extend the model card generation process with dynamic values, you can override the `generate_model_card()` method: ```py from huggingface_hub import ModelCard, PyTorchModelHubMixin class UniDepthV1(nn.Module, PyTorchModelHubMixin, ...): (...) def generate_model_card(self, *args, **kwargs) -> ModelCard: card = super().generate_model_card(*args, **kwargs) card.data.metrics = ... # add metrics to the metadata card.text += ... # append section to the modelcard return card ``` #### Config `ModelHubMixin` handles the model configuration for you. It automatically checks the input values when you instantiate the model and serializes them in a `config.json` file. This provides 2 benefits: 1. Users will be able to reload the model with the exact same parameters as you. 2. Having a `config.json` file automatically enables analytics on the Hub (i.e. the "downloads" count). But how does it work in practice? Several rules make the process as smooth as possible from a user perspective: - if your `__init__` method expects a `config` input, it will be automatically saved in the repo as `config.json`. - if the `config` input parameter is annotated with a dataclass type (e.g. `config: Optional[MyConfigClass] = None`), then the `config` value will be correctly deserialized for you. - all values passed at initialization will also be stored in the config file. This means you don't necessarily have to expect a `config` input to benefit from it. Example: ```py class MyModel(ModelHubMixin): def __init__(value: str, size: int = 3): self.value = value self.size = size (...) # implement _save_pretrained / _from_pretrained model = MyModel(value="my_value") model.save_pretrained(...) # config.json contains passed and default values {"value": "my_value", "size": 3} ``` But what if a value cannot be serialized as JSON? By default, the value will be ignored when saving the config file. However, in some cases your library already expects a custom object as input that cannot be serialized, and you don't want to update your internal logic to update its type. No worries! You can pass custom encoders/decoders for any type when inheriting from `ModelHubMixin`. This is a bit more work but ensures your internal logic is untouched when integrating your library with the Hub. Here is a concrete example where a class expects a `argparse.Namespace` config as input: ```py class VoiceCraft(nn.Module): def __init__(self, args): self.pattern = self.args.pattern self.hidden_size = self.args.hidden_size ... ``` One solution can be to update the `__init__` signature to `def __init__(self, pattern: str, hidden_size: int)` and update all snippets that instantiate your class. This is a perfectly valid way to fix it but it might break downstream applications using your library. Another solution is to provide a simple encoder/decoder to convert `argparse.Namespace` to a dictionary. ```py from argparse import Namespace class VoiceCraft( nn.Module, PyTorchModelHubMixin, # inherit from mixin coders={ Namespace : ( lambda x: vars(x), # Encoder: how to convert a `Namespace` to a valid jsonable value? lambda data: Namespace(**data), # Decoder: how to reconstruct a `Namespace` from a dictionary? ) } ): def __init__(self, args: Namespace): # annotate `args` self.pattern = self.args.pattern self.hidden_size = self.args.hidden_size ... ``` In the snippet above, both the internal logic and the `__init__` signature of the class did not change. This means all existing code snippets for your library will continue to work. To achieve this, we had to: 1. Inherit from the mixin (`PytorchModelHubMixin` in this case). 2. Pass a `coders` parameter in the inheritance. This is a dictionary where keys are custom types you want to process. Values are a tuple `(encoder, decoder)`. - The encoder expects an object of the specified type as input and returns a jsonable value. This will be used when saving a model with `save_pretrained`. - The decoder expects raw data (typically a dictionary) as input and reconstructs the initial object. This will be used when loading the model with `from_pretrained`. 3. Add a type annotation to the `__init__` signature. This is important to let the mixin know which type is expected by the class and, therefore, which decoder to use. For the sake of simplicity, the encoder/decoder functions in the example above are not robust. For a concrete implementation, you would most likely have to handle corner cases properly. ## Quick comparison Let's quickly sum up the two approaches we saw with their advantages and drawbacks. The table below is only indicative. Your framework might have some specificities that you need to address. This guide is only here to give guidelines and ideas on how to handle integration. In any case, feel free to contact us if you have any questions! | Integration | Using helpers | Using `ModelHubMixin` | |:---:|:---:|:---:| | User experience | `model = load_from_hub(...)`
`push_to_hub(model, ...)` | `model = MyModel.from_pretrained(...)`
`model.push_to_hub(...)` | | Flexibility | Very flexible.
You fully control the implementation. | Less flexible.
Your framework must have a model class. | | Maintenance | More maintenance to add support for configuration, and new features. Might also require fixing issues reported by users. | Less maintenance as most of the interactions with the Hub are implemented in `huggingface_hub`. | | Documentation / Type annotation | To be written manually. | Partially handled by `huggingface_hub`. | | Download counter | To be handled manually. | Enabled by default if class has a `config` attribute. | | Model card | To be handled manually | Generated by default with library_name, tags, etc. | # Webhooks Webhooks are a foundation for MLOps-related features. They allow you to listen for new changes on specific repos or to all repos belonging to particular users/organizations you're interested in following. This guide will first explain how to manage webhooks programmatically. Then we'll see how to leverage `huggingface_hub` to create a server listening to webhooks and deploy it to a Space. This guide assumes you are familiar with the concept of webhooks on the Huggingface Hub. To learn more about webhooks themselves, you should read this [guide](https://huggingface.co/docs/hub/webhooks) first. ## Managing Webhooks `huggingface_hub` allows you to manage your webhooks programmatically. You can list your existing webhooks, create new ones, and update, enable, disable or delete them. This section guides you through the procedures using the Hugging Face Hub's API functions. ### Creating a Webhook To create a new webhook, use `create_webhook()` and specify the URL where payloads should be sent, what events should be watched, and optionally set a domain and a secret for security. ```python from huggingface_hub import create_webhook # Example: Creating a webhook webhook = create_webhook( url="https://webhook.site/your-custom-url", watched=[{"type": "user", "name": "your-username"}, {"type": "org", "name": "your-org-name"}], domains=["repo", "discussion"], secret="your-secret" ) ``` ### Listing Webhooks To see all the webhooks you have configured, you can list them with `list_webhooks()`. This is useful to review their IDs, URLs, and statuses. ```python from huggingface_hub import list_webhooks # Example: Listing all webhooks webhooks = list_webhooks() for webhook in webhooks: print(webhook) ``` ### Updating a Webhook If you need to change the configuration of an existing webhook, such as the URL or the events it watches, you can update it using `update_webhook()`. ```python from huggingface_hub import update_webhook # Example: Updating a webhook updated_webhook = update_webhook( webhook_id="your-webhook-id", url="https://new.webhook.site/url", watched=[{"type": "user", "name": "new-username"}], domains=["repo"] ) ``` ### Enabling and Disabling Webhooks You might want to temporarily disable a webhook without deleting it. This can be done using `disable_webhook()`, and the webhook can be re-enabled later with `enable_webhook()`. ```python from huggingface_hub import enable_webhook, disable_webhook # Example: Enabling a webhook enabled_webhook = enable_webhook("your-webhook-id") print("Enabled:", enabled_webhook) # Example: Disabling a webhook disabled_webhook = disable_webhook("your-webhook-id") print("Disabled:", disabled_webhook) ``` ### Deleting a Webhook When a webhook is no longer needed, it can be permanently deleted using `delete_webhook()`. ```python from huggingface_hub import delete_webhook # Example: Deleting a webhook delete_webhook("your-webhook-id") ``` ## Webhooks Server The base class that we will use in this guides section is `WebhooksServer()`. It is a class for easily configuring a server that can receive webhooks from the Huggingface Hub. The server is based on a [Gradio](https://gradio.app/) app. It has a UI to display instructions for you or your users and an API to listen to webhooks. To see a running example of a webhook server, check out the [Spaces CI Bot](https://huggingface.co/spaces/spaces-ci-bot/webhook) one. It is a Space that launches ephemeral environments when a PR is opened on a Space. This is an [experimental feature](../package_reference/environment_variables#hfhubdisableexperimentalwarning). This means that we are still working on improving the API. Breaking changes might be introduced in the future without prior notice. Make sure to pin the version of `huggingface_hub` in your requirements. ### Create an endpoint Implementing a webhook endpoint is as simple as decorating a function. Let's see a first example to explain the main concepts: ```python # app.py from huggingface_hub import webhook_endpoint, WebhookPayload @webhook_endpoint async def trigger_training(payload: WebhookPayload) -> None: if payload.repo.type == "dataset" and payload.event.action == "update": # Trigger a training job if a dataset is updated ... ``` Save this snippet in a file called `'app.py'` and run it with `'python app.py'`. You should see a message like this: ```text Webhook secret is not defined. This means your webhook endpoints will be open to everyone. To add a secret, set `WEBHOOK_SECRET` as environment variable or pass it at initialization: `app = WebhooksServer(webhook_secret='my_secret', ...)` For more details about webhook secrets, please refer to https://huggingface.co/docs/hub/webhooks#webhook-secret. Running on local URL: http://127.0.0.1:7860 Running on public URL: https://1fadb0f52d8bf825fc.gradio.live This share link expires in 72 hours. For free permanent hosting and GPU upgrades (NEW!), check out Spaces: https://huggingface.co/spaces Webhooks are correctly setup and ready to use: - POST https://1fadb0f52d8bf825fc.gradio.live/webhooks/trigger_training Go to https://huggingface.co/settings/webhooks to setup your webhooks. ``` Good job! You just launched a webhook server! Let's break down what happened exactly: 1. By decorating a function with `webhook_endpoint()`, a `WebhooksServer()` object has been created in the background. As you can see, this server is a Gradio app running on http://127.0.0.1:7860. If you open this URL in your browser, you will see a landing page with instructions about the registered webhooks. 2. A Gradio app is a FastAPI server under the hood. A new POST route `/webhooks/trigger_training` has been added to it. This is the route that will listen to webhooks and run the `trigger_training` function when triggered. FastAPI will automatically parse the payload and pass it to the function as a `WebhookPayload` object. This is a `pydantic` object that contains all the information about the event that triggered the webhook. 3. The Gradio app also opened a tunnel to receive requests from the internet. This is the interesting part: you can configure a Webhook on https://huggingface.co/settings/webhooks pointing to your local machine. This is useful for debugging your webhook server and quickly iterating before deploying it to a Space. 4. Finally, the logs also tell you that your server is currently not secured by a secret. This is not problematic for local debugging but is to keep in mind for later. By default, the server is started at the end of your script. If you are running it in a notebook, you can start the server manually by calling `decorated_function.run()`. Since a unique server is used, you only have to start the server once even if you have multiple endpoints. ### Configure a Webhook Now that you have a webhook server running, you want to configure a Webhook to start receiving messages. Go to https://huggingface.co/settings/webhooks, click on "Add a new webhook" and configure your Webhook. Set the target repositories you want to watch and the Webhook URL, here `https://1fadb0f52d8bf825fc.gradio.live/webhooks/trigger_training`.
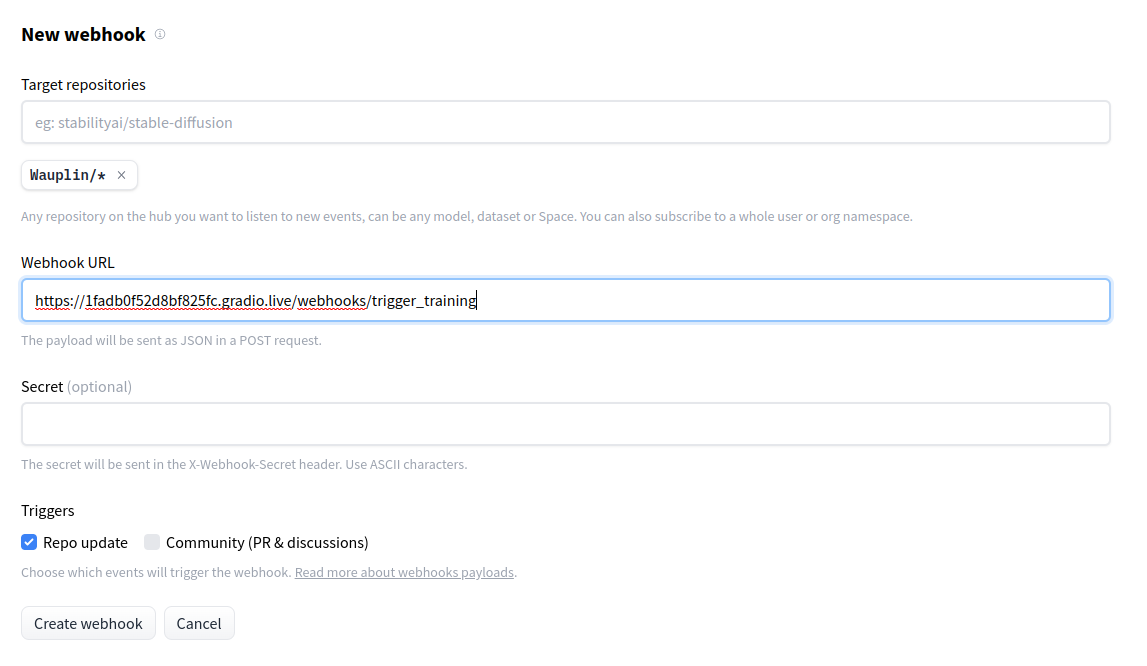
And that's it! You can now trigger that webhook by updating the target repository (e.g. push a commit). Check the Activity tab of your Webhook to see the events that have been triggered. Now that you have a working setup, you can test it and quickly iterate. If you modify your code and restart the server, your public URL might change. Make sure to update the webhook configuration on the Hub if needed. ### Deploy to a Space Now that you have a working webhook server, the goal is to deploy it to a Space. Go to https://huggingface.co/new-space to create a Space. Give it a name, select the Gradio SDK and click on "Create Space". Upload your code to the Space in a file called `app.py`. Your Space will start automatically! For more details about Spaces, please refer to this [guide](https://huggingface.co/docs/hub/spaces-overview). Your webhook server is now running on a public Space. If most cases, you will want to secure it with a secret. Go to your Space settings > Section "Repository secrets" > "Add a secret". Set the `WEBHOOK_SECRET` environment variable to the value of your choice. Go back to the [Webhooks settings](https://huggingface.co/settings/webhooks) and set the secret in the webhook configuration. Now, only requests with the correct secret will be accepted by your server. And this is it! Your Space is now ready to receive webhooks from the Hub. Please keep in mind that if you run the Space on a free 'cpu-basic' hardware, it will be shut down after 48 hours of inactivity. If you need a permanent Space, you should consider setting to an [upgraded hardware](https://huggingface.co/docs/hub/spaces-gpus#hardware-specs). ### Advanced usage The guide above explained the quickest way to setup a `WebhooksServer()`. In this section, we will see how to customize it further. #### Multiple endpoints You can register multiple endpoints on the same server. For example, you might want to have one endpoint to trigger a training job and another one to trigger a model evaluation. You can do this by adding multiple `@webhook_endpoint` decorators: ```python # app.py from huggingface_hub import webhook_endpoint, WebhookPayload @webhook_endpoint async def trigger_training(payload: WebhookPayload) -> None: if payload.repo.type == "dataset" and payload.event.action == "update": # Trigger a training job if a dataset is updated ... @webhook_endpoint async def trigger_evaluation(payload: WebhookPayload) -> None: if payload.repo.type == "model" and payload.event.action == "update": # Trigger an evaluation job if a model is updated ... ``` Which will create two endpoints: ```text (...) Webhooks are correctly setup and ready to use: - POST https://1fadb0f52d8bf825fc.gradio.live/webhooks/trigger_training - POST https://1fadb0f52d8bf825fc.gradio.live/webhooks/trigger_evaluation ``` #### Custom server To get more flexibility, you can also create a `WebhooksServer()` object directly. This is useful if you want to customize the landing page of your server. You can do this by passing a [Gradio UI](https://gradio.app/docs/#blocks) that will overwrite the default one. For example, you can add instructions for your users or add a form to manually trigger the webhooks. When creating a `WebhooksServer()`, you can register new webhooks using the `add_webhook()` decorator. Here is a complete example: ```python import gradio as gr from fastapi import Request from huggingface_hub import WebhooksServer, WebhookPayload # 1. Define UI with gr.Blocks() as ui: ... # 2. Create WebhooksServer with custom UI and secret app = WebhooksServer(ui=ui, webhook_secret="my_secret_key") # 3. Register webhook with explicit name @app.add_webhook("/say_hello") async def hello(payload: WebhookPayload): return {"message": "hello"} # 4. Register webhook with implicit name @app.add_webhook async def goodbye(payload: WebhookPayload): return {"message": "goodbye"} # 5. Start server (optional) app.run() ``` 1. We define a custom UI using Gradio blocks. This UI will be displayed on the landing page of the server. 2. We create a `WebhooksServer()` object with a custom UI and a secret. The secret is optional and can be set with the `WEBHOOK_SECRET` environment variable. 3. We register a webhook with an explicit name. This will create an endpoint at `/webhooks/say_hello`. 4. We register a webhook with an implicit name. This will create an endpoint at `/webhooks/goodbye`. 5. We start the server. This is optional as your server will automatically be started at the end of the script. # Create and share Model Cards The `huggingface_hub` library provides a Python interface to create, share, and update Model Cards. Visit [the dedicated documentation page](https://huggingface.co/docs/hub/models-cards) for a deeper view of what Model Cards on the Hub are, and how they work under the hood. [New (beta)! Try our experimental Model Card Creator App](https://huggingface.co/spaces/huggingface/Model_Cards_Writing_Tool) ## Load a Model Card from the Hub To load an existing card from the Hub, you can use the `ModelCard.load()` function. Here, we'll load the card from [`nateraw/vit-base-beans`](https://huggingface.co/nateraw/vit-base-beans). ```python from huggingface_hub import ModelCard card = ModelCard.load('nateraw/vit-base-beans') ``` This card has some helpful attributes that you may want to access/leverage: - `card.data`: Returns a `ModelCardData` instance with the model card's metadata. Call `.to_dict()` on this instance to get the representation as a dictionary. - `card.text`: Returns the text of the card, *excluding the metadata header*. - `card.content`: Returns the text content of the card, *including the metadata header*. ## Create Model Cards ### From Text To initialize a Model Card from text, just pass the text content of the card to the `ModelCard` on init. ```python content = """ --- language: en license: mit --- # My Model Card """ card = ModelCard(content) card.data.to_dict() == {'language': 'en', 'license': 'mit'} # True ``` Another way you might want to do this is with f-strings. In the following example, we: - Use `ModelCardData.to_yaml()` to convert metadata we defined to YAML so we can use it to insert the YAML block in the model card. - Show how you might use a template variable via Python f-strings. ```python card_data = ModelCardData(language='en', license='mit', library='timm') example_template_var = 'nateraw' content = f""" --- { card_data.to_yaml() } --- # My Model Card This model created by [@{example_template_var}](https://github.com/{example_template_var}) """ card = ModelCard(content) print(card) ``` The above example would leave us with a card that looks like this: ``` --- language: en license: mit library: timm --- # My Model Card This model created by [@nateraw](https://github.com/nateraw) ``` ### From a Jinja Template If you have `Jinja2` installed, you can create Model Cards from a jinja template file. Let's see a basic example: ```python from pathlib import Path from huggingface_hub import ModelCard, ModelCardData # Define your jinja template template_text = """ --- {{ card_data }} --- # Model Card for MyCoolModel This model does this and that. This model was created by [@{{ author }}](https://hf.co/{{author}}). """.strip() # Write the template to a file Path('custom_template.md').write_text(template_text) # Define card metadata card_data = ModelCardData(language='en', license='mit', library_name='keras') # Create card from template, passing it any jinja template variables you want. # In our case, we'll pass author card = ModelCard.from_template(card_data, template_path='custom_template.md', author='nateraw') card.save('my_model_card_1.md') print(card) ``` The resulting card's markdown looks like this: ``` --- language: en license: mit library_name: keras --- # Model Card for MyCoolModel This model does this and that. This model was created by [@nateraw](https://hf.co/nateraw). ``` If you update any card.data, it'll reflect in the card itself. ``` card.data.library_name = 'timm' card.data.language = 'fr' card.data.license = 'apache-2.0' print(card) ``` Now, as you can see, the metadata header has been updated: ``` --- language: fr license: apache-2.0 library_name: timm --- # Model Card for MyCoolModel This model does this and that. This model was created by [@nateraw](https://hf.co/nateraw). ``` As you update the card data, you can validate the card is still valid against the Hub by calling `ModelCard.validate()`. This ensures that the card passes any validation rules set up on the Hugging Face Hub. ### From the Default Template Instead of using your own template, you can also use the [default template](https://github.com/huggingface/huggingface_hub/blob/main/src/huggingface_hub/templates/modelcard_template.md), which is a fully featured model card with tons of sections you may want to fill out. Under the hood, it uses [Jinja2](https://jinja.palletsprojects.com/en/3.1.x/) to fill out a template file. Note that you will have to have Jinja2 installed to use `from_template`. You can do so with `pip install Jinja2`. ```python card_data = ModelCardData(language='en', license='mit', library_name='keras') card = ModelCard.from_template( card_data, model_id='my-cool-model', model_description="this model does this and that", developers="Nate Raw", repo="https://github.com/huggingface/huggingface_hub", ) card.save('my_model_card_2.md') print(card) ``` ## Share Model Cards If you're authenticated with the Hugging Face Hub (either by using `huggingface-cli login` or `login()`), you can push cards to the Hub by simply calling `ModelCard.push_to_hub()`. Let's take a look at how to do that... First, we'll create a new repo called 'hf-hub-modelcards-pr-test' under the authenticated user's namespace: ```python from huggingface_hub import whoami, create_repo user = whoami()['name'] repo_id = f'{user}/hf-hub-modelcards-pr-test' url = create_repo(repo_id, exist_ok=True) ``` Then, we'll create a card from the default template (same as the one defined in the section above): ```python card_data = ModelCardData(language='en', license='mit', library_name='keras') card = ModelCard.from_template( card_data, model_id='my-cool-model', model_description="this model does this and that", developers="Nate Raw", repo="https://github.com/huggingface/huggingface_hub", ) ``` Finally, we'll push that up to the hub ```python card.push_to_hub(repo_id) ``` You can check out the resulting card [here](https://huggingface.co/nateraw/hf-hub-modelcards-pr-test/blob/main/README.md). If you instead wanted to push a card as a pull request, you can just say `create_pr=True` when calling `push_to_hub`: ```python card.push_to_hub(repo_id, create_pr=True) ``` A resulting PR created from this command can be seen [here](https://huggingface.co/nateraw/hf-hub-modelcards-pr-test/discussions/3). ## Update metadata In this section we will see what metadata are in repo cards and how to update them. `metadata` refers to a hash map (or key value) context that provides some high-level information about a model, dataset or Space. That information can include details such as the model's `pipeline type`, `model_id` or `model_description`. For more detail you can take a look to these guides: [Model Card](https://huggingface.co/docs/hub/model-cards#model-card-metadata), [Dataset Card](https://huggingface.co/docs/hub/datasets-cards#dataset-card-metadata) and [Spaces Settings](https://huggingface.co/docs/hub/spaces-settings#spaces-settings). Now lets see some examples on how to update those metadata. Let's start with a first example: ```python >>> from huggingface_hub import metadata_update >>> metadata_update("username/my-cool-model", {"pipeline_tag": "image-classification"}) ``` With these two lines of code you will update the metadata to set a new `pipeline_tag`. By default, you cannot update a key that is already existing on the card. If you want to do so, you must pass `overwrite=True` explicitly: ```python >>> from huggingface_hub import metadata_update >>> metadata_update("username/my-cool-model", {"pipeline_tag": "text-generation"}, overwrite=True) ``` It often happen that you want to suggest some changes to a repository on which you don't have write permission. You can do that by creating a PR on that repo which will allow the owners to review and merge your suggestions. ```python >>> from huggingface_hub import metadata_update >>> metadata_update("someone/model", {"pipeline_tag": "text-classification"}, create_pr=True) ``` ## Include Evaluation Results To include evaluation results in the metadata `model-index`, you can pass an `EvalResult` or a list of `EvalResult` with your associated evaluation results. Under the hood it'll create the `model-index` when you call `card.data.to_dict()`. For more information on how this works, you can check out [this section of the Hub docs](https://huggingface.co/docs/hub/models-cards#evaluation-results). Note that using this function requires you to include the `model_name` attribute in `ModelCardData`. ```python card_data = ModelCardData( language='en', license='mit', model_name='my-cool-model', eval_results = EvalResult( task_type='image-classification', dataset_type='beans', dataset_name='Beans', metric_type='accuracy', metric_value=0.7 ) ) card = ModelCard.from_template(card_data) print(card.data) ``` The resulting `card.data` should look like this: ``` language: en license: mit model-index: - name: my-cool-model results: - task: type: image-classification dataset: name: Beans type: beans metrics: - type: accuracy value: 0.7 ``` If you have more than one evaluation result you'd like to share, just pass a list of `EvalResult`: ```python card_data = ModelCardData( language='en', license='mit', model_name='my-cool-model', eval_results = [ EvalResult( task_type='image-classification', dataset_type='beans', dataset_name='Beans', metric_type='accuracy', metric_value=0.7 ), EvalResult( task_type='image-classification', dataset_type='beans', dataset_name='Beans', metric_type='f1', metric_value=0.65 ) ] ) card = ModelCard.from_template(card_data) card.data ``` Which should leave you with the following `card.data`: ``` language: en license: mit model-index: - name: my-cool-model results: - task: type: image-classification dataset: name: Beans type: beans metrics: - type: accuracy value: 0.7 - type: f1 value: 0.65 ``` # Interact with the Hub through the Filesystem API In addition to the `HfApi`, the `huggingface_hub` library provides `HfFileSystem`, a pythonic [fsspec-compatible](https://filesystem-spec.readthedocs.io/en/latest/) file interface to the Hugging Face Hub. The `HfFileSystem` builds on top of the `HfApi` and offers typical filesystem style operations like `cp`, `mv`, `ls`, `du`, `glob`, `get_file`, and `put_file`. `HfFileSystem` provides fsspec compatibility, which is useful for libraries that require it (e.g., reading Hugging Face datasets directly with `pandas`). However, it introduces additional overhead due to this compatibility layer. For better performance and reliability, it's recommended to use `HfApi` methods when possible. ## Usage ```python >>> from huggingface_hub import HfFileSystem >>> fs = HfFileSystem() >>> # List all files in a directory >>> fs.ls("datasets/my-username/my-dataset-repo/data", detail=False) ['datasets/my-username/my-dataset-repo/data/train.csv', 'datasets/my-username/my-dataset-repo/data/test.csv'] >>> # List all ".csv" files in a repo >>> fs.glob("datasets/my-username/my-dataset-repo/**/*.csv") ['datasets/my-username/my-dataset-repo/data/train.csv', 'datasets/my-username/my-dataset-repo/data/test.csv'] >>> # Read a remote file >>> with fs.open("datasets/my-username/my-dataset-repo/data/train.csv", "r") as f: ... train_data = f.readlines() >>> # Read the content of a remote file as a string >>> train_data = fs.read_text("datasets/my-username/my-dataset-repo/data/train.csv", revision="dev") >>> # Write a remote file >>> with fs.open("datasets/my-username/my-dataset-repo/data/validation.csv", "w") as f: ... f.write("text,label") ... f.write("Fantastic movie!,good") ``` The optional `revision` argument can be passed to run an operation from a specific commit such as a branch, tag name, or a commit hash. Unlike Python's built-in `open`, `fsspec`'s `open` defaults to binary mode, `"rb"`. This means you must explicitly set mode as `"r"` for reading and `"w"` for writing in text mode. Appending to a file (modes `"a"` and `"ab"`) is not supported yet. ## Integrations The `HfFileSystem` can be used with any library that integrates `fsspec`, provided the URL follows the scheme: ``` hf://[][@]/ ```
The `repo_type_prefix` is `datasets/` for datasets, `spaces/` for spaces, and models don't need a prefix in the URL. Some interesting integrations where `HfFileSystem` simplifies interacting with the Hub are listed below: * Reading/writing a [Pandas](https://pandas.pydata.org/pandas-docs/stable/user_guide/io.html#reading-writing-remote-files) DataFrame from/to a Hub repository: ```python >>> import pandas as pd >>> # Read a remote CSV file into a dataframe >>> df = pd.read_csv("hf://datasets/my-username/my-dataset-repo/train.csv") >>> # Write a dataframe to a remote CSV file >>> df.to_csv("hf://datasets/my-username/my-dataset-repo/test.csv") ``` The same workflow can also be used for [Dask](https://docs.dask.org/en/stable/how-to/connect-to-remote-data.html) and [Polars](https://pola-rs.github.io/polars/py-polars/html/reference/io.html) DataFrames. * Querying (remote) Hub files with [DuckDB](https://duckdb.org/docs/guides/python/filesystems): ```python >>> from huggingface_hub import HfFileSystem >>> import duckdb >>> fs = HfFileSystem() >>> duckdb.register_filesystem(fs) >>> # Query a remote file and get the result back as a dataframe >>> fs_query_file = "hf://datasets/my-username/my-dataset-repo/data_dir/data.parquet" >>> df = duckdb.query(f"SELECT * FROM '{fs_query_file}' LIMIT 10").df() ``` * Using the Hub as an array store with [Zarr](https://zarr.readthedocs.io/en/stable/tutorial.html#io-with-fsspec): ```python >>> import numpy as np >>> import zarr >>> embeddings = np.random.randn(50000, 1000).astype("float32") >>> # Write an array to a repo >>> with zarr.open_group("hf://my-username/my-model-repo/array-store", mode="w") as root: ... foo = root.create_group("embeddings") ... foobar = foo.zeros('experiment_0', shape=(50000, 1000), chunks=(10000, 1000), dtype='f4') ... foobar[:] = embeddings >>> # Read an array from a repo >>> with zarr.open_group("hf://my-username/my-model-repo/array-store", mode="r") as root: ... first_row = root["embeddings/experiment_0"][0] ``` ## Authentication In many cases, you must be logged in with a Hugging Face account to interact with the Hub. Refer to the [Authentication](../quick-start#authentication) section of the documentation to learn more about authentication methods on the Hub. It is also possible to log in programmatically by passing your `token` as an argument to `HfFileSystem`: ```python >>> from huggingface_hub import HfFileSystem >>> fs = HfFileSystem(token=token) ``` If you log in this way, be careful not to accidentally leak the token when sharing your source code! # Create and manage a repository The Hugging Face Hub is a collection of git repositories. [Git](https://git-scm.com/) is a widely used tool in software development to easily version projects when working collaboratively. This guide will show you how to interact with the repositories on the Hub, especially: - Create and delete a repository. - Manage branches and tags. - Rename your repository. - Update your repository visibility. - Manage a local copy of your repository. If you are used to working with platforms such as GitLab/GitHub/Bitbucket, your first instinct might be to use `git` CLI to clone your repo (`git clone`), commit changes (`git add, git commit`) and push them (`git push`). This is valid when using the Hugging Face Hub. However, software engineering and machine learning do not share the same requirements and workflows. Model repositories might maintain large model weight files for different frameworks and tools, so cloning the repository can lead to you maintaining large local folders with massive sizes. As a result, it may be more efficient to use our custom HTTP methods. You can read our [Git vs HTTP paradigm](../concepts/git_vs_http) explanation page for more details. If you want to create and manage a repository on the Hub, your machine must be logged in. If you are not, please refer to [this section](../quick-start#authentication). In the rest of this guide, we will assume that your machine is logged in. ## Repo creation and deletion The first step is to know how to create and delete repositories. You can only manage repositories that you own (under your username namespace) or from organizations in which you have write permissions. ### Create a repository Create an empty repository with `create_repo()` and give it a name with the `repo_id` parameter. The `repo_id` is your namespace followed by the repository name: `username_or_org/repo_name`. ```py >>> from huggingface_hub import create_repo >>> create_repo("lysandre/test-model") 'https://huggingface.co/lysandre/test-model' ``` By default, `create_repo()` creates a model repository. But you can use the `repo_type` parameter to specify another repository type. For example, if you want to create a dataset repository: ```py >>> from huggingface_hub import create_repo >>> create_repo("lysandre/test-dataset", repo_type="dataset") 'https://huggingface.co/datasets/lysandre/test-dataset' ``` When you create a repository, you can set your repository visibility with the `private` parameter. ```py >>> from huggingface_hub import create_repo >>> create_repo("lysandre/test-private", private=True) ``` If you want to change the repository visibility at a later time, you can use the `update_repo_visibility()` function. If you are part of an organization with an Enterprise plan, you can create a repo in a specific resource group by passing `resource_group_id` as parameter to `create_repo()`. Resource groups are a security feature to control which members from your org can access a given resource. You can get the resource group ID by copying it from your org settings page url on the Hub (e.g. `"https://huggingface.co/organizations/huggingface/settings/resource-groups/66670e5163145ca562cb1988"` => `"66670e5163145ca562cb1988"`). For more details about resource group, check out this [guide](https://huggingface.co/docs/hub/en/security-resource-groups). ### Delete a repository Delete a repository with `delete_repo()`. Make sure you want to delete a repository because this is an irreversible process! Specify the `repo_id` of the repository you want to delete: ```py >>> delete_repo(repo_id="lysandre/my-corrupted-dataset", repo_type="dataset") ``` ### Duplicate a repository (only for Spaces) In some cases, you want to copy someone else's repo to adapt it to your use case. This is possible for Spaces using the `duplicate_space()` method. It will duplicate the whole repository. You will still need to configure your own settings (hardware, sleep-time, storage, variables and secrets). Check out our [Manage your Space](./manage-spaces) guide for more details. ```py >>> from huggingface_hub import duplicate_space >>> duplicate_space("multimodalart/dreambooth-training", private=False) RepoUrl('https://huggingface.co/spaces/nateraw/dreambooth-training',...) ``` ## Upload and download files Now that you have created your repository, you are interested in pushing changes to it and downloading files from it. These 2 topics deserve their own guides. Please refer to the [upload](./upload) and the [download](./download) guides to learn how to use your repository. ## Branches and tags Git repositories often make use of branches to store different versions of a same repository. Tags can also be used to flag a specific state of your repository, for example, when releasing a version. More generally, branches and tags are referred as [git references](https://git-scm.com/book/en/v2/Git-Internals-Git-References). ### Create branches and tags You can create new branch and tags using `create_branch()` and `create_tag()`: ```py >>> from huggingface_hub import create_branch, create_tag # Create a branch on a Space repo from `main` branch >>> create_branch("Matthijs/speecht5-tts-demo", repo_type="space", branch="handle-dog-speaker") # Create a tag on a Dataset repo from `v0.1-release` branch >>> create_tag("bigcode/the-stack", repo_type="dataset", revision="v0.1-release", tag="v0.1.1", tag_message="Bump release version.") ``` You can use the `delete_branch()` and `delete_tag()` functions in the same way to delete a branch or a tag. ### List all branches and tags You can also list the existing git refs from a repository using `list_repo_refs()`: ```py >>> from huggingface_hub import list_repo_refs >>> list_repo_refs("bigcode/the-stack", repo_type="dataset") GitRefs( branches=[ GitRefInfo(name='main', ref='refs/heads/main', target_commit='18edc1591d9ce72aa82f56c4431b3c969b210ae3'), GitRefInfo(name='v1.1.a1', ref='refs/heads/v1.1.a1', target_commit='f9826b862d1567f3822d3d25649b0d6d22ace714') ], converts=[], tags=[ GitRefInfo(name='v1.0', ref='refs/tags/v1.0', target_commit='c37a8cd1e382064d8aced5e05543c5f7753834da') ] ) ``` ## Change repository settings Repositories come with some settings that you can configure. Most of the time, you will want to do that manually in the repo settings page in your browser. You must have write access to a repo to configure it (either own it or being part of an organization). In this section, we will see the settings that you can also configure programmatically using `huggingface_hub`. Some settings are specific to Spaces (hardware, environment variables,...). To configure those, please refer to our [Manage your Spaces](../guides/manage-spaces) guide. ### Update visibility A repository can be public or private. A private repository is only visible to you or members of the organization in which the repository is located. Change a repository to private as shown in the following: ```py >>> from huggingface_hub import update_repo_settings >>> update_repo_settings(repo_id=repo_id, private=True) ``` ### Setup gated access To give more control over how repos are used, the Hub allows repo authors to enable **access requests** for their repos. User must agree to share their contact information (username and email address) with the repo authors to access the files when enabled. A repo with access requests enabled is called a **gated repo**. You can set a repo as gated using `update_repo_settings()`: ```py >>> from huggingface_hub import HfApi >>> api = HfApi() >>> api.update_repo_settings(repo_id=repo_id, gated="auto") # Set automatic gating for a model ``` ### Rename your repository You can rename your repository on the Hub using `move_repo()`. Using this method, you can also move the repo from a user to an organization. When doing so, there are a [few limitations](https://hf.co/docs/hub/repositories-settings#renaming-or-transferring-a-repo) that you should be aware of. For example, you can't transfer your repo to another user. ```py >>> from huggingface_hub import move_repo >>> move_repo(from_id="Wauplin/cool-model", to_id="huggingface/cool-model") ``` ## Manage a local copy of your repository All the actions described above can be done using HTTP requests. However, in some cases you might be interested in having a local copy of your repository and interact with it using the Git commands you are familiar with. The `Repository` class allows you to interact with files and repositories on the Hub with functions similar to Git commands. It is a wrapper over Git and Git-LFS methods to use the Git commands you already know and love. Before starting, please make sure you have Git-LFS installed (see [here](https://git-lfs.github.com/) for installation instructions). `Repository` is deprecated in favor of the http-based alternatives implemented in `HfApi`. Given its large adoption in legacy code, the complete removal of `Repository` will only happen in release `v1.0`. For more details, please read [this explanation page](./concepts/git_vs_http). ### Use a local repository Instantiate a `Repository` object with a path to a local repository: ```py >>> from huggingface_hub import Repository >>> repo = Repository(local_dir="//") ``` ### Clone The `clone_from` parameter clones a repository from a Hugging Face repository ID to a local directory specified by the `local_dir` argument: ```py >>> from huggingface_hub import Repository >>> repo = Repository(local_dir="w2v2", clone_from="facebook/wav2vec2-large-960h-lv60") ``` `clone_from` can also clone a repository using a URL: ```py >>> repo = Repository(local_dir="huggingface-hub", clone_from="https://huggingface.co/facebook/wav2vec2-large-960h-lv60") ``` You can combine the `clone_from` parameter with `create_repo()` to create and clone a repository: ```py >>> repo_url = create_repo(repo_id="repo_name") >>> repo = Repository(local_dir="repo_local_path", clone_from=repo_url) ``` You can also configure a Git username and email to a cloned repository by specifying the `git_user` and `git_email` parameters when you clone a repository. When users commit to that repository, Git will be aware of the commit author. ```py >>> repo = Repository( ... "my-dataset", ... clone_from="/", ... token=True, ... repo_type="dataset", ... git_user="MyName", ... git_email="me@cool.mail" ... ) ``` ### Branch Branches are important for collaboration and experimentation without impacting your current files and code. Switch between branches with `git_checkout()`. For example, if you want to switch from `branch1` to `branch2`: ```py >>> from huggingface_hub import Repository >>> repo = Repository(local_dir="huggingface-hub", clone_from="/", revision='branch1') >>> repo.git_checkout("branch2") ``` ### Pull `git_pull()` allows you to update a current local branch with changes from a remote repository: ```py >>> from huggingface_hub import Repository >>> repo.git_pull() ``` Set `rebase=True` if you want your local commits to occur after your branch is updated with the new commits from the remote: ```py >>> repo.git_pull(rebase=True) ``` # Collections A collection is a group of related items on the Hub (models, datasets, Spaces, papers) that are organized together on the same page. Collections are useful for creating your own portfolio, bookmarking content in categories, or presenting a curated list of items you want to share. Check out this [guide](https://huggingface.co/docs/hub/collections) to understand in more detail what collections are and how they look on the Hub. You can directly manage collections in the browser, but in this guide, we will focus on how to manage them programmatically. ## Fetch a collection Use `get_collection()` to fetch your collections or any public ones. You must have the collection's *slug* to retrieve a collection. A slug is an identifier for a collection based on the title and a unique ID. You can find the slug in the URL of the collection page.
Let's fetch the collection with, `"TheBloke/recent-models-64f9a55bb3115b4f513ec026"`: ```py >>> from huggingface_hub import get_collection >>> collection = get_collection("TheBloke/recent-models-64f9a55bb3115b4f513ec026") >>> collection Collection( slug='TheBloke/recent-models-64f9a55bb3115b4f513ec026', title='Recent models', owner='TheBloke', items=[...], last_updated=datetime.datetime(2023, 10, 2, 22, 56, 48, 632000, tzinfo=datetime.timezone.utc), position=1, private=False, theme='green', upvotes=90, description="Models I've recently quantized. Please note that currently this list has to be updated manually, and therefore is not guaranteed to be up-to-date." ) >>> collection.items[0] CollectionItem( item_object_id='651446103cd773a050bf64c2', item_id='TheBloke/U-Amethyst-20B-AWQ', item_type='model', position=88, note=None ) ``` The `Collection` object returned by `get_collection()` contains: - high-level metadata: `slug`, `owner`, `title`, `description`, etc. - a list of `CollectionItem` objects; each item represents a model, a dataset, a Space, or a paper. All collection items are guaranteed to have: - a unique `item_object_id`: this is the id of the collection item in the database - an `item_id`: this is the id on the Hub of the underlying item (model, dataset, Space, paper); it is not necessarily unique, and only the `item_id`/`item_type` pair is unique - an `item_type`: model, dataset, Space, paper - the `position` of the item in the collection, which can be updated to reorganize your collection (see `update_collection_item()` below) A `note` can also be attached to the item. This is useful to add additional information about the item (a comment, a link to a blog post, etc.). The attribute still has a `None` value if an item doesn't have a note. In addition to these base attributes, returned items can have additional attributes depending on their type: `author`, `private`, `lastModified`, `gated`, `title`, `likes`, `upvotes`, etc. None of these attributes are guaranteed to be returned. ## List collections We can also retrieve collections using `list_collections()`. Collections can be filtered using some parameters. Let's list all the collections from the user [`teknium`](https://huggingface.co/teknium). ```py >>> from huggingface_hub import list_collections >>> collections = list_collections(owner="teknium") ``` This returns an iterable of `Collection` objects. We can iterate over them to print, for example, the number of upvotes for each collection. ```py >>> for collection in collections: ... print("Number of upvotes:", collection.upvotes) Number of upvotes: 1 Number of upvotes: 5 ``` When listing collections, the item list per collection is truncated to 4 items maximum. To retrieve all items from a collection, you must use `get_collection()`. It is possible to do more advanced filtering. Let's get all collections containing the model [TheBloke/OpenHermes-2.5-Mistral-7B-GGUF](https://huggingface.co/TheBloke/OpenHermes-2.5-Mistral-7B-GGUF), sorted by trending, and limit the count to 5. ```py >>> collections = list_collections(item="models/TheBloke/OpenHermes-2.5-Mistral-7B-GGUF", sort="trending", limit=5): >>> for collection in collections: ... print(collection.slug) teknium/quantized-models-6544690bb978e0b0f7328748 AmeerH/function-calling-65560a2565d7a6ef568527af PostArchitekt/7bz-65479bb8c194936469697d8c gnomealone/need-to-test-652007226c6ce4cdacf9c233 Crataco/favorite-7b-models-651944072b4fffcb41f8b568 ``` Parameter `sort` must be one of `"last_modified"`, `"trending"` or `"upvotes"`. Parameter `item` accepts any particular item. For example: * `"models/teknium/OpenHermes-2.5-Mistral-7B"` * `"spaces/julien-c/open-gpt-rhyming-robot"` * `"datasets/squad"` * `"papers/2311.12983"` For more details, please check out `list_collections()` reference. ## Create a new collection Now that we know how to get a `Collection`, let's create our own! Use `create_collection()` with a title and description. To create a collection on an organization page, pass `namespace="my-cool-org"` when creating the collection. Finally, you can also create private collections by passing `private=True`. ```py >>> from huggingface_hub import create_collection >>> collection = create_collection( ... title="ICCV 2023", ... description="Portfolio of models, papers and demos I presented at ICCV 2023", ... ) ``` It will return a `Collection` object with the high-level metadata (title, description, owner, etc.) and an empty list of items. You will now be able to refer to this collection using its `slug`. ```py >>> collection.slug 'owner/iccv-2023-15e23b46cb98efca45' >>> collection.title "ICCV 2023" >>> collection.owner "username" >>> collection.url 'https://huggingface.co/collections/owner/iccv-2023-15e23b46cb98efca45' ``` ## Manage items in a collection Now that we have a `Collection`, we want to add items to it and organize them. ### Add items Items have to be added one by one using `add_collection_item()`. You only need to know the `collection_slug`, `item_id` and `item_type`. Optionally, you can also add a `note` to the item (500 characters maximum). ```py >>> from huggingface_hub import create_collection, add_collection_item >>> collection = create_collection(title="OS Week Highlights - Sept 18 - 24", namespace="osanseviero") >>> collection.slug "osanseviero/os-week-highlights-sept-18-24-650bfed7f795a59f491afb80" >>> add_collection_item(collection.slug, item_id="coqui/xtts", item_type="space") >>> add_collection_item( ... collection.slug, ... item_id="warp-ai/wuerstchen", ... item_type="model", ... note="Würstchen is a new fast and efficient high resolution text-to-image architecture and model" ... ) >>> add_collection_item(collection.slug, item_id="lmsys/lmsys-chat-1m", item_type="dataset") >>> add_collection_item(collection.slug, item_id="warp-ai/wuerstchen", item_type="space") # same item_id, different item_type ``` If an item already exists in a collection (same `item_id`/`item_type` pair), an HTTP 409 error will be raised. You can choose to ignore this error by setting `exists_ok=True`. ### Add a note to an existing item You can modify an existing item to add or modify the note attached to it using `update_collection_item()`. Let's reuse the example above: ```py >>> from huggingface_hub import get_collection, update_collection_item # Fetch collection with newly added items >>> collection_slug = "osanseviero/os-week-highlights-sept-18-24-650bfed7f795a59f491afb80" >>> collection = get_collection(collection_slug) # Add note the `lmsys-chat-1m` dataset >>> update_collection_item( ... collection_slug=collection_slug, ... item_object_id=collection.items[2].item_object_id, ... note="This dataset contains one million real-world conversations with 25 state-of-the-art LLMs.", ... ) ``` ### Reorder items Items in a collection are ordered. The order is determined by the `position` attribute of each item. By default, items are ordered by appending new items at the end of the collection. You can update the order using `update_collection_item()` the same way you would add a note. Let's reuse our example above: ```py >>> from huggingface_hub import get_collection, update_collection_item # Fetch collection >>> collection_slug = "osanseviero/os-week-highlights-sept-18-24-650bfed7f795a59f491afb80" >>> collection = get_collection(collection_slug) # Reorder to place the two `Wuerstchen` items together >>> update_collection_item( ... collection_slug=collection_slug, ... item_object_id=collection.items[3].item_object_id, ... position=2, ... ) ``` ### Remove items Finally, you can also remove an item using `delete_collection_item()`. ```py >>> from huggingface_hub import get_collection, update_collection_item # Fetch collection >>> collection_slug = "osanseviero/os-week-highlights-sept-18-24-650bfed7f795a59f491afb80" >>> collection = get_collection(collection_slug) # Remove `coqui/xtts` Space from the list >>> delete_collection_item(collection_slug=collection_slug, item_object_id=collection.items[0].item_object_id) ``` ## Delete collection A collection can be deleted using `delete_collection()`. This is a non-revertible action. A deleted collection cannot be restored. ```py >>> from huggingface_hub import delete_collection >>> collection = delete_collection("username/useless-collection-64f9a55bb3115b4f513ec026", missing_ok=True) ``` # Upload files to the Hub Sharing your files and work is an important aspect of the Hub. The `huggingface_hub` offers several options for uploading your files to the Hub. You can use these functions independently or integrate them into your library, making it more convenient for your users to interact with the Hub. This guide will show you how to push files: - without using Git. - that are very large with [Git LFS](https://git-lfs.github.com/). - with the `commit` context manager. - with the `push_to_hub()` function. Whenever you want to upload files to the Hub, you need to log in to your Hugging Face account. For more details about authentication, check out [this section](../quick-start#authentication). ## Upload a file Once you've created a repository with `create_repo()`, you can upload a file to your repository using `upload_file()`. Specify the path of the file to upload, where you want to upload the file to in the repository, and the name of the repository you want to add the file to. Depending on your repository type, you can optionally set the repository type as a `dataset`, `model`, or `space`. ```py >>> from huggingface_hub import HfApi >>> api = HfApi() >>> api.upload_file( ... path_or_fileobj="/path/to/local/folder/README.md", ... path_in_repo="README.md", ... repo_id="username/test-dataset", ... repo_type="dataset", ... ) ``` ## Upload a folder Use the `upload_folder()` function to upload a local folder to an existing repository. Specify the path of the local folder to upload, where you want to upload the folder to in the repository, and the name of the repository you want to add the folder to. Depending on your repository type, you can optionally set the repository type as a `dataset`, `model`, or `space`. ```py >>> from huggingface_hub import HfApi >>> api = HfApi() # Upload all the content from the local folder to your remote Space. # By default, files are uploaded at the root of the repo >>> api.upload_folder( ... folder_path="/path/to/local/space", ... repo_id="username/my-cool-space", ... repo_type="space", ... ) ``` By default, the `.gitignore` file will be taken into account to know which files should be committed or not. By default we check if a `.gitignore` file is present in a commit, and if not, we check if it exists on the Hub. Please be aware that only a `.gitignore` file present at the root of the directory with be used. We do not check for `.gitignore` files in subdirectories. If you don't want to use an hardcoded `.gitignore` file, you can use the `allow_patterns` and `ignore_patterns` arguments to filter which files to upload. These parameters accept either a single pattern or a list of patterns. Patterns are Standard Wildcards (globbing patterns) as documented [here](https://tldp.org/LDP/GNU-Linux-Tools-Summary/html/x11655.htm). If both `allow_patterns` and `ignore_patterns` are provided, both constraints apply. Beside the `.gitignore` file and allow/ignore patterns, any `.git/` folder present in any subdirectory will be ignored. ```py >>> api.upload_folder( ... folder_path="/path/to/local/folder", ... path_in_repo="my-dataset/train", # Upload to a specific folder ... repo_id="username/test-dataset", ... repo_type="dataset", ... ignore_patterns="**/logs/*.txt", # Ignore all text logs ... ) ``` You can also use the `delete_patterns` argument to specify files you want to delete from the repo in the same commit. This can prove useful if you want to clean a remote folder before pushing files in it and you don't know which files already exists. The example below uploads the local `./logs` folder to the remote `/experiment/logs/` folder. Only txt files are uploaded but before that, all previous logs on the repo on deleted. All of this in a single commit. ```py >>> api.upload_folder( ... folder_path="/path/to/local/folder/logs", ... repo_id="username/trained-model", ... path_in_repo="experiment/logs/", ... allow_patterns="*.txt", # Upload all local text files ... delete_patterns="*.txt", # Delete all remote text files before ... ) ``` ## Upload from the CLI You can use the `huggingface-cli upload` command from the terminal to directly upload files to the Hub. Internally it uses the same `upload_file()` and `upload_folder()` helpers described above. You can either upload a single file or an entire folder: ```bash # Usage: huggingface-cli upload [repo_id] [local_path] [path_in_repo] >>> huggingface-cli upload Wauplin/my-cool-model ./models/model.safetensors model.safetensors https://huggingface.co/Wauplin/my-cool-model/blob/main/model.safetensors >>> huggingface-cli upload Wauplin/my-cool-model ./models . https://huggingface.co/Wauplin/my-cool-model/tree/main ``` `local_path` and `path_in_repo` are optional and can be implicitly inferred. If `local_path` is not set, the tool will check if a local folder or file has the same name as the `repo_id`. If that's the case, its content will be uploaded. Otherwise, an exception is raised asking the user to explicitly set `local_path`. In any case, if `path_in_repo` is not set, files are uploaded at the root of the repo. For more details about the CLI upload command, please refer to the [CLI guide](./cli#huggingface-cli-upload). ## Upload a large folder In most cases, the `upload_folder()` method and `huggingface-cli upload` command should be the go-to solutions to upload files to the Hub. They ensure a single commit will be made, handle a lot of use cases, and fail explicitly when something wrong happens. However, when dealing with a large amount of data, you will usually prefer a resilient process even if it leads to more commits or requires more CPU usage. The `upload_large_folder()` method has been implemented in that spirit: - it is resumable: the upload process is split into many small tasks (hashing files, pre-uploading them, and committing them). Each time a task is completed, the result is cached locally in a `./cache/huggingface` folder inside the folder you are trying to upload. By doing so, restarting the process after an interruption will resume all completed tasks. - it is multi-threaded: hashing large files and pre-uploading them benefits a lot from multithreading if your machine allows it. - it is resilient to errors: a high-level retry-mechanism has been added to retry each independent task indefinitely until it passes (no matter if it's a OSError, ConnectionError, PermissionError, etc.). This mechanism is double-edged. If transient errors happen, the process will continue and retry. If permanent errors happen (e.g. permission denied), it will retry indefinitely without solving the root cause. If you want more technical details about how `upload_large_folder` is implemented under the hood, please have a look to the `upload_large_folder()` package reference. Here is how to use `upload_large_folder()` in a script. The method signature is very similar to `upload_folder()`: ```py >>> api.upload_large_folder( ... repo_id="HuggingFaceM4/Docmatix", ... repo_type="dataset", ... folder_path="/path/to/local/docmatix", ... ) ``` You will see the following output in your terminal: ``` Repo created: https://huggingface.co/datasets/HuggingFaceM4/Docmatix Found 5 candidate files to upload Recovering from metadata files: 100%|█████████████████████████████████████| 5/5 [00:00<00:00, 542.66it/s] ---------- 2024-07-22 17:23:17 (0:00:00) ---------- Files: hashed 5/5 (5.0G/5.0G) | pre-uploaded: 0/5 (0.0/5.0G) | committed: 0/5 (0.0/5.0G) | ignored: 0 Workers: hashing: 0 | get upload mode: 0 | pre-uploading: 5 | committing: 0 | waiting: 11 --------------------------------------------------- ``` First, the repo is created if it didn't exist before. Then, the local folder is scanned for files to upload. For each file, we try to recover metadata information (from a previously interrupted upload). From there, it is able to launch workers and print an update status every 1 minute. Here, we can see that 5 files have already been hashed but not pre-uploaded. 5 workers are pre-uploading files while the 11 others are waiting for a task. A command line is also provided. You can define the number of workers and the level of verbosity in the terminal: ```sh huggingface-cli upload-large-folder HuggingFaceM4/Docmatix --repo-type=dataset /path/to/local/docmatix --num-workers=16 ``` For large uploads, you have to set `repo_type="model"` or `--repo-type=model` explicitly. Usually, this information is implicit in all other `HfApi` methods. This is to avoid having data uploaded to a repository with a wrong type. If that's the case, you'll have to re-upload everything. While being much more robust to upload large folders, `upload_large_folder` is more limited than `upload_folder()` feature-wise. In practice: - you cannot set a custom `path_in_repo`. If you want to upload to a subfolder, you need to set the proper structure locally. - you cannot set a custom `commit_message` and `commit_description` since multiple commits are created. - you cannot delete from the repo while uploading. Please make a separate commit first. - you cannot create a PR directly. Please create a PR first (from the UI or using `create_pull_request()`) and then commit to it by passing `revision`. ### Tips and tricks for large uploads There are some limitations to be aware of when dealing with a large amount of data in your repo. Given the time it takes to stream the data, getting an upload/push to fail at the end of the process or encountering a degraded experience, be it on hf.co or when working locally, can be very annoying. Check out our [Repository limitations and recommendations](https://huggingface.co/docs/hub/repositories-recommendations) guide for best practices on how to structure your repositories on the Hub. Let's move on with some practical tips to make your upload process as smooth as possible. - **Start small**: We recommend starting with a small amount of data to test your upload script. It's easier to iterate on a script when failing takes only a little time. - **Expect failures**: Streaming large amounts of data is challenging. You don't know what can happen, but it's always best to consider that something will fail at least once -no matter if it's due to your machine, your connection, or our servers. For example, if you plan to upload a large number of files, it's best to keep track locally of which files you already uploaded before uploading the next batch. You are ensured that an LFS file that is already committed will never be re-uploaded twice but checking it client-side can still save some time. This is what `upload_large_folder()` does for you. - **Use `hf_transfer`**: this is a Rust-based [library](https://github.com/huggingface/hf_transfer) meant to speed up uploads on machines with very high bandwidth. To use `hf_transfer`: 1. Specify the `hf_transfer` extra when installing `huggingface_hub` (i.e., `pip install huggingface_hub[hf_transfer]`). 2. Set `HF_HUB_ENABLE_HF_TRANSFER=1` as an environment variable. `hf_transfer` is a power user tool! It is tested and production-ready, but it lacks user-friendly features like advanced error handling or proxies. For more details, please take a look at this [section](https://huggingface.co/docs/huggingface_hub/hf_transfer). ## Advanced features In most cases, you won't need more than `upload_file()` and `upload_folder()` to upload your files to the Hub. However, `huggingface_hub` has more advanced features to make things easier. Let's have a look at them! ### Non-blocking uploads In some cases, you want to push data without blocking your main thread. This is particularly useful to upload logs and artifacts while continuing a training. To do so, you can use the `run_as_future` argument in both `upload_file()` and `upload_folder()`. This will return a [`concurrent.futures.Future`](https://docs.python.org/3/library/concurrent.futures.html#future-objects) object that you can use to check the status of the upload. ```py >>> from huggingface_hub import HfApi >>> api = HfApi() >>> future = api.upload_folder( # Upload in the background (non-blocking action) ... repo_id="username/my-model", ... folder_path="checkpoints-001", ... run_as_future=True, ... ) >>> future Future(...) >>> future.done() False >>> future.result() # Wait for the upload to complete (blocking action) ... ``` Background jobs are queued when using `run_as_future=True`. This means that you are guaranteed that the jobs will be executed in the correct order. Even though background jobs are mostly useful to upload data/create commits, you can queue any method you like using `run_as_future()`. For instance, you can use it to create a repo and then upload data to it in the background. The built-in `run_as_future` argument in upload methods is just an alias around it. ```py >>> from huggingface_hub import HfApi >>> api = HfApi() >>> api.run_as_future(api.create_repo, "username/my-model", exists_ok=True) Future(...) >>> api.upload_file( ... repo_id="username/my-model", ... path_in_repo="file.txt", ... path_or_fileobj=b"file content", ... run_as_future=True, ... ) Future(...) ``` ### Upload a folder by chunks `upload_folder()` makes it easy to upload an entire folder to the Hub. However, for large folders (thousands of files or hundreds of GB), we recommend using `upload_large_folder()`, which splits the upload into multiple commits. See the [Upload a large folder](#upload-a-large-folder) section for more details. ### Scheduled uploads The Hugging Face Hub makes it easy to save and version data. However, there are some limitations when updating the same file thousands of times. For instance, you might want to save logs of a training process or user feedback on a deployed Space. In these cases, uploading the data as a dataset on the Hub makes sense, but it can be hard to do properly. The main reason is that you don't want to version every update of your data because it'll make the git repository unusable. The `CommitScheduler` class offers a solution to this problem. The idea is to run a background job that regularly pushes a local folder to the Hub. Let's assume you have a Gradio Space that takes as input some text and generates two translations of it. Then, the user can select their preferred translation. For each run, you want to save the input, output, and user preference to analyze the results. This is a perfect use case for `CommitScheduler`; you want to save data to the Hub (potentially millions of user feedback), but you don't _need_ to save in real-time each user's input. Instead, you can save the data locally in a JSON file and upload it every 10 minutes. For example: ```py >>> import json >>> import uuid >>> from pathlib import Path >>> import gradio as gr >>> from huggingface_hub import CommitScheduler # Define the file where to save the data. Use UUID to make sure not to overwrite existing data from a previous run. >>> feedback_file = Path("user_feedback/") / f"data_{uuid.uuid4()}.json" >>> feedback_folder = feedback_file.parent # Schedule regular uploads. Remote repo and local folder are created if they don't already exist. >>> scheduler = CommitScheduler( ... repo_id="report-translation-feedback", ... repo_type="dataset", ... folder_path=feedback_folder, ... path_in_repo="data", ... every=10, ... ) # Define the function that will be called when the user submits its feedback (to be called in Gradio) >>> def save_feedback(input_text:str, output_1: str, output_2:str, user_choice: int) -> None: ... """ ... Append input/outputs and user feedback to a JSON Lines file using a thread lock to avoid concurrent writes from different users. ... """ ... with scheduler.lock: ... with feedback_file.open("a") as f: ... f.write(json.dumps({"input": input_text, "output_1": output_1, "output_2": output_2, "user_choice": user_choice})) ... f.write("\n") # Start Gradio >>> with gr.Blocks() as demo: >>> ... # define Gradio demo + use `save_feedback` >>> demo.launch() ``` And that's it! User input/outputs and feedback will be available as a dataset on the Hub. By using a unique JSON file name, you are guaranteed you won't overwrite data from a previous run or data from another Spaces/replicas pushing concurrently to the same repository. For more details about the `CommitScheduler`, here is what you need to know: - **append-only:** It is assumed that you will only add content to the folder. You must only append data to existing files or create new files. Deleting or overwriting a file might corrupt your repository. - **git history**: The scheduler will commit the folder every `every` minutes. To avoid polluting the git repository too much, it is recommended to set a minimal value of 5 minutes. Besides, the scheduler is designed to avoid empty commits. If no new content is detected in the folder, the scheduled commit is dropped. - **errors:** The scheduler run as background thread. It is started when you instantiate the class and never stops. In particular, if an error occurs during the upload (example: connection issue), the scheduler will silently ignore it and retry at the next scheduled commit. - **thread-safety:** In most cases it is safe to assume that you can write to a file without having to worry about a lock file. The scheduler will not crash or be corrupted if you write content to the folder while it's uploading. In practice, _it is possible_ that concurrency issues happen for heavy-loaded apps. In this case, we advice to use the `scheduler.lock` lock to ensure thread-safety. The lock is blocked only when the scheduler scans the folder for changes, not when it uploads data. You can safely assume that it will not affect the user experience on your Space. #### Space persistence demo Persisting data from a Space to a Dataset on the Hub is the main use case for `CommitScheduler`. Depending on the use case, you might want to structure your data differently. The structure has to be robust to concurrent users and restarts which often implies generating UUIDs. Besides robustness, you should upload data in a format readable by the 🤗 Datasets library for later reuse. We created a [Space](https://huggingface.co/spaces/Wauplin/space_to_dataset_saver) that demonstrates how to save several different data formats (you may need to adapt it for your own specific needs). #### Custom uploads `CommitScheduler` assumes your data is append-only and should be uploading "as is". However, you might want to customize the way data is uploaded. You can do that by creating a class inheriting from `CommitScheduler` and overwrite the `push_to_hub` method (feel free to overwrite it any way you want). You are guaranteed it will be called every `every` minutes in a background thread. You don't have to worry about concurrency and errors but you must be careful about other aspects, such as pushing empty commits or duplicated data. In the (simplified) example below, we overwrite `push_to_hub` to zip all PNG files in a single archive to avoid overloading the repo on the Hub: ```py class ZipScheduler(CommitScheduler): def push_to_hub(self): # 1. List PNG files png_files = list(self.folder_path.glob("*.png")) if len(png_files) == 0: return None # return early if nothing to commit # 2. Zip png files in a single archive with tempfile.TemporaryDirectory() as tmpdir: archive_path = Path(tmpdir) / "train.zip" with zipfile.ZipFile(archive_path, "w", zipfile.ZIP_DEFLATED) as zip: for png_file in png_files: zip.write(filename=png_file, arcname=png_file.name) # 3. Upload archive self.api.upload_file(..., path_or_fileobj=archive_path) # 4. Delete local png files to avoid re-uploading them later for png_file in png_files: png_file.unlink() ``` When you overwrite `push_to_hub`, you have access to the attributes of `CommitScheduler` and especially: - `HfApi` client: `api` - Folder parameters: `folder_path` and `path_in_repo` - Repo parameters: `repo_id`, `repo_type`, `revision` - The thread lock: `lock` For more examples of custom schedulers, check out our [demo Space](https://huggingface.co/spaces/Wauplin/space_to_dataset_saver) containing different implementations depending on your use cases. ### create_commit The `upload_file()` and `upload_folder()` functions are high-level APIs that are generally convenient to use. We recommend trying these functions first if you don't need to work at a lower level. However, if you want to work at a commit-level, you can use the `create_commit()` function directly. There are three types of operations supported by `create_commit()`: - `CommitOperationAdd` uploads a file to the Hub. If the file already exists, the file contents are overwritten. This operation accepts two arguments: - `path_in_repo`: the repository path to upload a file to. - `path_or_fileobj`: either a path to a file on your filesystem or a file-like object. This is the content of the file to upload to the Hub. - `CommitOperationDelete` removes a file or a folder from a repository. This operation accepts `path_in_repo` as an argument. - `CommitOperationCopy` copies a file within a repository. This operation accepts three arguments: - `src_path_in_repo`: the repository path of the file to copy. - `path_in_repo`: the repository path where the file should be copied. - `src_revision`: optional - the revision of the file to copy if your want to copy a file from a different branch/revision. For example, if you want to upload two files and delete a file in a Hub repository: 1. Use the appropriate `CommitOperation` to add or delete a file and to delete a folder: ```py >>> from huggingface_hub import HfApi, CommitOperationAdd, CommitOperationDelete >>> api = HfApi() >>> operations = [ ... CommitOperationAdd(path_in_repo="LICENSE.md", path_or_fileobj="~/repo/LICENSE.md"), ... CommitOperationAdd(path_in_repo="weights.h5", path_or_fileobj="~/repo/weights-final.h5"), ... CommitOperationDelete(path_in_repo="old-weights.h5"), ... CommitOperationDelete(path_in_repo="logs/"), ... CommitOperationCopy(src_path_in_repo="image.png", path_in_repo="duplicate_image.png"), ... ] ``` 2. Pass your operations to `create_commit()`: ```py >>> api.create_commit( ... repo_id="lysandre/test-model", ... operations=operations, ... commit_message="Upload my model weights and license", ... ) ``` In addition to `upload_file()` and `upload_folder()`, the following functions also use `create_commit()` under the hood: - `delete_file()` deletes a single file from a repository on the Hub. - `delete_folder()` deletes an entire folder from a repository on the Hub. - `metadata_update()` updates a repository's metadata. For more detailed information, take a look at the `HfApi` reference. ### Preupload LFS files before commit In some cases, you might want to upload huge files to S3 **before** making the commit call. For example, if you are committing a dataset in several shards that are generated in-memory, you would need to upload the shards one by one to avoid an out-of-memory issue. A solution is to upload each shard as a separate commit on the repo. While being perfectly valid, this solution has the drawback of potentially messing the git history by generating tens of commits. To overcome this issue, you can upload your files one by one to S3 and then create a single commit at the end. This is possible using `preupload_lfs_files()` in combination with `create_commit()`. This is a power-user method. Directly using `upload_file()`, `upload_folder()` or `create_commit()` instead of handling the low-level logic of pre-uploading files is the way to go in the vast majority of cases. The main caveat of `preupload_lfs_files()` is that until the commit is actually made, the upload files are not accessible on the repo on the Hub. If you have a question, feel free to ping us on our Discord or in a GitHub issue. Here is a simple example illustrating how to pre-upload files: ```py >>> from huggingface_hub import CommitOperationAdd, preupload_lfs_files, create_commit, create_repo >>> repo_id = create_repo("test_preupload").repo_id >>> operations = [] # List of all `CommitOperationAdd` objects that will be generated >>> for i in range(5): ... content = ... # generate binary content ... addition = CommitOperationAdd(path_in_repo=f"shard_{i}_of_5.bin", path_or_fileobj=content) ... preupload_lfs_files(repo_id, additions=[addition]) ... operations.append(addition) >>> # Create commit >>> create_commit(repo_id, operations=operations, commit_message="Commit all shards") ``` First, we create the `CommitOperationAdd` objects one by one. In a real-world example, those would contain the generated shards. Each file is uploaded before generating the next one. During the `preupload_lfs_files()` step, **the `CommitOperationAdd` object is mutated**. You should only use it to pass it directly to `create_commit()`. The main update of the object is that **the binary content is removed** from it, meaning that it will be garbage-collected if you don't store another reference to it. This is expected as we don't want to keep in memory the content that is already uploaded. Finally we create the commit by passing all the operations to `create_commit()`. You can pass additional operations (add, delete or copy) that have not been processed yet and they will be handled correctly. ## (legacy) Upload files with Git LFS All the methods described above use the Hub's API to upload files. This is the recommended way to upload files to the Hub. However, we also provide `Repository`, a wrapper around the git tool to manage a local repository. Although `Repository` is not formally deprecated, we recommend using the HTTP-based methods described above instead. For more details about this recommendation, please have a look at [this guide](../concepts/git_vs_http) explaining the core differences between HTTP-based and Git-based approaches. Git LFS automatically handles files larger than 10MB. But for very large files (>5GB), you need to install a custom transfer agent for Git LFS: ```bash huggingface-cli lfs-enable-largefiles ``` You should install this for each repository that has a very large file. Once installed, you'll be able to push files larger than 5GB. ### commit context manager The `commit` context manager handles four of the most common Git commands: pull, add, commit, and push. `git-lfs` automatically tracks any file larger than 10MB. In the following example, the `commit` context manager: 1. Pulls from the `text-files` repository. 2. Adds a change made to `file.txt`. 3. Commits the change. 4. Pushes the change to the `text-files` repository. ```python >>> from huggingface_hub import Repository >>> with Repository(local_dir="text-files", clone_from="/text-files").commit(commit_message="My first file :)"): ... with open("file.txt", "w+") as f: ... f.write(json.dumps({"hey": 8})) ``` Here is another example of how to use the `commit` context manager to save and upload a file to a repository: ```python >>> import torch >>> model = torch.nn.Transformer() >>> with Repository("torch-model", clone_from="/torch-model", token=True).commit(commit_message="My cool model :)"): ... torch.save(model.state_dict(), "model.pt") ``` Set `blocking=False` if you would like to push your commits asynchronously. Non-blocking behavior is helpful when you want to continue running your script while your commits are being pushed. ```python >>> with repo.commit(commit_message="My cool model :)", blocking=False) ``` You can check the status of your push with the `command_queue` method: ```python >>> last_command = repo.command_queue[-1] >>> last_command.status ``` Refer to the table below for the possible statuses: | Status | Description | | -------- | ------------------------------------ | | -1 | The push is ongoing. | | 0 | The push has completed successfully. | | Non-zero | An error has occurred. | When `blocking=False`, commands are tracked, and your script will only exit when all pushes are completed, even if other errors occur in your script. Some additional useful commands for checking the status of a push include: ```python # Inspect an error. >>> last_command.stderr # Check whether a push is completed or ongoing. >>> last_command.is_done # Check whether a push command has errored. >>> last_command.failed ``` ### push_to_hub The `Repository` class has a `push_to_hub()` function to add files, make a commit, and push them to a repository. Unlike the `commit` context manager, you'll need to pull from a repository first before calling `push_to_hub()`. For example, if you've already cloned a repository from the Hub, then you can initialize the `repo` from the local directory: ```python >>> from huggingface_hub import Repository >>> repo = Repository(local_dir="path/to/local/repo") ``` Update your local clone with `git_pull()` and then push your file to the Hub: ```py >>> repo.git_pull() >>> repo.push_to_hub(commit_message="Commit my-awesome-file to the Hub") ``` However, if you aren't ready to push a file yet, you can use `git_add()` and `git_commit()` to only add and commit your file: ```py >>> repo.git_add("path/to/file") >>> repo.git_commit(commit_message="add my first model config file :)") ``` When you're ready, push the file to your repository with `git_push()`: ```py >>> repo.git_push() ``` # Mixins & serialization methods ## Mixins The `huggingface_hub` library offers a range of mixins that can be used as a parent class for your objects, in order to provide simple uploading and downloading functions. Check out our [integration guide](../guides/integrations) to learn how to integrate any ML framework with the Hub. ### Generic ### PyTorch ### Keras ### Fastai [[autodoc]] ModelHubMixin - all - _save_pretrained - _from_pretrained [[autodoc]] PyTorchModelHubMixin [[autodoc]] KerasModelHubMixin [[autodoc]] from_pretrained_keras [[autodoc]] push_to_hub_keras [[autodoc]] save_pretrained_keras [[autodoc]] from_pretrained_fastai [[autodoc]] push_to_hub_fastai # Environment variables `huggingface_hub` can be configured using environment variables. If you are unfamiliar with environment variable, here are generic articles about them [on macOS and Linux](https://linuxize.com/post/how-to-set-and-list-environment-variables-in-linux/) and on [Windows](https://phoenixnap.com/kb/windows-set-environment-variable). This page will guide you through all environment variables specific to `huggingface_hub` and their meaning. ## Generic ### HF_INFERENCE_ENDPOINT To configure the inference api base url. You might want to set this variable if your organization is pointing at an API Gateway rather than directly at the inference api. Defaults to `"/static-proxy?url=https%3A%2F%2Fapi-inference.huggingface.co"`. ### HF_HOME To configure where `huggingface_hub` will locally store data. In particular, your token and the cache will be stored in this folder. Defaults to `"~/.cache/huggingface"` unless [XDG_CACHE_HOME](#xdgcachehome) is set. ### HF_HUB_CACHE To configure where repositories from the Hub will be cached locally (models, datasets and spaces). Defaults to `"$HF_HOME/hub"` (e.g. `"~/.cache/huggingface/hub"` by default). ### HF_ASSETS_CACHE To configure where [assets](../guides/manage-cache#caching-assets) created by downstream libraries will be cached locally. Those assets can be preprocessed data, files downloaded from GitHub, logs,... Defaults to `"$HF_HOME/assets"` (e.g. `"~/.cache/huggingface/assets"` by default). ### HF_TOKEN To configure the User Access Token to authenticate to the Hub. If set, this value will overwrite the token stored on the machine (in either `$HF_TOKEN_PATH` or `"$HF_HOME/token"` if the former is not set). For more details about authentication, check out [this section](../quick-start#authentication). ### HF_TOKEN_PATH To configure where `huggingface_hub` should store the User Access Token. Defaults to `"$HF_HOME/token"` (e.g. `~/.cache/huggingface/token` by default). ### HF_HUB_VERBOSITY Set the verbosity level of the `huggingface_hub`'s logger. Must be one of `{"debug", "info", "warning", "error", "critical"}`. Defaults to `"warning"`. For more details, see [logging reference](../package_reference/utilities#huggingface_hub.utils.logging.get_verbosity). ### HF_HUB_LOCAL_DIR_AUTO_SYMLINK_THRESHOLD This environment variable has been deprecated and is now ignored by `huggingface_hub`. Downloading files to the local dir does not rely on symlinks anymore. ### HF_HUB_ETAG_TIMEOUT Integer value to define the number of seconds to wait for server response when fetching the latest metadata from a repo before downloading a file. If the request times out, `huggingface_hub` will default to the locally cached files. Setting a lower value speeds up the workflow for machines with a slow connection that have already cached files. A higher value guarantees the metadata call to succeed in more cases. Default to 10s. ### HF_HUB_DOWNLOAD_TIMEOUT Integer value to define the number of seconds to wait for server response when downloading a file. If the request times out, a TimeoutError is raised. Setting a higher value is beneficial on machine with a slow connection. A smaller value makes the process fail quicker in case of complete network outage. Default to 10s. ## Boolean values The following environment variables expect a boolean value. The variable will be considered as `True` if its value is one of `{"1", "ON", "YES", "TRUE"}` (case-insensitive). Any other value (or undefined) will be considered as `False`. ### HF_HUB_OFFLINE If set, no HTTP calls will be made to the Hugging Face Hub. If you try to download files, only the cached files will be accessed. If no cache file is detected, an error is raised This is useful in case your network is slow and you don't care about having the latest version of a file. If `HF_HUB_OFFLINE=1` is set as environment variable and you call any method of `HfApi`, an `OfflineModeIsEnabled` exception will be raised. **Note:** even if the latest version of a file is cached, calling `hf_hub_download` still triggers a HTTP request to check that a new version is not available. Setting `HF_HUB_OFFLINE=1` will skip this call which speeds up your loading time. ### HF_HUB_DISABLE_IMPLICIT_TOKEN Authentication is not mandatory for every requests to the Hub. For instance, requesting details about `"gpt2"` model does not require to be authenticated. However, if a user is [logged in](../package_reference/login), the default behavior will be to always send the token in order to ease user experience (never get a HTTP 401 Unauthorized) when accessing private or gated repositories. For privacy, you can disable this behavior by setting `HF_HUB_DISABLE_IMPLICIT_TOKEN=1`. In this case, the token will be sent only for "write-access" calls (example: create a commit). **Note:** disabling implicit sending of token can have weird side effects. For example, if you want to list all models on the Hub, your private models will not be listed. You would need to explicitly pass `token=True` argument in your script. ### HF_HUB_DISABLE_PROGRESS_BARS For time consuming tasks, `huggingface_hub` displays a progress bar by default (using tqdm). You can disable all the progress bars at once by setting `HF_HUB_DISABLE_PROGRESS_BARS=1`. ### HF_HUB_DISABLE_SYMLINKS_WARNING If you are on a Windows machine, it is recommended to enable the developer mode or to run `huggingface_hub` in admin mode. If not, `huggingface_hub` will not be able to create symlinks in your cache system. You will be able to execute any script but your user experience will be degraded as some huge files might end-up duplicated on your hard-drive. A warning message is triggered to warn you about this behavior. Set `HF_HUB_DISABLE_SYMLINKS_WARNING=1`, to disable this warning. For more details, see [cache limitations](../guides/manage-cache#limitations). ### HF_HUB_DISABLE_EXPERIMENTAL_WARNING Some features of `huggingface_hub` are experimental. This means you can use them but we do not guarantee they will be maintained in the future. In particular, we might update the API or behavior of such features without any deprecation cycle. A warning message is triggered when using an experimental feature to warn you about it. If you're comfortable debugging any potential issues using an experimental feature, you can set `HF_HUB_DISABLE_EXPERIMENTAL_WARNING=1` to disable the warning. If you are using an experimental feature, please let us know! Your feedback can help us design and improve it. ### HF_HUB_DISABLE_TELEMETRY By default, some data is collected by HF libraries (`transformers`, `datasets`, `gradio`,..) to monitor usage, debug issues and help prioritize features. Each library defines its own policy (i.e. which usage to monitor) but the core implementation happens in `huggingface_hub` (see `send_telemetry`). You can set `HF_HUB_DISABLE_TELEMETRY=1` as environment variable to globally disable telemetry. ### HF_HUB_ENABLE_HF_TRANSFER Set to `True` for faster uploads and downloads from the Hub using `hf_transfer`. By default, `huggingface_hub` uses the Python-based `requests.get` and `requests.post` functions. Although these are reliable and versatile, they may not be the most efficient choice for machines with high bandwidth. [`hf_transfer`](https://github.com/huggingface/hf_transfer) is a Rust-based package developed to maximize the bandwidth used by dividing large files into smaller parts and transferring them simultaneously using multiple threads. This approach can potentially double the transfer speed. To use `hf_transfer`: 1. Specify the `hf_transfer` extra when installing `huggingface_hub` (e.g. `pip install huggingface_hub[hf_transfer]`). 2. Set `HF_HUB_ENABLE_HF_TRANSFER=1` as an environment variable. Please note that using `hf_transfer` comes with certain limitations. Since it is not purely Python-based, debugging errors may be challenging. Additionally, `hf_transfer` lacks several user-friendly features such as resumable downloads and proxies. These omissions are intentional to maintain the simplicity and speed of the Rust logic. Consequently, `hf_transfer` is not enabled by default in `huggingface_hub`. ## Deprecated environment variables In order to standardize all environment variables within the Hugging Face ecosystem, some variables have been marked as deprecated. Although they remain functional, they no longer take precedence over their replacements. The following table outlines the deprecated variables and their corresponding alternatives: | Deprecated Variable | Replacement | | --- | --- | | `HUGGINGFACE_HUB_CACHE` | `HF_HUB_CACHE` | | `HUGGINGFACE_ASSETS_CACHE` | `HF_ASSETS_CACHE` | | `HUGGING_FACE_HUB_TOKEN` | `HF_TOKEN` | | `HUGGINGFACE_HUB_VERBOSITY` | `HF_HUB_VERBOSITY` | ## From external tools Some environment variables are not specific to `huggingface_hub` but are still taken into account when they are set. ### DO_NOT_TRACK Boolean value. Equivalent to `HF_HUB_DISABLE_TELEMETRY`. When set to true, telemetry is globally disabled in the Hugging Face Python ecosystem (`transformers`, `diffusers`, `gradio`, etc.). See https://consoledonottrack.com/ for more details. ### NO_COLOR Boolean value. When set, `huggingface-cli` tool will not print any ANSI color. See [no-color.org](https://no-color.org/). ### XDG_CACHE_HOME Used only when `HF_HOME` is not set! This is the default way to configure where [user-specific non-essential (cached) data should be written](https://wiki.archlinux.org/title/XDG_Base_Directory) on linux machines. If `HF_HOME` is not set, the default home will be `"$XDG_CACHE_HOME/huggingface"` instead of `"~/.cache/huggingface"`. # Managing your Space runtime Check the `HfApi` documentation page for the reference of methods to manage your Space on the Hub. - Duplicate a Space: `duplicate_space()` - Fetch current runtime: `get_space_runtime()` - Manage secrets: `add_space_secret()` and `delete_space_secret()` - Manage hardware: `request_space_hardware()` - Manage state: `pause_space()`, `restart_space()`, `set_space_sleep_time()` ## Data structures ### SpaceRuntime ### SpaceHardware ### SpaceStage ### SpaceStorage ### SpaceVariable [[autodoc]] SpaceRuntime [[autodoc]] SpaceHardware [[autodoc]] SpaceStage [[autodoc]] SpaceStorage [[autodoc]] SpaceVariable # Webhooks Server Webhooks are a foundation for MLOps-related features. They allow you to listen for new changes on specific repos or to all repos belonging to particular users/organizations you're interested in following. To learn more about webhooks on the Huggingface Hub, you can read the Webhooks [guide](https://huggingface.co/docs/hub/webhooks). Check out this [guide](../guides/webhooks_server) for a step-by-step tutorial on how to setup your webhooks server and deploy it as a Space. This is an experimental feature. This means that we are still working on improving the API. Breaking changes might be introduced in the future without prior notice. Make sure to pin the version of `huggingface_hub` in your requirements. A warning is triggered when you use an experimental feature. You can disable it by setting `HF_HUB_DISABLE_EXPERIMENTAL_WARNING=1` as an environment variable. ## Server The server is a [Gradio](https://gradio.app/) app. It has a UI to display instructions for you or your users and an API to listen to webhooks. Implementing a webhook endpoint is as simple as decorating a function. You can then debug it by redirecting the Webhooks to your machine (using a Gradio tunnel) before deploying it to a Space. ### WebhooksServer ### @webhook_endpoint ## Payload `WebhookPayload` is the main data structure that contains the payload from Webhooks. This is a `pydantic` class which makes it very easy to use with FastAPI. If you pass it as a parameter to a webhook endpoint, it will be automatically validated and parsed as a Python object. For more information about webhooks payload, you can refer to the Webhooks Payload [guide](https://huggingface.co/docs/hub/webhooks#webhook-payloads). ### WebhookPayload ### WebhookPayloadComment ### WebhookPayloadDiscussion ### WebhookPayloadDiscussionChanges ### WebhookPayloadEvent ### WebhookPayloadMovedTo ### WebhookPayloadRepo ### WebhookPayloadUrl ### WebhookPayloadWebhook [[autodoc]] huggingface_hub.WebhooksServer [[autodoc]] huggingface_hub.webhook_endpoint [[autodoc]] huggingface_hub.WebhookPayload [[autodoc]] huggingface_hub.WebhookPayload [[autodoc]] huggingface_hub.WebhookPayloadComment [[autodoc]] huggingface_hub.WebhookPayloadDiscussion [[autodoc]] huggingface_hub.WebhookPayloadDiscussionChanges [[autodoc]] huggingface_hub.WebhookPayloadEvent [[autodoc]] huggingface_hub.WebhookPayloadMovedTo [[autodoc]] huggingface_hub.WebhookPayloadRepo [[autodoc]] huggingface_hub.WebhookPayloadUrl [[autodoc]] huggingface_hub.WebhookPayloadWebhook # Repository Cards The huggingface_hub library provides a Python interface to create, share, and update Model/Dataset Cards. Visit the [dedicated documentation page](https://huggingface.co/docs/hub/models-cards) for a deeper view of what Model Cards on the Hub are, and how they work under the hood. You can also check out our [Model Cards guide](../how-to-model-cards) to get a feel for how you would use these utilities in your own projects. ## Repo Card The `RepoCard` object is the parent class of `ModelCard`, `DatasetCard` and `SpaceCard`. ## Card Data The `CardData` object is the parent class of `ModelCardData` and `DatasetCardData`. ## Model Cards ### ModelCard ### ModelCardData ## Dataset Cards Dataset cards are also known as Data Cards in the ML Community. ### DatasetCard ### DatasetCardData ## Space Cards ### SpaceCard ### SpaceCardData ## Utilities ### EvalResult ### model_index_to_eval_results ### eval_results_to_model_index ### metadata_eval_result ### metadata_update [[autodoc]] huggingface_hub.repocard.RepoCard - __init__ - all [[autodoc]] huggingface_hub.repocard_data.CardData [[autodoc]] ModelCard [[autodoc]] ModelCardData [[autodoc]] DatasetCard [[autodoc]] DatasetCardData [[autodoc]] SpaceCard [[autodoc]] SpaceCardData [[autodoc]] EvalResult [[autodoc]] huggingface_hub.repocard_data.model_index_to_eval_results [[autodoc]] huggingface_hub.repocard_data.eval_results_to_model_index [[autodoc]] huggingface_hub.repocard.metadata_eval_result [[autodoc]] huggingface_hub.repocard.metadata_update # HfApi Client Below is the documentation for the `HfApi` class, which serves as a Python wrapper for the Hugging Face Hub's API. All methods from the `HfApi` are also accessible from the package's root directly. Both approaches are detailed below. Using the root method is more straightforward but the `HfApi` class gives you more flexibility. In particular, you can pass a token that will be reused in all HTTP calls. This is different than `huggingface-cli login` or `login()` as the token is not persisted on the machine. It is also possible to provide a different endpoint or configure a custom user-agent. ```python from huggingface_hub import HfApi, list_models # Use root method models = list_models() # Or configure a HfApi client hf_api = HfApi( endpoint="https://huggingface.co", # Can be a Private Hub endpoint. token="hf_xxx", # Token is not persisted on the machine. ) models = hf_api.list_models() ``` ## HfApi ## API Dataclasses ### AccessRequest ### CommitInfo ### DatasetInfo ### GitRefInfo ### GitCommitInfo ### GitRefs ### ModelInfo ### RepoSibling ### RepoFile ### RepoUrl ### SafetensorsRepoMetadata ### SafetensorsFileMetadata ### SpaceInfo ### TensorInfo ### User ### UserLikes ### WebhookInfo ### WebhookWatchedItem ## CommitOperation Below are the supported values for `CommitOperation()`: ## CommitScheduler [[autodoc]] HfApi [[autodoc]] huggingface_hub.hf_api.AccessRequest [[autodoc]] huggingface_hub.hf_api.CommitInfo [[autodoc]] huggingface_hub.hf_api.DatasetInfo [[autodoc]] huggingface_hub.hf_api.GitRefInfo [[autodoc]] huggingface_hub.hf_api.GitCommitInfo [[autodoc]] huggingface_hub.hf_api.GitRefs [[autodoc]] huggingface_hub.hf_api.ModelInfo [[autodoc]] huggingface_hub.hf_api.RepoSibling [[autodoc]] huggingface_hub.hf_api.RepoFile [[autodoc]] huggingface_hub.hf_api.RepoUrl [[autodoc]] huggingface_hub.utils.SafetensorsRepoMetadata [[autodoc]] huggingface_hub.utils.SafetensorsFileMetadata [[autodoc]] huggingface_hub.hf_api.SpaceInfo [[autodoc]] huggingface_hub.utils.TensorInfo [[autodoc]] huggingface_hub.hf_api.User [[autodoc]] huggingface_hub.hf_api.UserLikes [[autodoc]] huggingface_hub.hf_api.WebhookInfo [[autodoc]] huggingface_hub.hf_api.WebhookWatchedItem [[autodoc]] CommitOperationAdd [[autodoc]] CommitOperationDelete [[autodoc]] CommitOperationCopy [[autodoc]] CommitScheduler # Downloading files ## Download a single file ### hf_hub_download ### hf_hub_url ## Download a snapshot of the repo ## Get metadata about a file ### get_hf_file_metadata ### HfFileMetadata ## Caching The methods displayed above are designed to work with a caching system that prevents re-downloading files. The caching system was updated in v0.8.0 to become the central cache-system shared across libraries that depend on the Hub. Read the [cache-system guide](../guides/manage-cache) for a detailed presentation of caching at at HF. [[autodoc]] huggingface_hub.hf_hub_download [[autodoc]] huggingface_hub.hf_hub_url [[autodoc]] huggingface_hub.snapshot_download [[autodoc]] huggingface_hub.get_hf_file_metadata [[autodoc]] huggingface_hub.HfFileMetadata # Cache-system reference The caching system was updated in v0.8.0 to become the central cache-system shared across libraries that depend on the Hub. Read the [cache-system guide](../guides/manage-cache) for a detailed presentation of caching at HF. ## Helpers ### try_to_load_from_cache ### cached_assets_path ### scan_cache_dir ## Data structures All structures are built and returned by `scan_cache_dir()` and are immutable. ### HFCacheInfo ### CachedRepoInfo ### CachedRevisionInfo ### CachedFileInfo ### DeleteCacheStrategy ## Exceptions ### CorruptedCacheException [[autodoc]] huggingface_hub.try_to_load_from_cache [[autodoc]] huggingface_hub.cached_assets_path [[autodoc]] huggingface_hub.scan_cache_dir [[autodoc]] huggingface_hub.HFCacheInfo [[autodoc]] huggingface_hub.CachedRepoInfo - size_on_disk_str - refs [[autodoc]] huggingface_hub.CachedRevisionInfo - size_on_disk_str - nb_files [[autodoc]] huggingface_hub.CachedFileInfo - size_on_disk_str [[autodoc]] huggingface_hub.DeleteCacheStrategy - expected_freed_size_str [[autodoc]] huggingface_hub.CorruptedCacheException # Inference Endpoints Inference Endpoints provides a secure production solution to easily deploy models on a dedicated and autoscaling infrastructure managed by Hugging Face. An Inference Endpoint is built from a model from the [Hub](https://huggingface.co/models). This page is a reference for `huggingface_hub`'s integration with Inference Endpoints. For more information about the Inference Endpoints product, check out its [official documentation](https://huggingface.co/docs/inference-endpoints/index). Check out the [related guide](../guides/inference_endpoints) to learn how to use `huggingface_hub` to manage your Inference Endpoints programmatically. Inference Endpoints can be fully managed via API. The endpoints are documented with [Swagger](https://api.endpoints.huggingface.cloud/). The `InferenceEndpoint` class is a simple wrapper built on top on this API. ## Methods A subset of the Inference Endpoint features are implemented in [HfApi](/docs/huggingface_hub/main/en/package_reference/hf_api#huggingface_hub.HfApi): - [get_inference_endpoint()](/docs/huggingface_hub/main/en/package_reference/hf_api#huggingface_hub.HfApi.get_inference_endpoint) and [list_inference_endpoints()](/docs/huggingface_hub/main/en/package_reference/hf_api#huggingface_hub.HfApi.list_inference_endpoints) to get information about your Inference Endpoints - [create_inference_endpoint()](/docs/huggingface_hub/main/en/package_reference/hf_api#huggingface_hub.HfApi.create_inference_endpoint), [update_inference_endpoint()](/docs/huggingface_hub/main/en/package_reference/hf_api#huggingface_hub.HfApi.update_inference_endpoint) and [delete_inference_endpoint()](/docs/huggingface_hub/main/en/package_reference/hf_api#huggingface_hub.HfApi.delete_inference_endpoint) to deploy and manage Inference Endpoints - [pause_inference_endpoint()](/docs/huggingface_hub/main/en/package_reference/hf_api#huggingface_hub.HfApi.pause_inference_endpoint) and [resume_inference_endpoint()](/docs/huggingface_hub/main/en/package_reference/hf_api#huggingface_hub.HfApi.resume_inference_endpoint) to pause and resume an Inference Endpoint - [scale_to_zero_inference_endpoint()](/docs/huggingface_hub/main/en/package_reference/hf_api#huggingface_hub.HfApi.scale_to_zero_inference_endpoint) to manually scale an Endpoint to 0 replicas ## InferenceEndpoint The main dataclass is `InferenceEndpoint`. It contains information about a deployed `InferenceEndpoint`, including its configuration and current state. Once deployed, you can run inference on the Endpoint using the `InferenceEndpoint.client` and `InferenceEndpoint.async_client` properties that respectively return an `InferenceClient` and an `AsyncInferenceClient` object. ## InferenceEndpointStatus ## InferenceEndpointType ## InferenceEndpointError [[autodoc]] InferenceEndpoint - from_raw - client - async_client - all [[autodoc]] InferenceEndpointStatus [[autodoc]] InferenceEndpointType [[autodoc]] InferenceEndpointError # Overview This section contains an exhaustive and technical description of `huggingface_hub` classes and methods. # Interacting with Discussions and Pull Requests Check the [HfApi](/docs/huggingface_hub/main/en/package_reference/hf_api#huggingface_hub.HfApi) documentation page for the reference of methods enabling interaction with Pull Requests and Discussions on the Hub. - [get_repo_discussions()](/docs/huggingface_hub/main/en/package_reference/hf_api#huggingface_hub.HfApi.get_repo_discussions) - [get_discussion_details()](/docs/huggingface_hub/main/en/package_reference/hf_api#huggingface_hub.HfApi.get_discussion_details) - [create_discussion()](/docs/huggingface_hub/main/en/package_reference/hf_api#huggingface_hub.HfApi.create_discussion) - [create_pull_request()](/docs/huggingface_hub/main/en/package_reference/hf_api#huggingface_hub.HfApi.create_pull_request) - [rename_discussion()](/docs/huggingface_hub/main/en/package_reference/hf_api#huggingface_hub.HfApi.rename_discussion) - [comment_discussion()](/docs/huggingface_hub/main/en/package_reference/hf_api#huggingface_hub.HfApi.comment_discussion) - [edit_discussion_comment()](/docs/huggingface_hub/main/en/package_reference/hf_api#huggingface_hub.HfApi.edit_discussion_comment) - [change_discussion_status()](/docs/huggingface_hub/main/en/package_reference/hf_api#huggingface_hub.HfApi.change_discussion_status) - [merge_pull_request()](/docs/huggingface_hub/main/en/package_reference/hf_api#huggingface_hub.HfApi.merge_pull_request) ## Data structures [[autodoc]] Discussion [[autodoc]] DiscussionWithDetails [[autodoc]] DiscussionEvent [[autodoc]] DiscussionComment [[autodoc]] DiscussionStatusChange [[autodoc]] DiscussionCommit [[autodoc]] DiscussionTitleChange # Inference types This page lists the types (e.g. dataclasses) available for each task supported on the Hugging Face Hub. Each task is specified using a JSON schema, and the types are generated from these schemas - with some customization due to Python requirements. Visit [@huggingface.js/tasks](https://github.com/huggingface/huggingface.js/tree/main/packages/tasks/src/tasks) to find the JSON schemas for each task. This part of the lib is still under development and will be improved in future releases. ## audio_classification ## audio_to_audio ## automatic_speech_recognition ## chat_completion ## depth_estimation ## document_question_answering ## feature_extraction ## fill_mask ## image_classification ## image_segmentation ## image_to_image ## image_to_text ## object_detection ## question_answering ## sentence_similarity ## summarization ## table_question_answering ## text2text_generation ## text_classification ## text_generation ## text_to_audio ## text_to_image ## text_to_speech ## token_classification ## translation ## video_classification ## visual_question_answering ## zero_shot_classification ## zero_shot_image_classification ## zero_shot_object_detection [[autodoc]] huggingface_hub.AudioClassificationInput [[autodoc]] huggingface_hub.AudioClassificationOutputElement [[autodoc]] huggingface_hub.AudioClassificationParameters [[autodoc]] huggingface_hub.AudioToAudioInput [[autodoc]] huggingface_hub.AudioToAudioOutputElement [[autodoc]] huggingface_hub.AutomaticSpeechRecognitionGenerationParameters [[autodoc]] huggingface_hub.AutomaticSpeechRecognitionInput [[autodoc]] huggingface_hub.AutomaticSpeechRecognitionOutput [[autodoc]] huggingface_hub.AutomaticSpeechRecognitionOutputChunk [[autodoc]] huggingface_hub.AutomaticSpeechRecognitionParameters [[autodoc]] huggingface_hub.ChatCompletionInput [[autodoc]] huggingface_hub.ChatCompletionInputFunctionDefinition [[autodoc]] huggingface_hub.ChatCompletionInputFunctionName [[autodoc]] huggingface_hub.ChatCompletionInputGrammarType [[autodoc]] huggingface_hub.ChatCompletionInputMessage [[autodoc]] huggingface_hub.ChatCompletionInputMessageChunk [[autodoc]] huggingface_hub.ChatCompletionInputStreamOptions [[autodoc]] huggingface_hub.ChatCompletionInputToolType [[autodoc]] huggingface_hub.ChatCompletionInputURL [[autodoc]] huggingface_hub.ChatCompletionOutput [[autodoc]] huggingface_hub.ChatCompletionOutputComplete [[autodoc]] huggingface_hub.ChatCompletionOutputFunctionDefinition [[autodoc]] huggingface_hub.ChatCompletionOutputLogprob [[autodoc]] huggingface_hub.ChatCompletionOutputLogprobs [[autodoc]] huggingface_hub.ChatCompletionOutputMessage [[autodoc]] huggingface_hub.ChatCompletionOutputToolCall [[autodoc]] huggingface_hub.ChatCompletionOutputTopLogprob [[autodoc]] huggingface_hub.ChatCompletionOutputUsage [[autodoc]] huggingface_hub.ChatCompletionStreamOutput [[autodoc]] huggingface_hub.ChatCompletionStreamOutputChoice [[autodoc]] huggingface_hub.ChatCompletionStreamOutputDelta [[autodoc]] huggingface_hub.ChatCompletionStreamOutputDeltaToolCall [[autodoc]] huggingface_hub.ChatCompletionStreamOutputFunction [[autodoc]] huggingface_hub.ChatCompletionStreamOutputLogprob [[autodoc]] huggingface_hub.ChatCompletionStreamOutputLogprobs [[autodoc]] huggingface_hub.ChatCompletionStreamOutputTopLogprob [[autodoc]] huggingface_hub.ChatCompletionStreamOutputUsage [[autodoc]] huggingface_hub.ToolElement [[autodoc]] huggingface_hub.DepthEstimationInput [[autodoc]] huggingface_hub.DepthEstimationOutput [[autodoc]] huggingface_hub.DocumentQuestionAnsweringInput [[autodoc]] huggingface_hub.DocumentQuestionAnsweringInputData [[autodoc]] huggingface_hub.DocumentQuestionAnsweringOutputElement [[autodoc]] huggingface_hub.DocumentQuestionAnsweringParameters [[autodoc]] huggingface_hub.FeatureExtractionInput [[autodoc]] huggingface_hub.FillMaskInput [[autodoc]] huggingface_hub.FillMaskOutputElement [[autodoc]] huggingface_hub.FillMaskParameters [[autodoc]] huggingface_hub.ImageClassificationInput [[autodoc]] huggingface_hub.ImageClassificationOutputElement [[autodoc]] huggingface_hub.ImageClassificationParameters [[autodoc]] huggingface_hub.ImageSegmentationInput [[autodoc]] huggingface_hub.ImageSegmentationOutputElement [[autodoc]] huggingface_hub.ImageSegmentationParameters [[autodoc]] huggingface_hub.ImageToImageInput [[autodoc]] huggingface_hub.ImageToImageOutput [[autodoc]] huggingface_hub.ImageToImageParameters [[autodoc]] huggingface_hub.ImageToImageTargetSize [[autodoc]] huggingface_hub.ImageToTextGenerationParameters [[autodoc]] huggingface_hub.ImageToTextInput [[autodoc]] huggingface_hub.ImageToTextOutput [[autodoc]] huggingface_hub.ImageToTextParameters [[autodoc]] huggingface_hub.ObjectDetectionBoundingBox [[autodoc]] huggingface_hub.ObjectDetectionInput [[autodoc]] huggingface_hub.ObjectDetectionOutputElement [[autodoc]] huggingface_hub.ObjectDetectionParameters [[autodoc]] huggingface_hub.QuestionAnsweringInput [[autodoc]] huggingface_hub.QuestionAnsweringInputData [[autodoc]] huggingface_hub.QuestionAnsweringOutputElement [[autodoc]] huggingface_hub.QuestionAnsweringParameters [[autodoc]] huggingface_hub.SentenceSimilarityInput [[autodoc]] huggingface_hub.SentenceSimilarityInputData [[autodoc]] huggingface_hub.SummarizationInput [[autodoc]] huggingface_hub.SummarizationOutput [[autodoc]] huggingface_hub.SummarizationParameters [[autodoc]] huggingface_hub.TableQuestionAnsweringInput [[autodoc]] huggingface_hub.TableQuestionAnsweringInputData [[autodoc]] huggingface_hub.TableQuestionAnsweringOutputElement [[autodoc]] huggingface_hub.Text2TextGenerationInput [[autodoc]] huggingface_hub.Text2TextGenerationOutput [[autodoc]] huggingface_hub.Text2TextGenerationParameters [[autodoc]] huggingface_hub.TextClassificationInput [[autodoc]] huggingface_hub.TextClassificationOutputElement [[autodoc]] huggingface_hub.TextClassificationParameters [[autodoc]] huggingface_hub.TextGenerationInput [[autodoc]] huggingface_hub.TextGenerationInputGenerateParameters [[autodoc]] huggingface_hub.TextGenerationInputGrammarType [[autodoc]] huggingface_hub.TextGenerationOutput [[autodoc]] huggingface_hub.TextGenerationOutputBestOfSequence [[autodoc]] huggingface_hub.TextGenerationOutputDetails [[autodoc]] huggingface_hub.TextGenerationOutputPrefillToken [[autodoc]] huggingface_hub.TextGenerationOutputToken [[autodoc]] huggingface_hub.TextGenerationStreamOutput [[autodoc]] huggingface_hub.TextGenerationStreamOutputStreamDetails [[autodoc]] huggingface_hub.TextGenerationStreamOutputToken [[autodoc]] huggingface_hub.TextToAudioGenerationParameters [[autodoc]] huggingface_hub.TextToAudioInput [[autodoc]] huggingface_hub.TextToAudioOutput [[autodoc]] huggingface_hub.TextToAudioParameters [[autodoc]] huggingface_hub.TextToImageInput [[autodoc]] huggingface_hub.TextToImageOutput [[autodoc]] huggingface_hub.TextToImageParameters [[autodoc]] huggingface_hub.TextToImageTargetSize [[autodoc]] huggingface_hub.TextToSpeechGenerationParameters [[autodoc]] huggingface_hub.TextToSpeechInput [[autodoc]] huggingface_hub.TextToSpeechOutput [[autodoc]] huggingface_hub.TextToSpeechParameters [[autodoc]] huggingface_hub.TokenClassificationInput [[autodoc]] huggingface_hub.TokenClassificationOutputElement [[autodoc]] huggingface_hub.TokenClassificationParameters [[autodoc]] huggingface_hub.TranslationInput [[autodoc]] huggingface_hub.TranslationOutput [[autodoc]] huggingface_hub.TranslationParameters [[autodoc]] huggingface_hub.VideoClassificationInput [[autodoc]] huggingface_hub.VideoClassificationOutputElement [[autodoc]] huggingface_hub.VideoClassificationParameters [[autodoc]] huggingface_hub.VisualQuestionAnsweringInput [[autodoc]] huggingface_hub.VisualQuestionAnsweringInputData [[autodoc]] huggingface_hub.VisualQuestionAnsweringOutputElement [[autodoc]] huggingface_hub.VisualQuestionAnsweringParameters [[autodoc]] huggingface_hub.ZeroShotClassificationInput [[autodoc]] huggingface_hub.ZeroShotClassificationInputData [[autodoc]] huggingface_hub.ZeroShotClassificationOutputElement [[autodoc]] huggingface_hub.ZeroShotClassificationParameters [[autodoc]] huggingface_hub.ZeroShotImageClassificationInput [[autodoc]] huggingface_hub.ZeroShotImageClassificationInputData [[autodoc]] huggingface_hub.ZeroShotImageClassificationOutputElement [[autodoc]] huggingface_hub.ZeroShotImageClassificationParameters [[autodoc]] huggingface_hub.ZeroShotObjectDetectionBoundingBox [[autodoc]] huggingface_hub.ZeroShotObjectDetectionInput [[autodoc]] huggingface_hub.ZeroShotObjectDetectionInputData [[autodoc]] huggingface_hub.ZeroShotObjectDetectionOutputElement # Utilities ## Configure logging The `huggingface_hub` package exposes a `logging` utility to control the logging level of the package itself. You can import it as such: ```py from huggingface_hub import logging ``` Then, you may define the verbosity in order to update the amount of logs you'll see: ```python from huggingface_hub import logging logging.set_verbosity_error() logging.set_verbosity_warning() logging.set_verbosity_info() logging.set_verbosity_debug() logging.set_verbosity(...) ``` The levels should be understood as follows: - `error`: only show critical logs about usage which may result in an error or unexpected behavior. - `warning`: show logs that aren't critical but usage may result in unintended behavior. Additionally, important informative logs may be shown. - `info`: show most logs, including some verbose logging regarding what is happening under the hood. If something is behaving in an unexpected manner, we recommend switching the verbosity level to this in order to get more information. - `debug`: show all logs, including some internal logs which may be used to track exactly what's happening under the hood. ### Repo-specific helper methods The methods exposed below are relevant when modifying modules from the `huggingface_hub` library itself. Using these shouldn't be necessary if you use `huggingface_hub` and you don't modify them. ## Configure progress bars Progress bars are a useful tool to display information to the user while a long-running task is being executed (e.g. when downloading or uploading files). `huggingface_hub` exposes a `tqdm` wrapper to display progress bars in a consistent way across the library. By default, progress bars are enabled. You can disable them globally by setting `HF_HUB_DISABLE_PROGRESS_BARS` environment variable. You can also enable/disable them using `enable_progress_bars()` and `disable_progress_bars()`. If set, the environment variable has priority on the helpers. ```py >>> from huggingface_hub import snapshot_download >>> from huggingface_hub.utils import are_progress_bars_disabled, disable_progress_bars, enable_progress_bars >>> # Disable progress bars globally >>> disable_progress_bars() >>> # Progress bar will not be shown ! >>> snapshot_download("gpt2") >>> are_progress_bars_disabled() True >>> # Re-enable progress bars globally >>> enable_progress_bars() ``` ### Group-specific control of progress bars You can also enable or disable progress bars for specific groups. This allows you to manage progress bar visibility more granularly within different parts of your application or library. When a progress bar is disabled for a group, all subgroups under it are also affected unless explicitly overridden. ```py # Disable progress bars for a specific group >>> disable_progress_bars("peft.foo") >>> assert not are_progress_bars_disabled("peft") >>> assert not are_progress_bars_disabled("peft.something") >>> assert are_progress_bars_disabled("peft.foo") >>> assert are_progress_bars_disabled("peft.foo.bar") # Re-enable progress bars for a subgroup >>> enable_progress_bars("peft.foo.bar") >>> assert are_progress_bars_disabled("peft.foo") >>> assert not are_progress_bars_disabled("peft.foo.bar") # Use groups with tqdm # No progress bar for `name="peft.foo"` >>> for _ in tqdm(range(5), name="peft.foo"): ... pass # Progress bar will be shown for `name="peft.foo.bar"` >>> for _ in tqdm(range(5), name="peft.foo.bar"): ... pass 100%|███████████████████████████████████████| 5/5 [00:00<00:00, 117817.53it/s] ``` ### are_progress_bars_disabled ### disable_progress_bars ### enable_progress_bars ## Configure HTTP backend In some environments, you might want to configure how HTTP calls are made, for example if you are using a proxy. `huggingface_hub` let you configure this globally using `configure_http_backend()`. All requests made to the Hub will then use your settings. Under the hood, `huggingface_hub` uses `requests.Session` so you might want to refer to the [`requests` documentation](https://requests.readthedocs.io/en/latest/user/advanced) to learn more about the available parameters. Since `requests.Session` is not guaranteed to be thread-safe, `huggingface_hub` creates one session instance per thread. Using sessions allows us to keep the connection open between HTTP calls and ultimately save time. If you are integrating `huggingface_hub` in a third-party library and wants to make a custom call to the Hub, use `get_session()` to get a Session configured by your users (i.e. replace any `requests.get(...)` call by `get_session().get(...)`). ## Handle HTTP errors `huggingface_hub` defines its own HTTP errors to refine the `HTTPError` raised by `requests` with additional information sent back by the server. ### Raise for status `hf_raise_for_status()` is meant to be the central method to "raise for status" from any request made to the Hub. It wraps the base `requests.raise_for_status` to provide additional information. Any `HTTPError` thrown is converted into a `HfHubHTTPError`. ```py import requests from huggingface_hub.utils import hf_raise_for_status, HfHubHTTPError response = requests.post(...) try: hf_raise_for_status(response) except HfHubHTTPError as e: print(str(e)) # formatted message e.request_id, e.server_message # details returned by server # Complete the error message with additional information once it's raised e.append_to_message("\n`create_commit` expects the repository to exist.") raise ``` ### HTTP errors Here is a list of HTTP errors thrown in `huggingface_hub`. #### HfHubHTTPError `HfHubHTTPError` is the parent class for any HF Hub HTTP error. It takes care of parsing the server response and format the error message to provide as much information to the user as possible. #### RepositoryNotFoundError #### GatedRepoError #### RevisionNotFoundError #### EntryNotFoundError #### BadRequestError #### LocalEntryNotFoundError #### OfflineModeIsEnabled ## Telemetry `huggingface_hub` includes an helper to send telemetry data. This information helps us debug issues and prioritize new features. Users can disable telemetry collection at any time by setting the `HF_HUB_DISABLE_TELEMETRY=1` environment variable. Telemetry is also disabled in offline mode (i.e. when setting HF_HUB_OFFLINE=1). If you are maintainer of a third-party library, sending telemetry data is as simple as making a call to `send_telemetry`. Data is sent in a separate thread to reduce as much as possible the impact for users. ## Validators `huggingface_hub` includes custom validators to validate method arguments automatically. Validation is inspired by the work done in [Pydantic](https://pydantic-docs.helpmanual.io/) to validate type hints but with more limited features. ### Generic decorator `validate_hf_hub_args()` is a generic decorator to encapsulate methods that have arguments following `huggingface_hub`'s naming. By default, all arguments that has a validator implemented will be validated. If an input is not valid, a `HFValidationError` is thrown. Only the first non-valid value throws an error and stops the validation process. Usage: ```py >>> from huggingface_hub.utils import validate_hf_hub_args >>> @validate_hf_hub_args ... def my_cool_method(repo_id: str): ... print(repo_id) >>> my_cool_method(repo_id="valid_repo_id") valid_repo_id >>> my_cool_method("other..repo..id") huggingface_hub.utils._validators.HFValidationError: Cannot have -- or .. in repo_id: 'other..repo..id'. >>> my_cool_method(repo_id="other..repo..id") huggingface_hub.utils._validators.HFValidationError: Cannot have -- or .. in repo_id: 'other..repo..id'. >>> @validate_hf_hub_args ... def my_cool_auth_method(token: str): ... print(token) >>> my_cool_auth_method(token="a token") "a token" >>> my_cool_auth_method(use_auth_token="a use_auth_token") "a use_auth_token" >>> my_cool_auth_method(token="a token", use_auth_token="a use_auth_token") UserWarning: Both `token` and `use_auth_token` are passed (...). `use_auth_token` value will be ignored. "a token" ``` #### validate_hf_hub_args #### HFValidationError ### Argument validators Validators can also be used individually. Here is a list of all arguments that can be validated. #### repo_id #### smoothly_deprecate_use_auth_token Not exactly a validator, but ran as well. [[autodoc]] logging.get_verbosity [[autodoc]] logging.set_verbosity [[autodoc]] logging.set_verbosity_info [[autodoc]] logging.set_verbosity_debug [[autodoc]] logging.set_verbosity_warning [[autodoc]] logging.set_verbosity_error [[autodoc]] logging.disable_propagation [[autodoc]] logging.enable_propagation [[autodoc]] logging.get_logger [[autodoc]] huggingface_hub.utils.are_progress_bars_disabled [[autodoc]] huggingface_hub.utils.disable_progress_bars [[autodoc]] huggingface_hub.utils.enable_progress_bars [[autodoc]] configure_http_backend [[autodoc]] get_session [[autodoc]] huggingface_hub.utils.hf_raise_for_status [[autodoc]] huggingface_hub.utils.HfHubHTTPError [[autodoc]] huggingface_hub.utils.RepositoryNotFoundError [[autodoc]] huggingface_hub.utils.GatedRepoError [[autodoc]] huggingface_hub.utils.RevisionNotFoundError [[autodoc]] huggingface_hub.utils.EntryNotFoundError [[autodoc]] huggingface_hub.utils.BadRequestError [[autodoc]] huggingface_hub.utils.LocalEntryNotFoundError [[autodoc]] huggingface_hub.utils.OfflineModeIsEnabled [[autodoc]] utils.send_telemetry [[autodoc]] utils.validate_hf_hub_args [[autodoc]] utils.HFValidationError [[autodoc]] utils.validate_repo_id [[autodoc]] utils.smoothly_deprecate_use_auth_token # Authentication The `huggingface_hub` library allows users to programmatically manage authentication to the Hub. This includes logging in, logging out, switching between tokens, and listing available tokens. For more details about authentication, check out [this section](../quick-start#authentication). ## login ## interpreter_login ## notebook_login ## logout ## auth_switch ## auth_list [[autodoc]] login [[autodoc]] interpreter_login [[autodoc]] notebook_login [[autodoc]] logout [[autodoc]] auth_switch [[autodoc]] auth_list # TensorBoard logger TensorBoard is a visualization toolkit for machine learning experimentation. TensorBoard allows tracking and visualizing metrics such as loss and accuracy, visualizing the model graph, viewing histograms, displaying images and much more. TensorBoard is well integrated with the Hugging Face Hub. The Hub automatically detects TensorBoard traces (such as `tfevents`) when pushed to the Hub which starts an instance to visualize them. To get more information about TensorBoard integration on the Hub, check out [this guide](https://huggingface.co/docs/hub/tensorboard). To benefit from this integration, `huggingface_hub` provides a custom logger to push logs to the Hub. It works as a drop-in replacement for [SummaryWriter](https://tensorboardx.readthedocs.io/en/latest/tensorboard.html) with no extra code needed. Traces are still saved locally and a background job push them to the Hub at regular interval. ## HFSummaryWriter [[autodoc]] HFSummaryWriter # Serialization `huggingface_hub` contains helpers to help ML libraries serialize models weights in a standardized way. This part of the lib is still under development and will be improved in future releases. The goal is to harmonize how weights are serialized on the Hub, both to remove code duplication across libraries and to foster conventions on the Hub. ## Save torch state dict The main helper of the `serialization` module takes a torch `nn.Module` as input and saves it to disk. It handles the logic to save shared tensors (see [safetensors explanation](https://huggingface.co/docs/safetensors/torch_shared_tensors)) as well as logic to split the state dictionary into shards, using `split_torch_state_dict_into_shards()` under the hood. At the moment, only `torch` framework is supported. If you want to save a state dictionary (e.g. a mapping between layer names and related tensors) instead of a `nn.Module`, you can use `save_torch_state_dict()` which provides the same features. This is useful for example if you want to apply custom logic to the state dict before saving it. ## Split state dict into shards The `serialization` module also contains low-level helpers to split a state dictionary into several shards, while creating a proper index in the process. These helpers are available for `torch` and `tensorflow` tensors and are designed to be easily extended to any other ML frameworks. ### split_tf_state_dict_into_shards ### split_torch_state_dict_into_shards ### split_state_dict_into_shards_factory This is the underlying factory from which each framework-specific helper is derived. In practice, you are not expected to use this factory directly except if you need to adapt it to a framework that is not yet supported. If that is the case, please let us know by [opening a new issue](https://github.com/huggingface/huggingface_hub/issues/new) on the `huggingface_hub` repo. ## Helpers ### get_torch_storage_id ### get_torch_storage_size [[autodoc]] huggingface_hub.save_torch_model [[autodoc]] huggingface_hub.save_torch_state_dict [[autodoc]] huggingface_hub.split_tf_state_dict_into_shards [[autodoc]] huggingface_hub.split_torch_state_dict_into_shards [[autodoc]] huggingface_hub.split_state_dict_into_shards_factory [[autodoc]] huggingface_hub.get_torch_storage_id [[autodoc]] huggingface_hub.get_torch_storage_size # Filesystem API The `HfFileSystem` class provides a pythonic file interface to the Hugging Face Hub based on [`fsspec`](https://filesystem-spec.readthedocs.io/en/latest/). ## HfFileSystem `HfFileSystem` is based on [fsspec](https://filesystem-spec.readthedocs.io/en/latest/), so it is compatible with most of the APIs that it offers. For more details, check out [our guide](../guides/hf_file_system) and fsspec's [API Reference](https://filesystem-spec.readthedocs.io/en/latest/api.html#fsspec.spec.AbstractFileSystem). - __init__ - all [[autodoc]] HfFileSystem # Inference Inference is the process of using a trained model to make predictions on new data. As this process can be compute-intensive, running on a dedicated server can be an interesting option. The `huggingface_hub` library provides an easy way to call a service that runs inference for hosted models. There are several services you can connect to: - [Inference API](https://huggingface.co/docs/api-inference/index): a service that allows you to run accelerated inference on Hugging Face's infrastructure for free. This service is a fast way to get started, test different models, and prototype AI products. - [Inference Endpoints](https://huggingface.co/inference-endpoints): a product to easily deploy models to production. Inference is run by Hugging Face in a dedicated, fully managed infrastructure on a cloud provider of your choice. These services can be called with the `InferenceClient` object. Please refer to [this guide](../guides/inference) for more information on how to use it. ## Inference Client ## Async Inference Client An async version of the client is also provided, based on `asyncio` and `aiohttp`. To use it, you can either install `aiohttp` directly or use the `[inference]` extra: ```sh pip install --upgrade huggingface_hub[inference] # or # pip install aiohttp ``` ## InferenceTimeoutError ### ModelStatus ## InferenceAPI `InferenceAPI` is the legacy way to call the Inference API. The interface is more simplistic and requires knowing the input parameters and output format for each task. It also lacks the ability to connect to other services like Inference Endpoints or AWS SageMaker. `InferenceAPI` will soon be deprecated so we recommend using `InferenceClient` whenever possible. Check out [this guide](../guides/inference#legacy-inferenceapi-client) to learn how to switch from `InferenceAPI` to `InferenceClient` in your scripts. [[autodoc]] InferenceClient [[autodoc]] AsyncInferenceClient [[autodoc]] InferenceTimeoutError [[autodoc]] huggingface_hub.inference._common.ModelStatus [[autodoc]] InferenceApi - __init__ - __call__ - all # Managing local and online repositories The `Repository` class is a helper class that wraps `git` and `git-lfs` commands. It provides tooling adapted for managing repositories which can be very large. It is the recommended tool as soon as any `git` operation is involved, or when collaboration will be a point of focus with the repository itself. ## The Repository class ## Helper methods ## Following asynchronous commands The `Repository` utility offers several methods which can be launched asynchronously: - `git_push` - `git_pull` - `push_to_hub` - The `commit` context manager See below for utilities to manage such asynchronous methods. [[autodoc]] Repository - __init__ - current_branch - all [[autodoc]] huggingface_hub.repository.is_git_repo [[autodoc]] huggingface_hub.repository.is_local_clone [[autodoc]] huggingface_hub.repository.is_tracked_with_lfs [[autodoc]] huggingface_hub.repository.is_git_ignored [[autodoc]] huggingface_hub.repository.files_to_be_staged [[autodoc]] huggingface_hub.repository.is_tracked_upstream [[autodoc]] huggingface_hub.repository.commits_to_push [[autodoc]] Repository - commands_failed - commands_in_progress - wait_for_commands [[autodoc]] huggingface_hub.repository.CommandInProgress # Managing collections Check out the [HfApi](/docs/huggingface_hub/main/en/package_reference/hf_api#huggingface_hub.HfApi) documentation page for the reference of methods to manage your Space on the Hub. - Get collection content: [get_collection()](/docs/huggingface_hub/main/en/package_reference/hf_api#huggingface_hub.HfApi.get_collection) - Create new collection: [create_collection()](/docs/huggingface_hub/main/en/package_reference/hf_api#huggingface_hub.HfApi.create_collection) - Update a collection: [update_collection_metadata()](/docs/huggingface_hub/main/en/package_reference/hf_api#huggingface_hub.HfApi.update_collection_metadata) - Delete a collection: [delete_collection()](/docs/huggingface_hub/main/en/package_reference/hf_api#huggingface_hub.HfApi.delete_collection) - Add an item to a collection: [add_collection_item()](/docs/huggingface_hub/main/en/package_reference/hf_api#huggingface_hub.HfApi.add_collection_item) - Update an item in a collection: [update_collection_item()](/docs/huggingface_hub/main/en/package_reference/hf_api#huggingface_hub.HfApi.update_collection_item) - Remove an item from a collection: [delete_collection_item()](/docs/huggingface_hub/main/en/package_reference/hf_api#huggingface_hub.HfApi.delete_collection_item) ### Collection ### CollectionItem [[autodoc]] Collection [[autodoc]] CollectionItem