Making ML-powered web games with Transformers.js
In this blog post, I'll show you how I made Doodle Dash, a real-time ML-powered web game that runs completely in your browser (thanks to Transformers.js). The goal of this tutorial is to show you how easy it is to make your own ML-powered web game... just in time for the upcoming Open Source AI Game Jam (7-9 July 2023). Join the game jam if you haven't already!
Quick links
- Demo: Doodle Dash
- Source code: doodle-dash
- Join the game jam: Open Source AI Game Jam
Overview
Before we start, let's talk about what we'll be creating. The game is inspired by Google's Quick, Draw! game, where you're given a word and a neural network has 20 seconds to guess what you're drawing (repeated 6 times). In fact, we'll be using their training data to train our own sketch detection model! Don't you just love open source? 😍
In our version, you'll have one minute to draw as many items as you can, one prompt at a time. If the model predicts the correct label, the canvas will be cleared and you'll be given a new word. Keep doing this until the timer runs out! Since the game runs locally in your browser, we don't have to worry about server latency at all. The model is able to make real-time predictions as you draw, to the tune of over 60 predictions a second... 🤯 WOW!
This tutorial is split into 3 sections:
1. Training the neural network
Training data
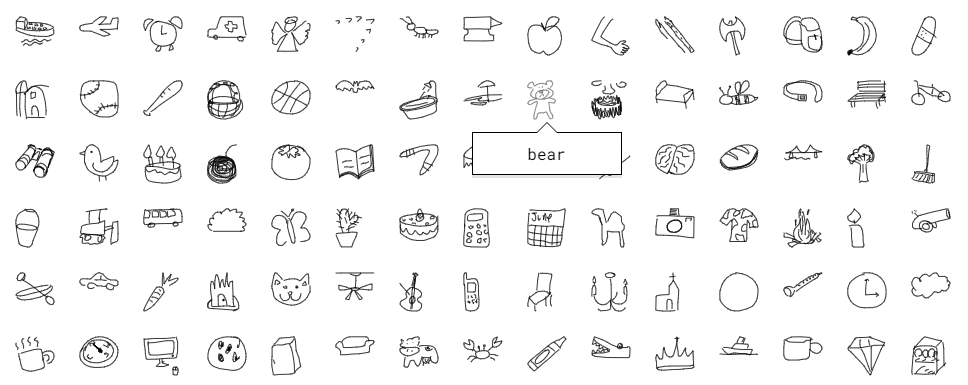
We'll be training our model using a subset of Google's Quick, Draw! dataset, which contains over 5 million drawings across 345 categories. Here are some samples from the dataset:
Model architecture
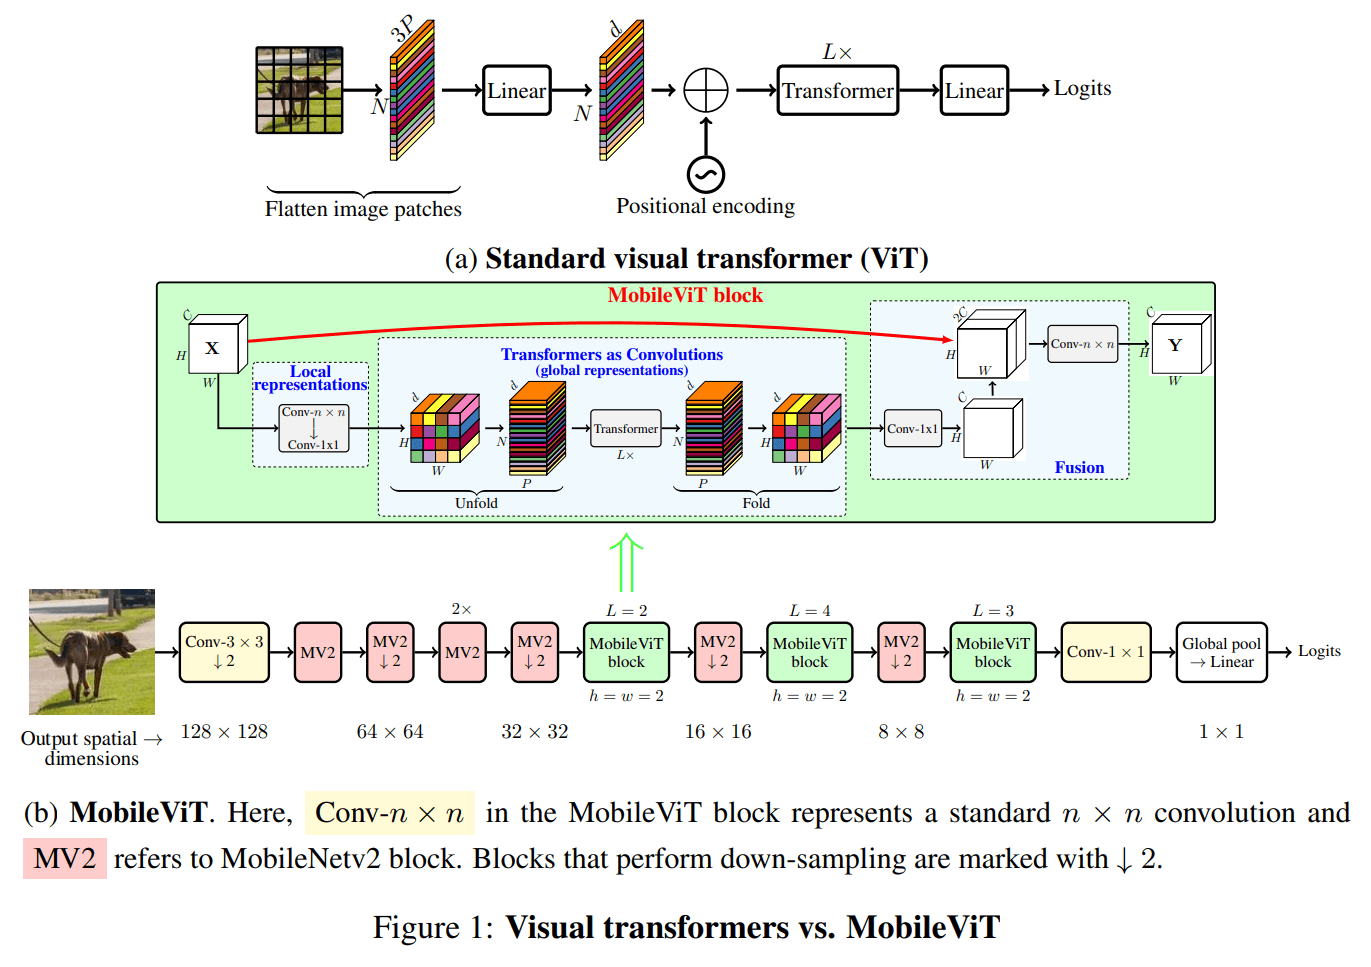
We'll be finetuning apple/mobilevit-small, a lightweight and mobile-friendly Vision Transformer that has been pre-trained on ImageNet-1k. It has only 5.6M parameters (~20 MB file size), a perfect candidate for running in-browser! For more information, check out the MobileViT paper and the model architecture below.
Finetuning
To keep the blog post (relatively) short, we've prepared a Colab notebook which will show you the exact steps we took to finetune apple/mobilevit-small on our dataset. At a high level, this involves:
Loading the "Quick, Draw!" dataset.
Transforming the dataset using a
MobileViTImageProcessor.Defining our collate function and evaluation metric.
Loading the pre-trained MobileVIT model using
MobileViTForImageClassification.from_pretrained.Training the model using the
TrainerandTrainingArgumentshelper classes.Evaluating the model using 🤗 Evaluate.
NOTE: You can find our finetuned model here on the Hugging Face Hub.
2. Running in the browser with Transformers.js
What is Transformers.js?
Transformers.js is a JavaScript library that allows you to run 🤗 Transformers directly in your browser (no need for a server)! It's designed to be functionally equivalent to the Python library, meaning you can run the same pre-trained models using a very similar API.
Behind the scenes, Transformers.js uses ONNX Runtime, so we need to convert our finetuned PyTorch model to ONNX.
Converting our model to ONNX
Fortunately, the 🤗 Optimum library makes it super simple to convert your finetuned model to ONNX! The easiest (and recommended way) is to:
Clone the Transformers.js repository and install the necessary dependencies:
git clone https://github.com/xenova/transformers.js.git
cd transformers.js
pip install -r scripts/requirements.txt
Run the conversion script (it uses
Optimumunder the hood):python -m scripts.convert --model_id <model_id>where
<model_id>is the name of the model you want to convert (e.g.Xenova/quickdraw-mobilevit-small).
Setting up our project
Let's start by scaffolding a simple React app using Vite:
npm create vite@latest doodle-dash -- --template react
Next, enter the project directory and install the necessary dependencies:
cd doodle-dash
npm install
npm install @xenova/transformers
You can then start the development server by running:
npm run dev
Running the model in the browser
Running machine learning models is computationally intensive, so it's important to perform inference in a separate thread. This way we won't block the main thread, which is used for rendering the UI and reacting to your drawing gestures 😉. The Web Workers API makes this super simple!
Create a new file (e.g., worker.js) in the src directory and add the following code:
import { pipeline, RawImage } from "@xenova/transformers";

const classifier = await pipeline("image-classification", 'Xenova/quickdraw-mobilevit-small', { quantized: false });

const image = await RawImage.read('https://huggingface.co/datasets/huggingface/documentation-images/resolve/main/blog/ml-web-games/skateboard.png');

const output = await classifier(image.grayscale());
console.log(output);
We can now use this worker in our App.jsx file by adding the following code to the App component:
import { useState, useEffect, useRef } from 'react'
// ... rest of the imports

function App() {
    // Create a reference to the worker object.
    const worker = useRef(null);

    // We use the `useEffect` hook to set up the worker as soon as the `App` component is mounted.
    useEffect(() => {
        if (!worker.current) {
            // Create the worker if it does not yet exist.
            worker.current = new Worker(new URL('./worker.js', import.meta.url), {
                type: 'module'
            });
        }

        // Create a callback function for messages from the worker thread.
        const onMessageReceived = (e) => { /* See code */ };

        // Attach the callback function as an event listener.
        worker.current.addEventListener('message', onMessageReceived);

        // Define a cleanup function for when the component is unmounted.
        return () => worker.current.removeEventListener('message', onMessageReceived);
    });

    // ... rest of the component
}
You can test that everything is working by running the development server (with npm run dev), visiting the local website (usually http://localhost:5173/), and opening the browser console. You should see the output of the model being logged to the console.
[{ label: "skateboard", score: 0.9980043172836304 }]
Woohoo! 🥳 Although the above code is just a small part of the final product, it shows how simple the machine-learning side of it is! The rest is just making it look nice and adding some game logic.
3. Game Design
In this section, I'll briefly discuss the game design process. As a reminder, you can find the full source code for the project on GitHub, so I won't be going into detail about the code itself.
Taking advantage of real-time performance
One of the main advantages of performing in-browser inference is that we can make predictions in real time (over 60 times a second). In the original Quick, Draw! game, the model only makes a new prediction every couple of seconds. We could do the same in our game, but then we wouldn't be taking advantage of its real-time performance! So, I decided to redesign the main game loop:
- Instead of six 20-second rounds (where each round corresponds to a new word), our version tasks the player with correctly drawing as many doodles as they can in 60 seconds (one prompt at a time).
- If you come across a word you are unable to draw, you can skip it (but this will cost you 3 seconds of your remaining time).
- In the original game, since the model would make a guess every few seconds, it could slowly cross labels off the list until it eventually guessed correctly. In our version, we instead decrease the model's scores for the first
nincorrect labels, withnincreasing over time as the user continues drawing.
Quality of life improvements
The original dataset contains 345 different classes, and since our model is relatively small (~20MB), it sometimes is unable to correctly guess some of the classes. To solve this problem, we removed some words which are either:
- Too similar to other labels (e.g., "barn" vs. "house")
- Too difficult to understand (e.g., "animal migration")
- Too difficult to draw in sufficient detail (e.g., "brain")
- Ambiguous (e.g., "bat")
After filtering, we were still left with over 300 different classes!
BONUS: Coming up with the name
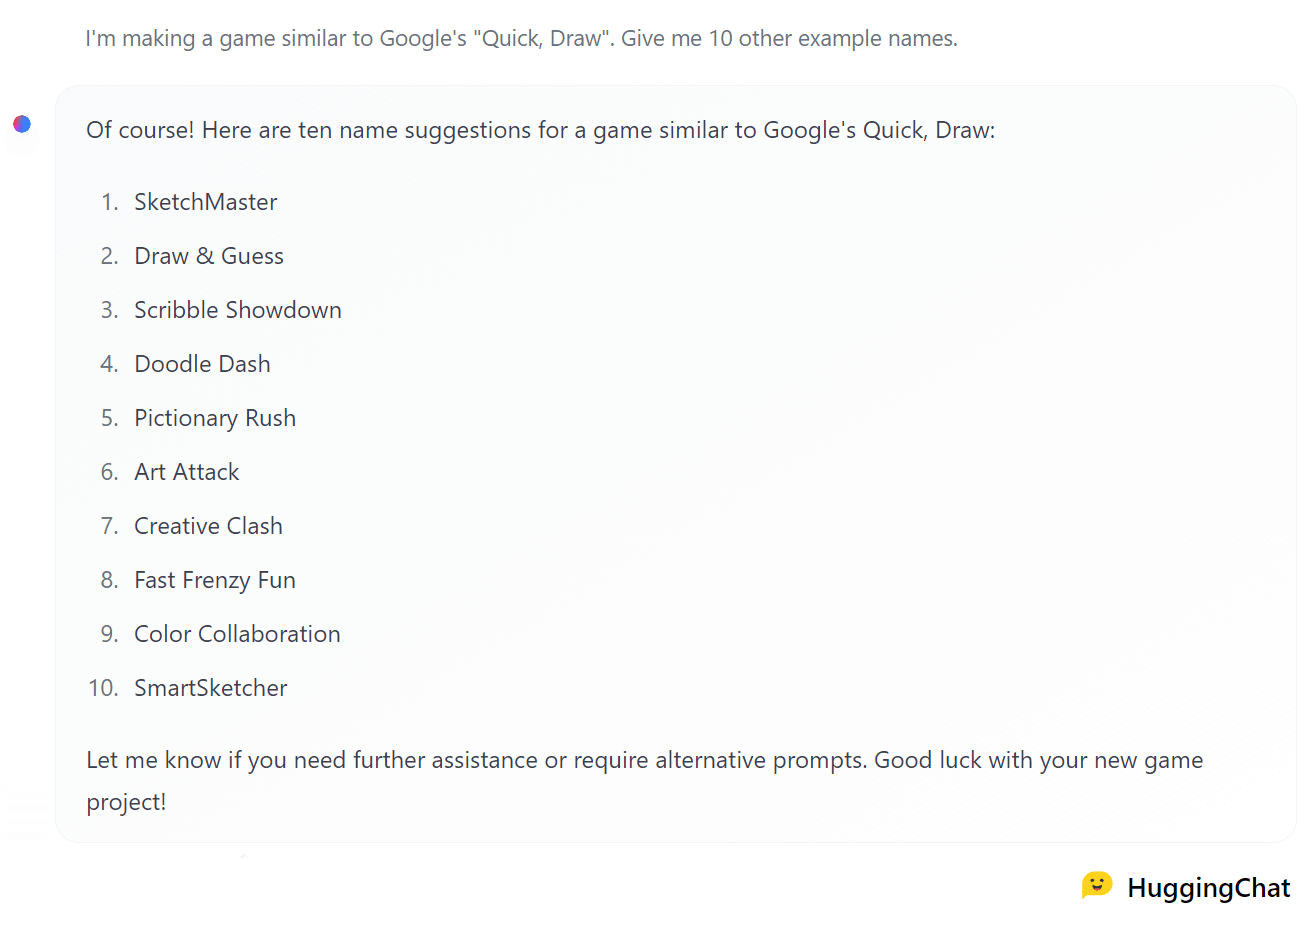
In the spirit of open-source development, I decided to ask Hugging Chat for some game name ideas... and needless to say, it did not disappoint!
I liked the alliteration of "Doodle Dash" (suggestion #4), so I decided to go with that. Thanks Hugging Chat! 🤗
I hope you enjoyed building this game with me! If you have any questions or suggestions, you can find me on Twitter, GitHub, or the 🤗 Hub. Also, if you want to improve the game (game modes? power-ups? animations? sound effects?), feel free to fork the project and submit a pull request! I'd love to see what you come up with!
PS: Don't forget to join the Open Source AI Game Jam! Hopefully this blog post inspires you to build your own web game with Transformers.js! 😉 See you at the Game Jam! 🚀


